Origin
Origin
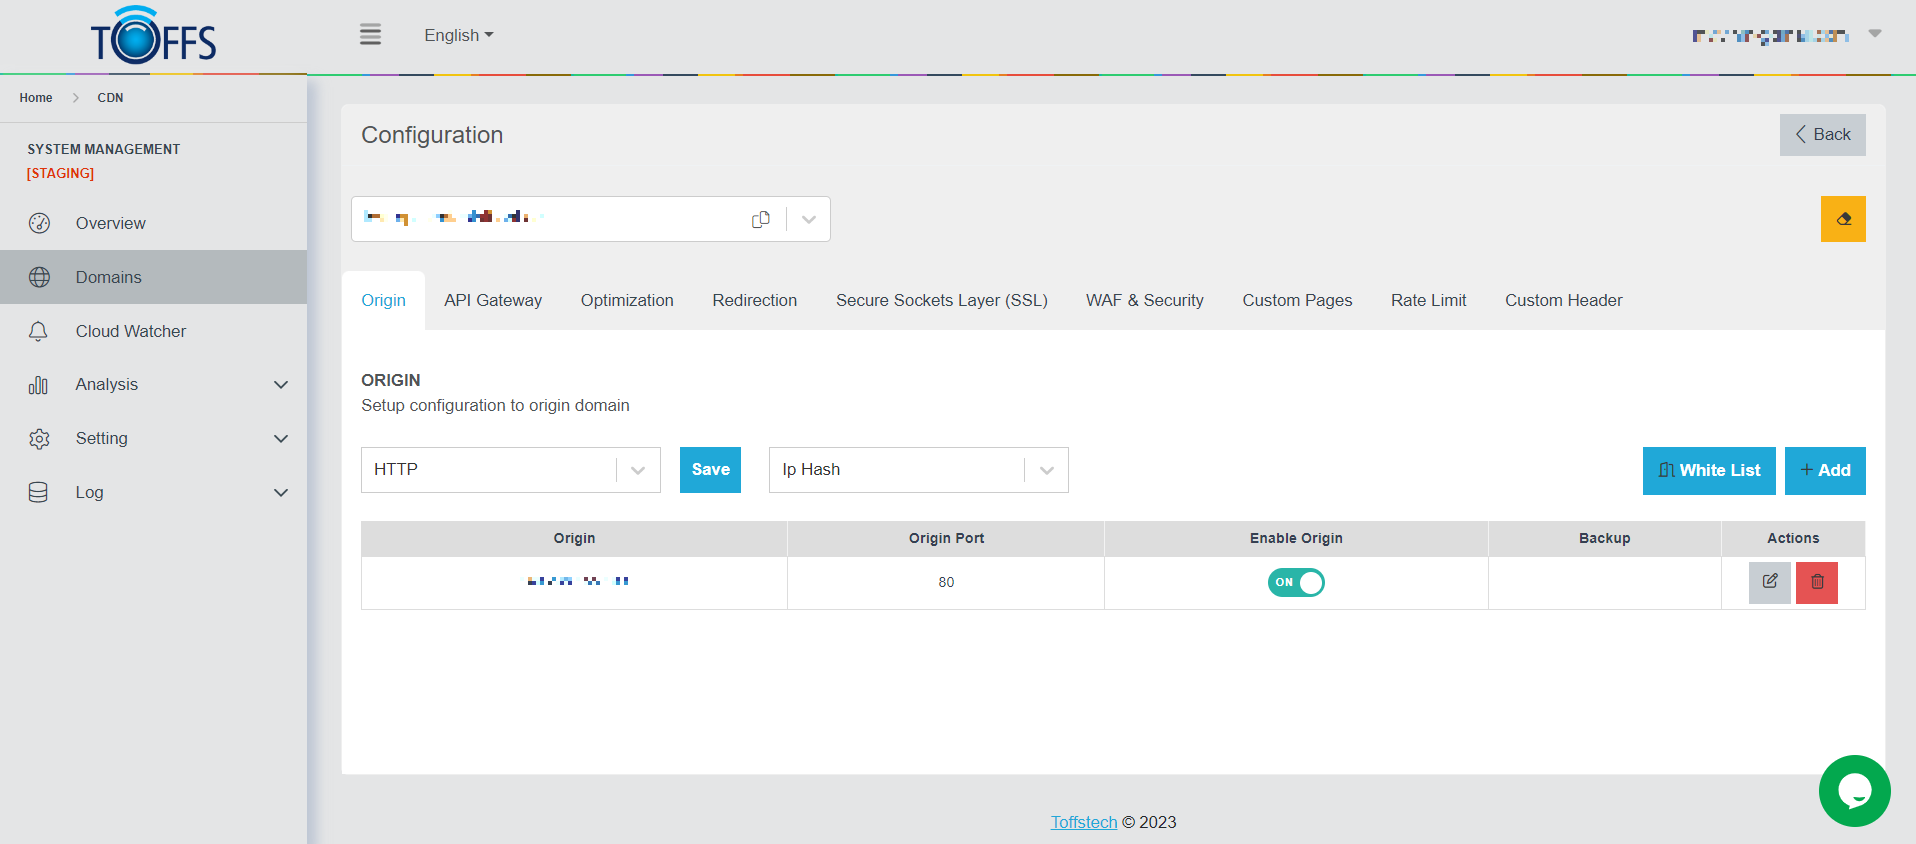 Figure 39
This is the “Origin” page under the “Configuration” page. In this section, you will find information about the origin IP address and the origin port of the domain.
You have the flexibility to select from various connection methods, including:
- “Round Robin”: Distributes traffic equally among the available IP addresses.
- “Backup”: Redirects traffic to a backup IP address in case the primary one becomes unavailable.
- “IP Hash”: Uses a hash function to map clients to specific IP addresses.
- “Least Connected”: Routes traffic to the IP address with the least active connections.
The “White List” button enables you to take advantage of the White List feature.
To add more IP addresses for the domain, simply use the “+Add” function.
If you need to modify information about the Origin, click on the “Edit” button.
Should you wish to remove an IP address from the configuration, the “Delete” button will serve this purpose.
Feel free to explore and configure the Origin settings to suit your specific needs
Changing HTTP/HTTPS:
To modify the HTTP/HTTPS settings:
Step 1: Click on the drop-down menu and choose either HTTP or HTTPS.
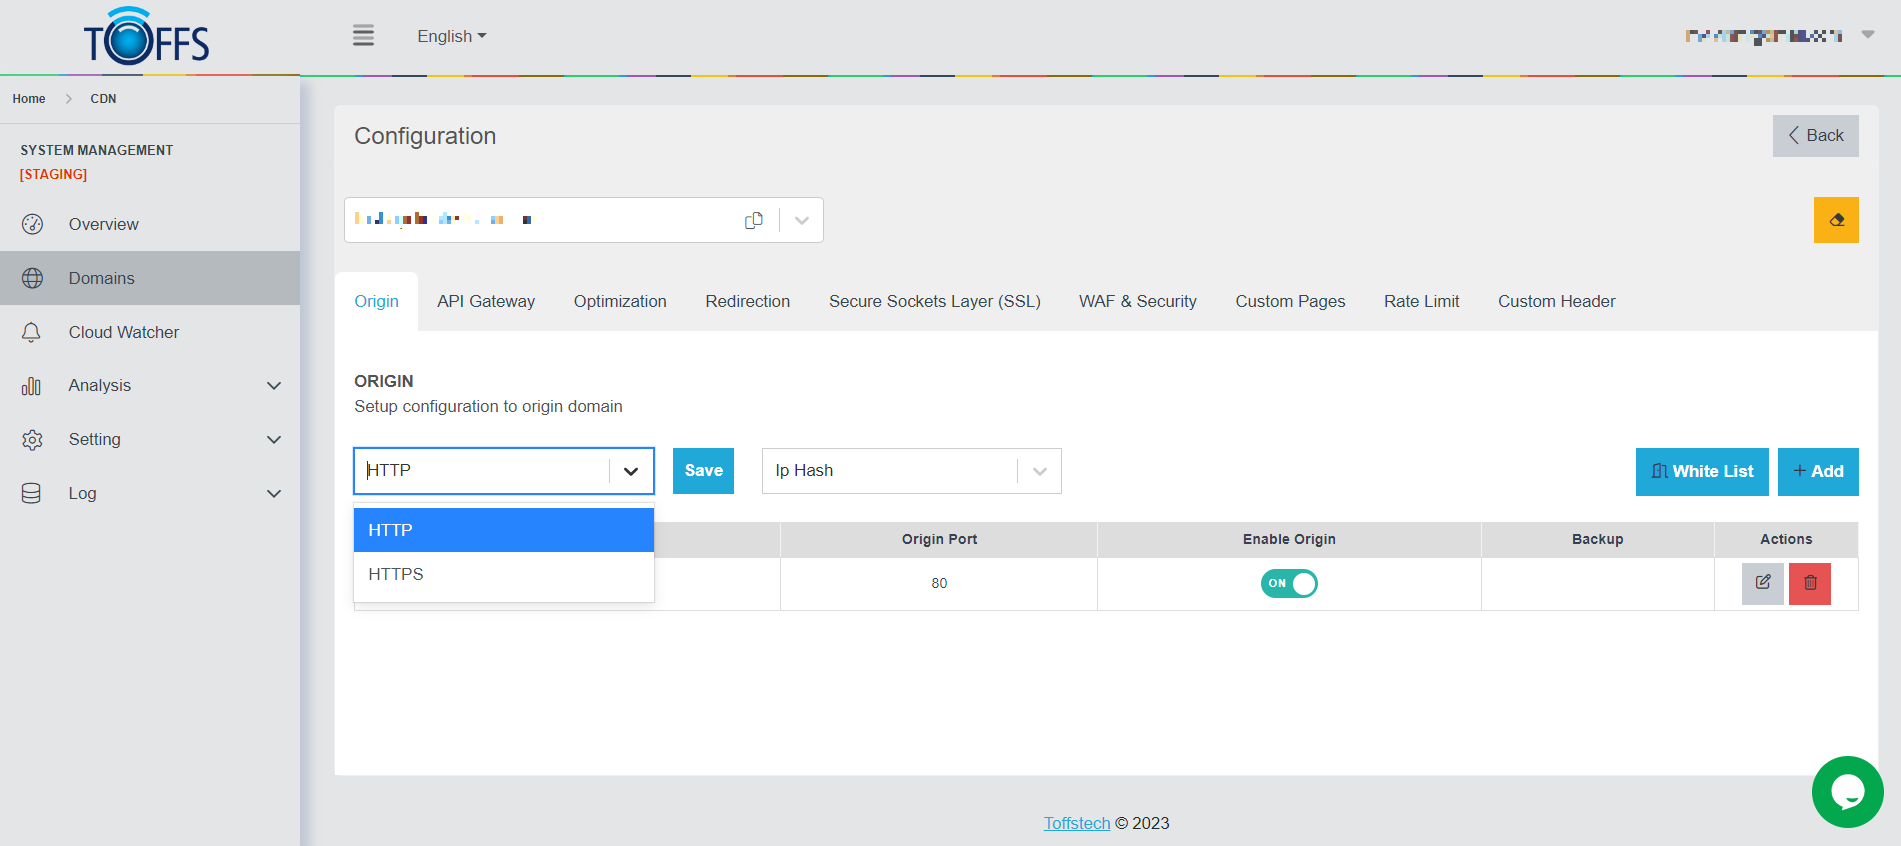 Figure 40
Step 2: After making your selection, click the “Save” button to save the changes.
Choosing Load Balancing Methods:
We will explore various load balancing methods that you can choose from. To make changes, follow these steps:
Step 1: Click the drop-down menu and select the desired load balancing method.
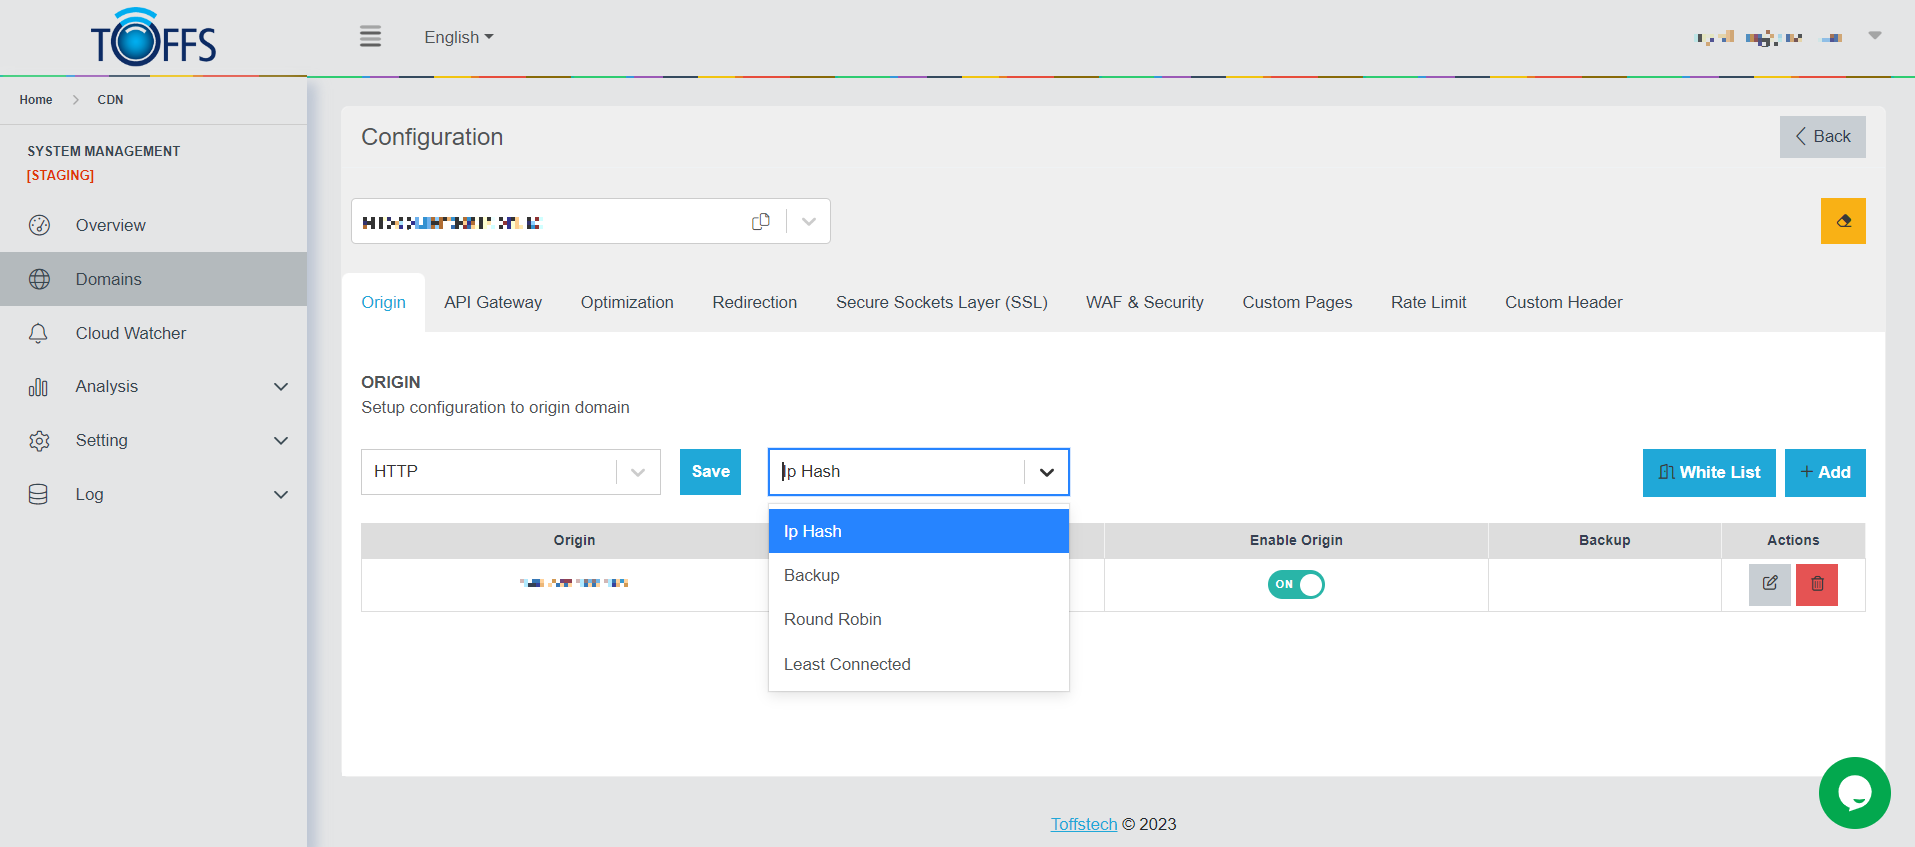 Figure 41
You have the following load balancing methods to choose from:
- IP Hash: This method relies on the Client’s IP address to coordinate and maintain the connection to the Server Origin.
- Backup: Servers with this parameter will only receive requests from the load balancer once all other servers are down. It serves as a failover option.
- Round Robin: With this method, the system will automatically distribute traffic down to the Client’s Server Origin using a rotation method. The traffic will be evenly spread between the servers.
- Least Connected: This method selects the Server Origin with the lowest number of active connections to coordinate downlink traffic. It ensures better distribution of traffic and prevents overloading a specific server.
Feel free to choose the load balancing method that best suits your requirements and network setup.
Origin White List
An IP whitelist is a useful tool to control user access by allowing or blocking requests from specific IP addresses. It is particularly valuable for safeguarding TOFFS CDN points of presence (POPs) from potential IP theft and attacks.
By default, the IP list feature is not enabled, but you can configure it easily to enhance your domain’s security. Follow the steps below to set up the Origin White List:
Step 1: Accessing the Origin White List Page
- Navigate to the “Origin” page and locate the “White List” button.
- Click on the “White List” button, and the system will redirect you to the Origin White List page.
 Figure 42
Step 2: Enabling the Origin White List Feature
- On the Origin White List page, find the “Origin White List” field.
- Click the toggle button to enable this feature.
Step 3: Adding IP Addresses to the Whitelist
- In the “Whitelist User IP” field, enter the desired IP address(es) you want to whitelist.
- You can enter a single IP or multiple IP addresses, depending on your requirements.
Step 4: Specifying the Origin for Whitelisted IPs
In the “Origin” field, designate the specific Origin that you want to allow access to the IP addresses mentioned in the whitelist.
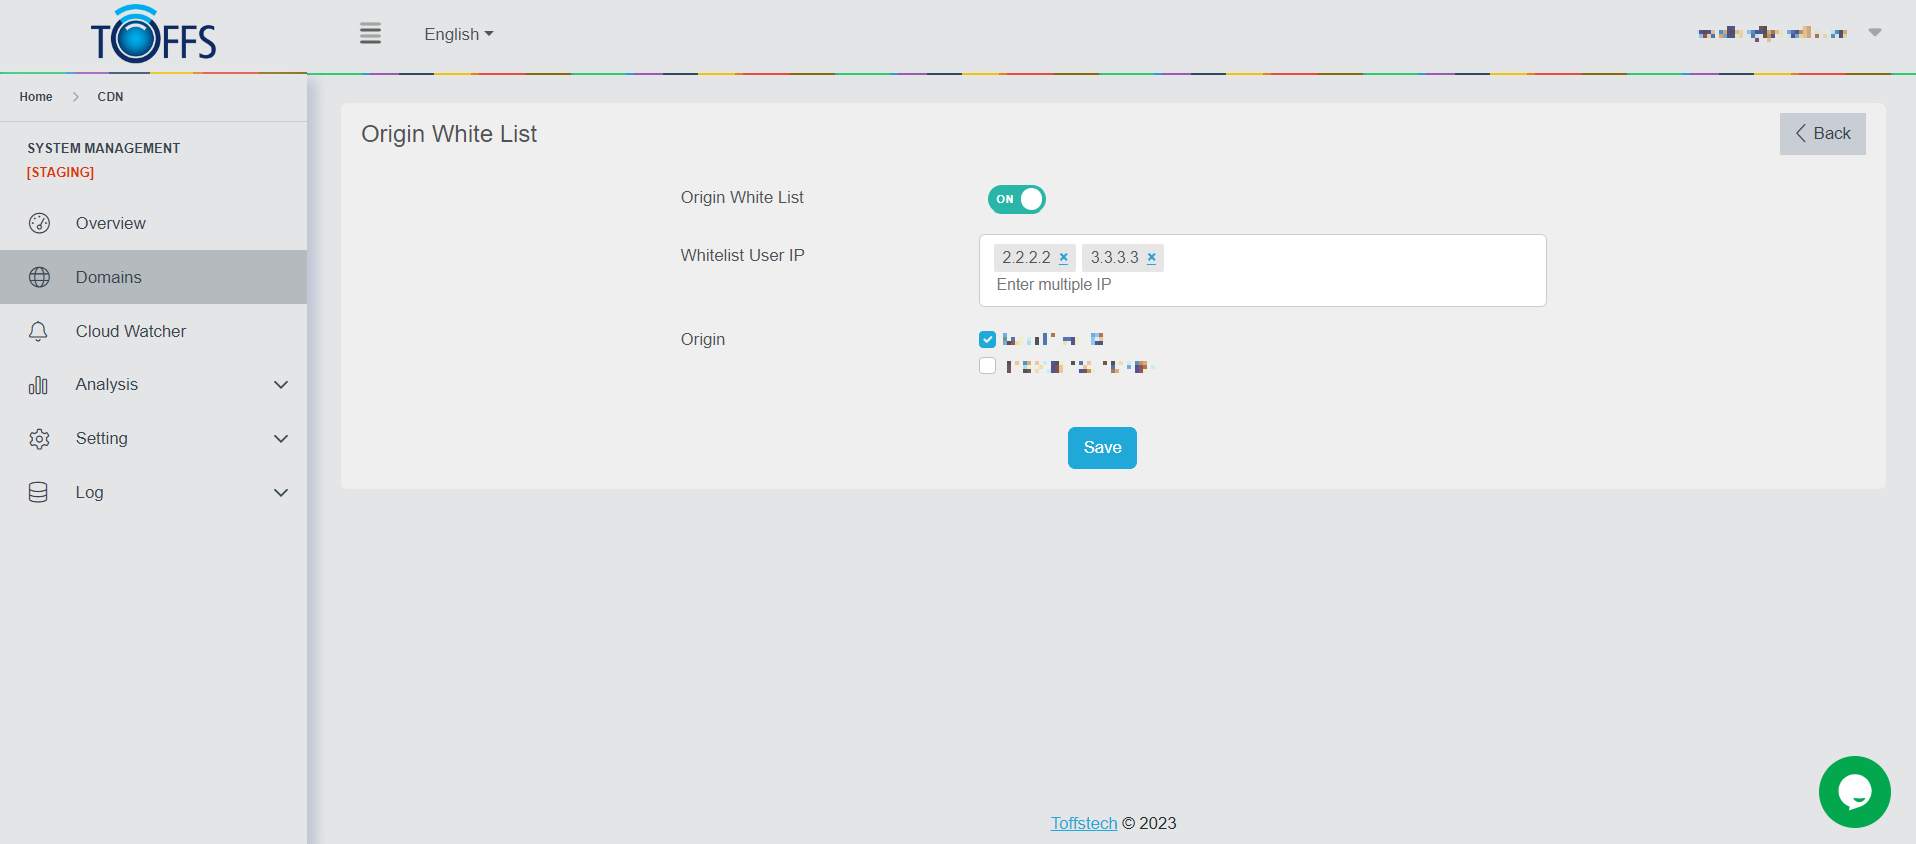 Figure 43
Step 5: Saving the Configuration
Once you have entered the necessary IP addresses and designated the respective Origin, click the “Save” button to finalize the setup.
Your IP whitelist is now active, and only the IP addresses specified in the whitelist can access the resources associated with the designated domain name.
By implementing this IP whitelist, you enhance the security of your CDN points of presence, ensuring that only trusted sources have access to your valuable resources. This can significantly mitigate the risk of unauthorized access, IP theft, and potential attacks.
Adding other origin for this domain
In this section, we will walk you through the process of adding more origin addresses for your domain. This function allows you to include additional origins, and it’s a straightforward process. Just follow the steps below:
Step 1: Accessing the Origin Page
To begin, navigate to the “Origin” page and locate the “+Add” button. When you find it, go ahead and click on it. By doing this, the system will redirect you to the “Add Origin” page.
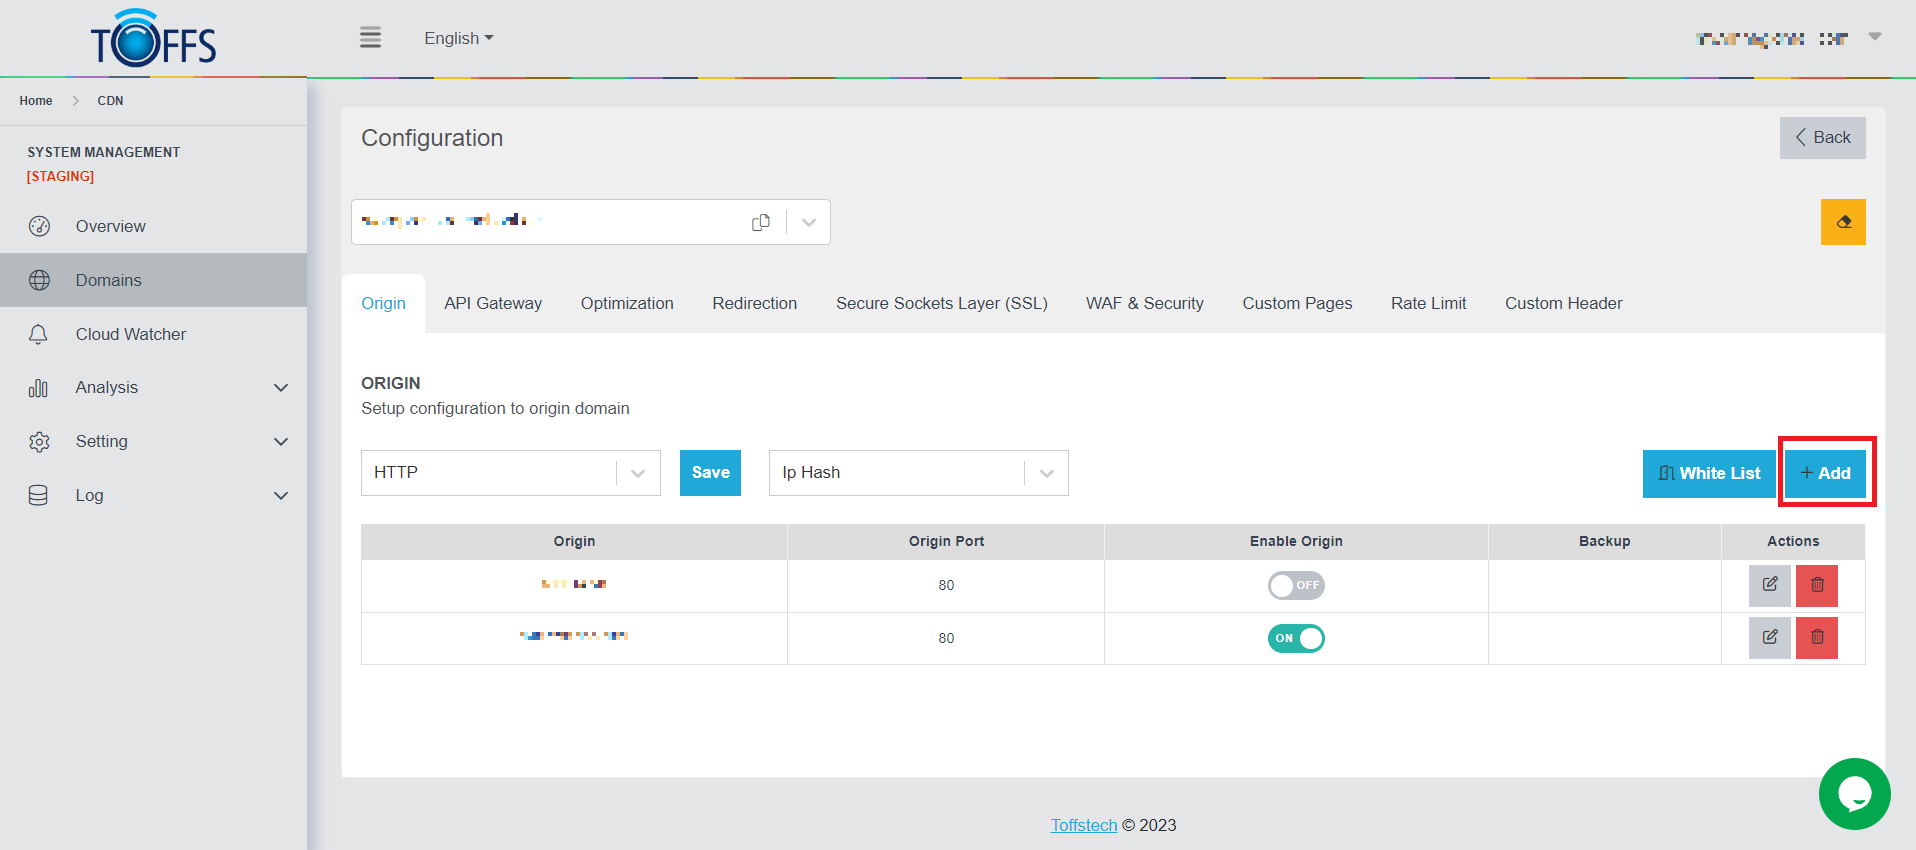 Figure 44
Step 2: Choosing the Origin Type
On the “Add Origin” page, you’ll be presented with two options: IPv4 (IP) or FQDN (Domain). Make your selection based on the type of origin you want to add.
Step 3: Providing the Origin Address
Now, it’s time to specify the address of the domain you wish to add as an origin. In the designated field labeled “Origin”, enter the appropriate domain address.
Step 4: Entering the Origin Port
Next, you’ll need to define the origin port for the new domain. Locate the “Origin Port” field and enter the desired port number.
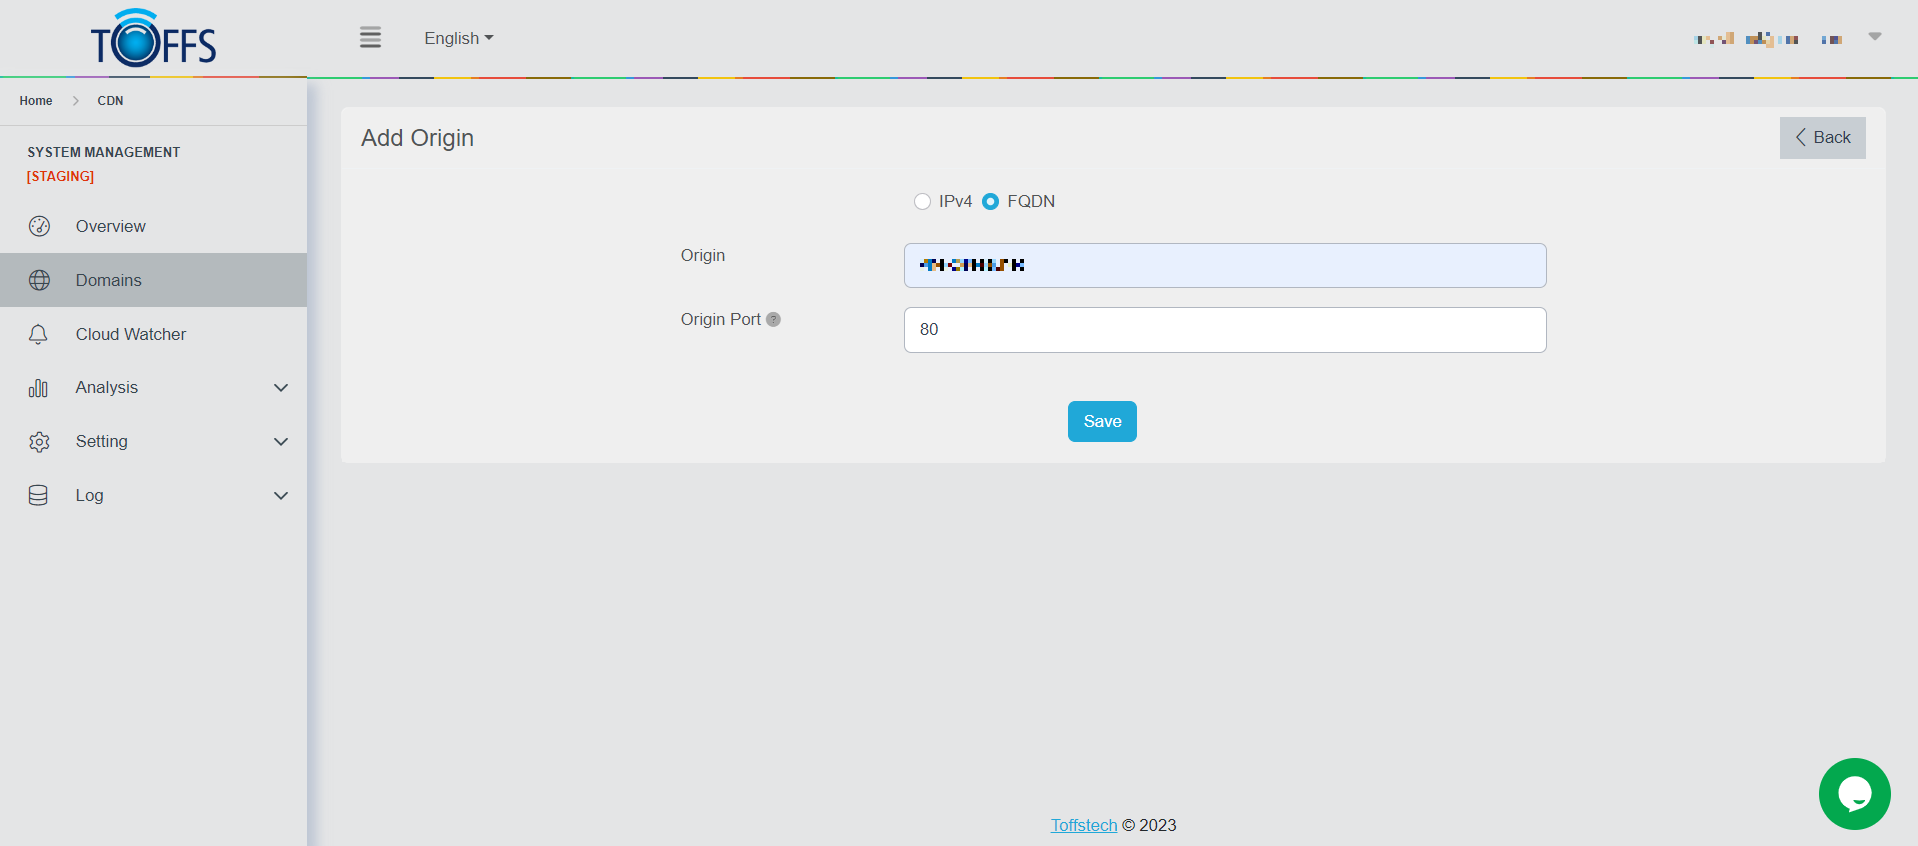 Figure 45
Step 5: Saving the Changes
Once you have filled in the required information, scroll to the bottom of the page and find the “Save” button. Click on it to save the changes you’ve made, effectively adding the new origin to your domain.
You have successfully added another origin for your domain. You can repeat these steps whenever you need to include more origin addresses. Now you have greater flexibility and control over your domain settings.
Editing an Origin
To make changes to the information about your Origin, follow these steps:
Step 1: Accessing the Edit Origin Page
Navigate to the Origin page and locate the “Edit” symbol button. Click on it.
The system will automatically redirect you to the Edit Origin page.
Step 2: Select the Type of Origin Address
Choose between two options: IPv4 (IP) or FQDN (Domain) based on your requirements.
Step 3: Entering the Origin Address
In the designated field, enter the appropriate Origin address of the domain.
Step 4: Specifying the Origin Port
Enter the desired Port for your Origin in the corresponding field.
Step 5: Saving Your Changes After making the necessary edits, click on the “Save” button to save your changes.
 Figure 46
By following these steps, you can successfully edit the information related to your Origin. Ensure that you have entered the correct details before saving the changes.
Removing an Origin address
To remove an Origin address, follow these steps:
Step 1: Locate the “Delete” symbol button next to each Origin address line that needs to be removed.
Step 2: Click on the “Delete” symbol button for the specific Origin address you want to remove.
 Figure 47
Please contact Toffs Security Operation Center for assistance if you encounter any issues.