WAF and Security
WAF and Security
This is the “WAF & Security” page under the “Configuration” page. Here, we will delve into the world of Web Application Firewall (WAF) and explore the vital aspects of enhancing your website’s security.
In this comprehensive guide, you will learn about the significance of a Web Application Firewall in safeguarding your web applications from various online threats. We will discuss the common types of attacks that a WAF can protect against, such as SQL injection, cross-site scripting (XSS), and distributed denial-of-service (DDoS) attacks.
Throughout this tutorial, we will also cover the essential steps to configure and optimize your WAF settings effectively. You will gain insights into defining security rules, whitelisting and blacklisting IPs, managing access controls, and much more.
Our aim is to empower you with the knowledge and tools necessary to build a robust and fortified web application that can withstand potential cyber threats. So, let’s dive in and make your web environment safer and more secure with the power of WAF!
Basic WAF Rules
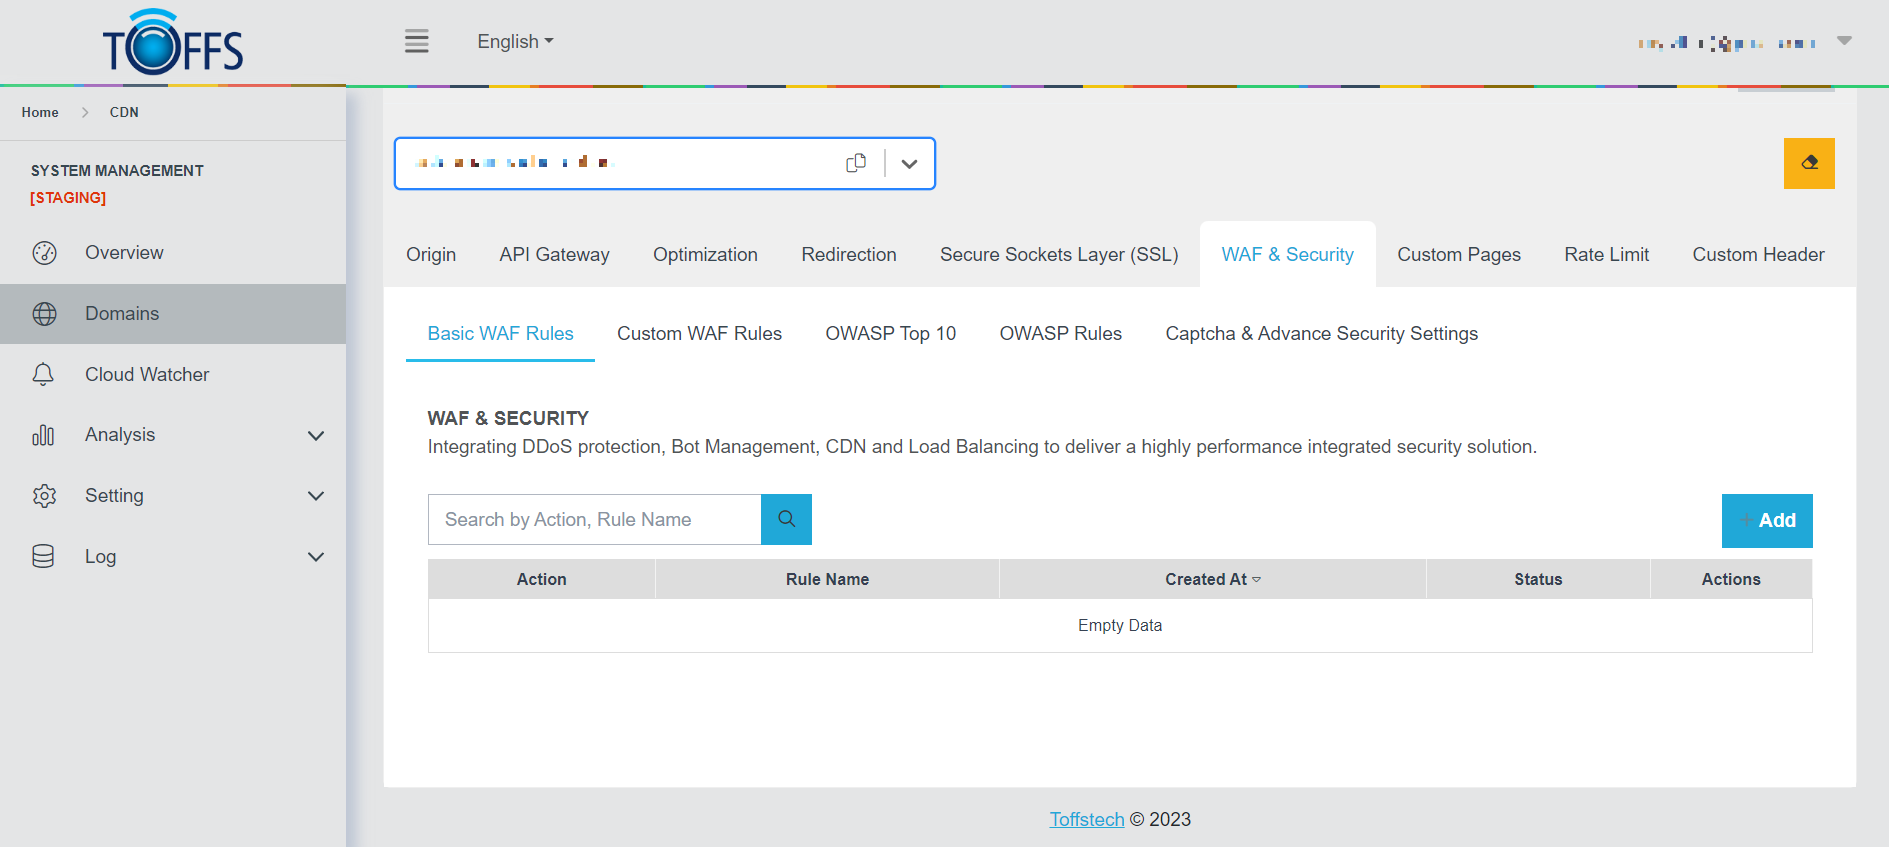 Figure 89
Basic WAF Rules: In this section, we’ll explore the concept of a Web Application Firewall (WAF) and its role in safeguarding websites and web applications. A WAF serves as a specialized firewall that constantly monitors, filters, and obstructs data packets during their transit to and from a web application. By implementing a WAF, servers can be better shielded against various threats and malicious activities.
Key Features of WAF:
Protection for Specific Web Applications: WAFs are strategically deployed to provide security to designated web applications or a group of related web applications. This targeted approach ensures that each application’s unique vulnerabilities are addressed effectively.
Rule-Based HTTP Conversation: WAFs operate based on a predefined set of rules. These rules are applied to each HTTP conversation, scrutinizing the data packets and taking action based on the specified criteria.
Additionally, this tutorial offers two essential functions to ease your WAF management:
“Search” Function: The “Search” feature simplifies the process of locating specific rules that you have already implemented. This helps in efficiently managing and modifying your WAF configuration.
“+Add” Function: The “+Add” function empowers you to create and add new rules, thus enhancing the protection of your domain. By customizing rules, you can fortify your WAF against emerging threats and tailor it to suit your application’s unique security requirements.
By mastering these basic WAF rules and features, you’ll be better equipped to safeguard your web applications from potential cyber threats and ensure a secure online environment for your users. Let’s dive in and explore the world of WAF protection!
To add a new Basic WAF Rule, follow these step-by-step instructions:
Step 1: Navigate to the Basic WAF Rules section and locate the ”+ Add” button.
 Figure 90
Once you click the button, you will be redirected to the page for adding a Basic WAF Rule.
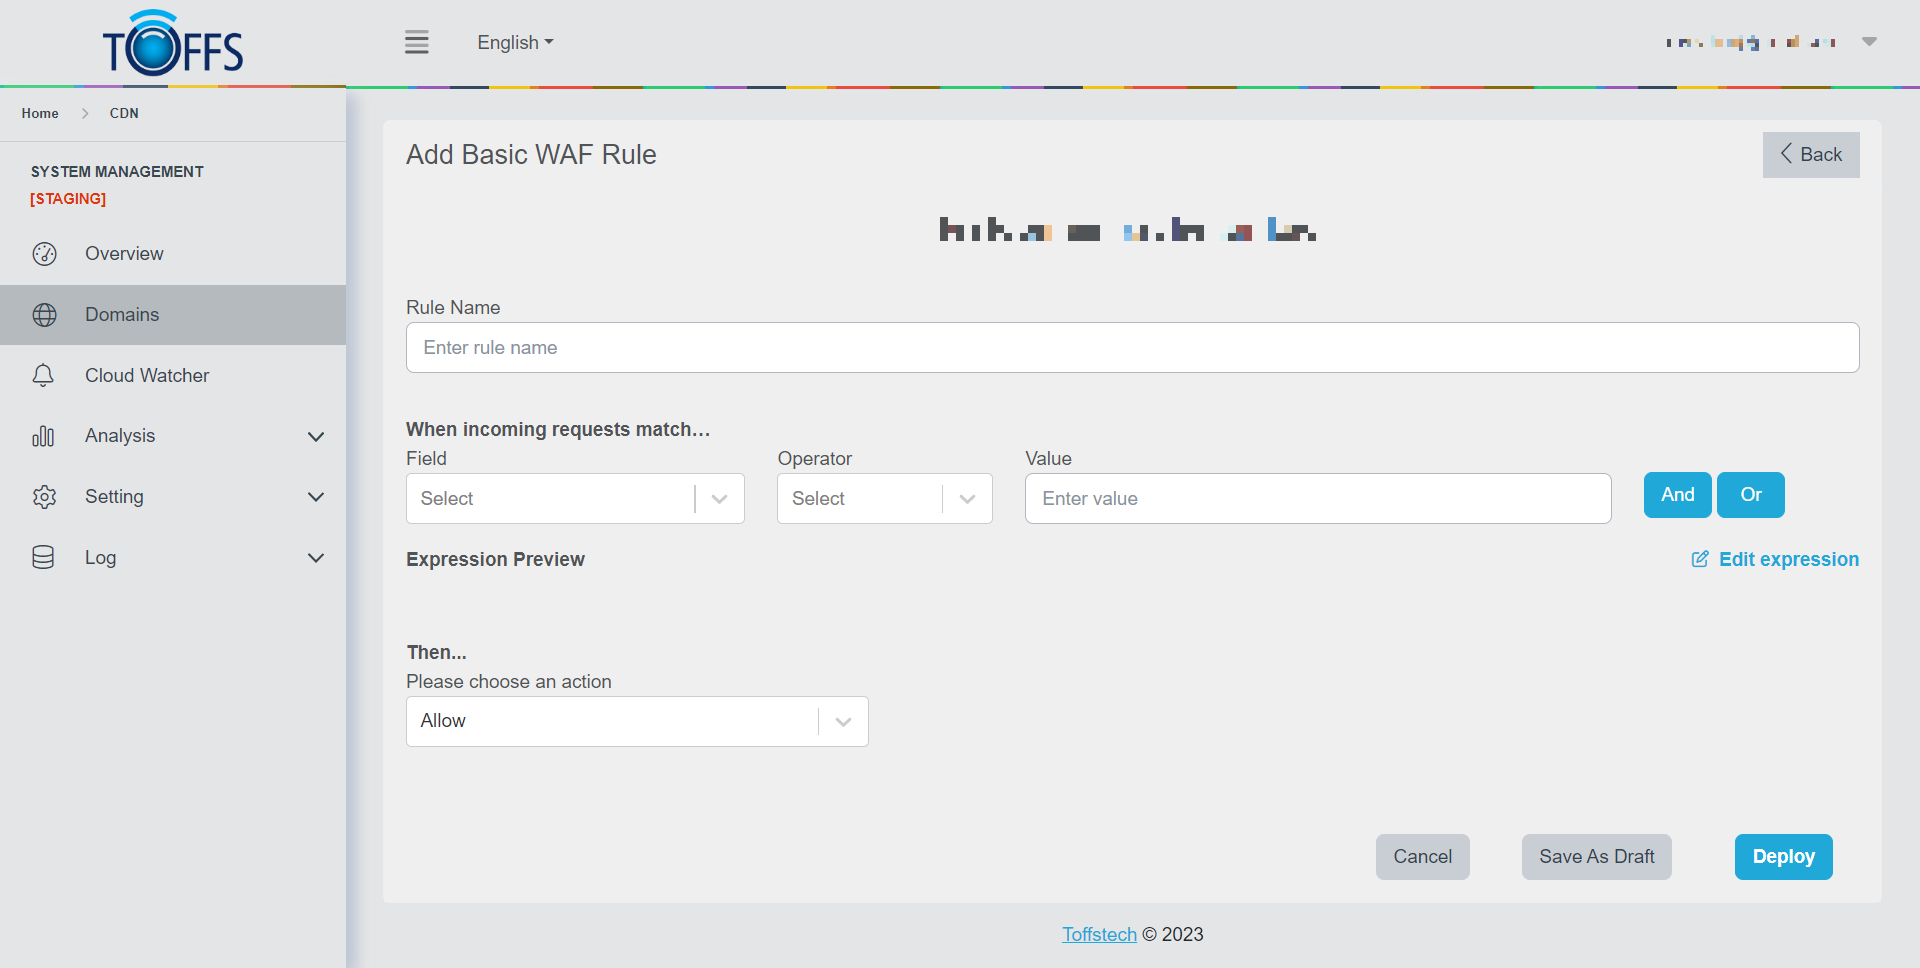 Figure 91
Step 2: In the “Rule Name” box, provide a name for your rule.
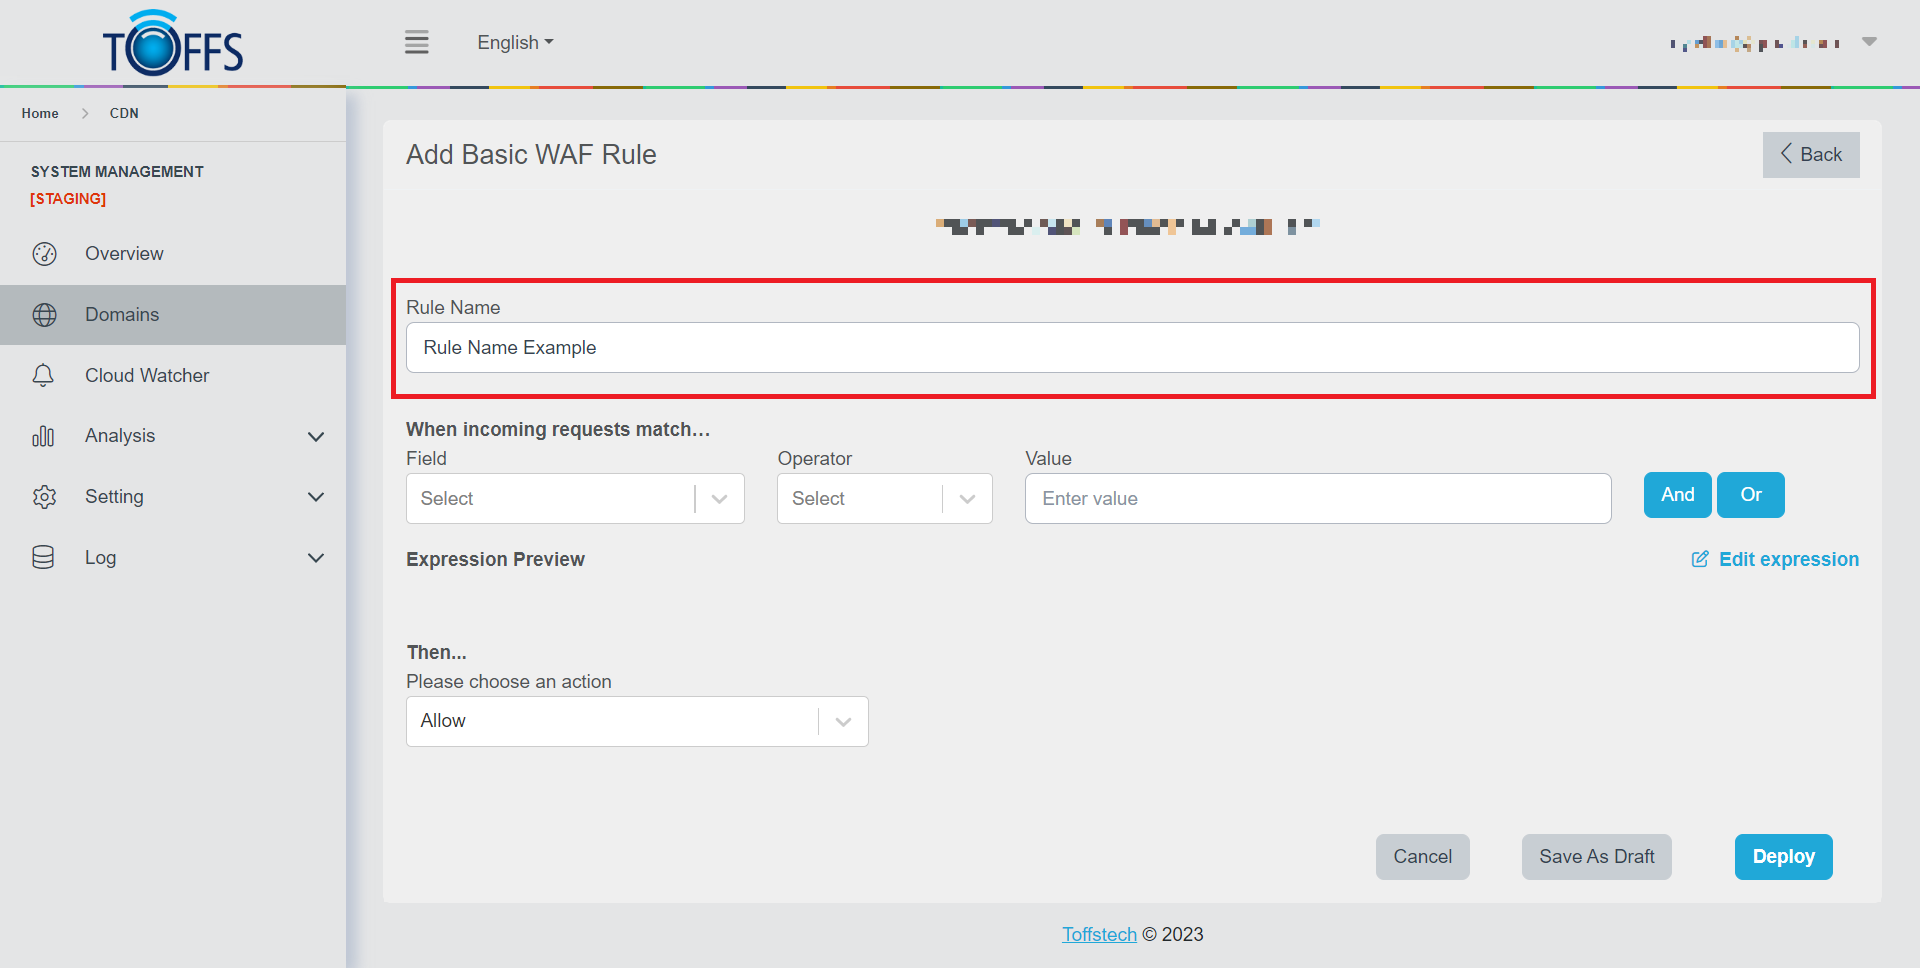 Figure 92
Step 3: Select the desired field for your rule.
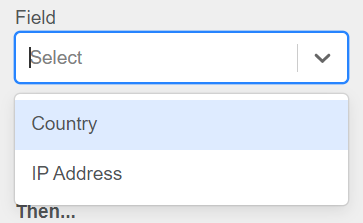 Figure 93
Step 4: Choose the appropriate operator for your selected field.
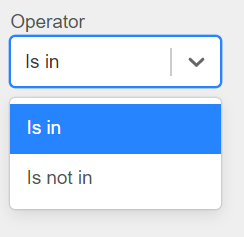 Figure 94
Step 5: Depending on the chosen field:
If the field is “Country”, the “Value” box will display a list of countries for you to select from.
If the field is “IP Address”, you will need to enter multiple values into the “Value” box.
Step 6: Optionally, you can use the “And” or “Or” buttons to combine multiple rules. To remove a rule, click the “X” button.
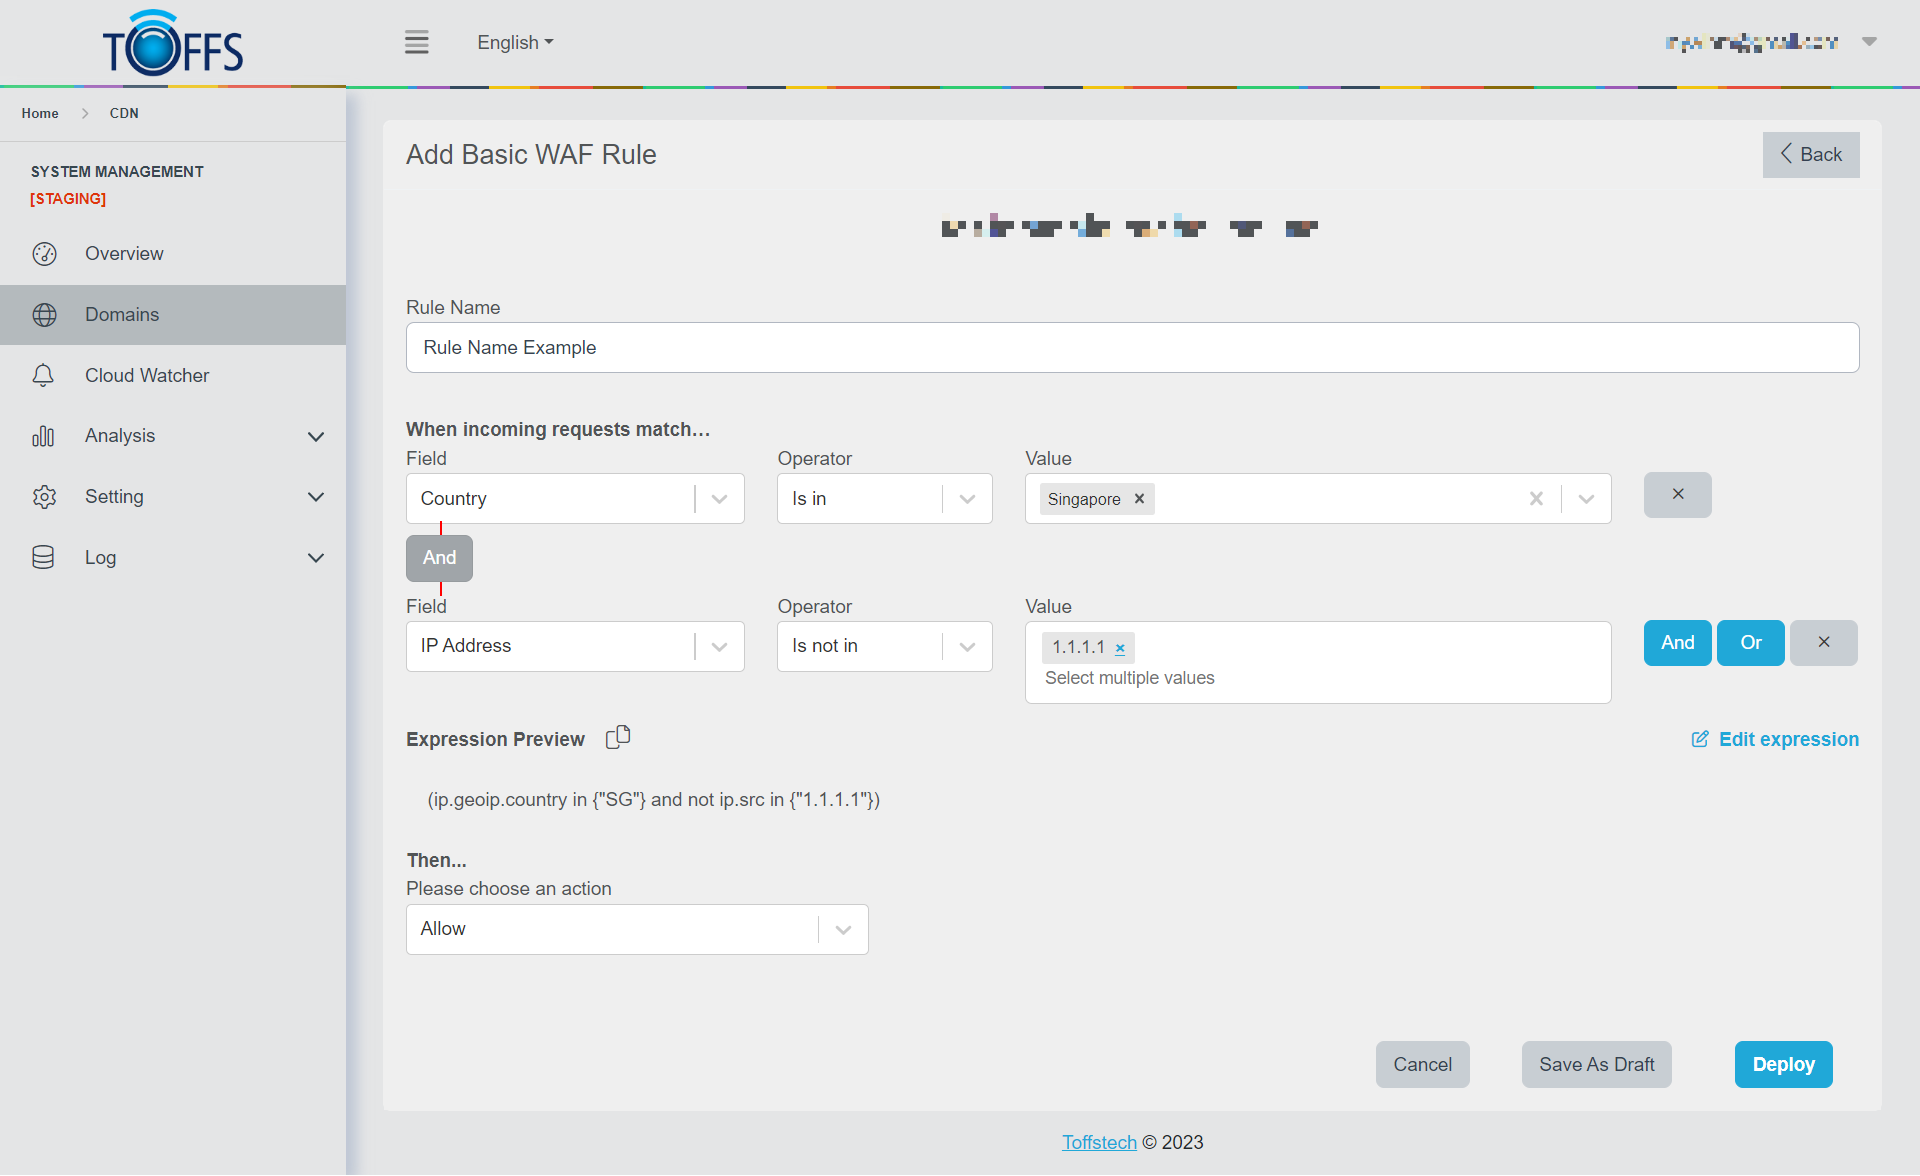 Figure 95
Step 7: Now, it’s time to choose an action for the rule.
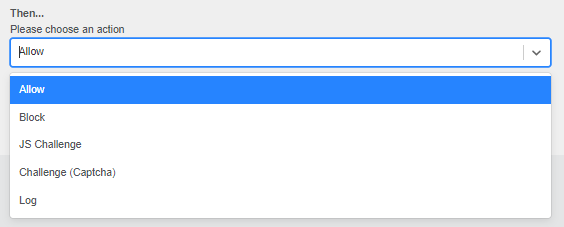 Figure 96
Step 8: Finally, click on the “Deploy” button to implement the rule immediately, or you can click “Save As Draft” if you want to keep it for later modifications.
 Figure 97
By following these steps, you’ll be able to seamlessly add a new Basic WAF Rule and enhance your web application’s security.
Custom WAF Rules
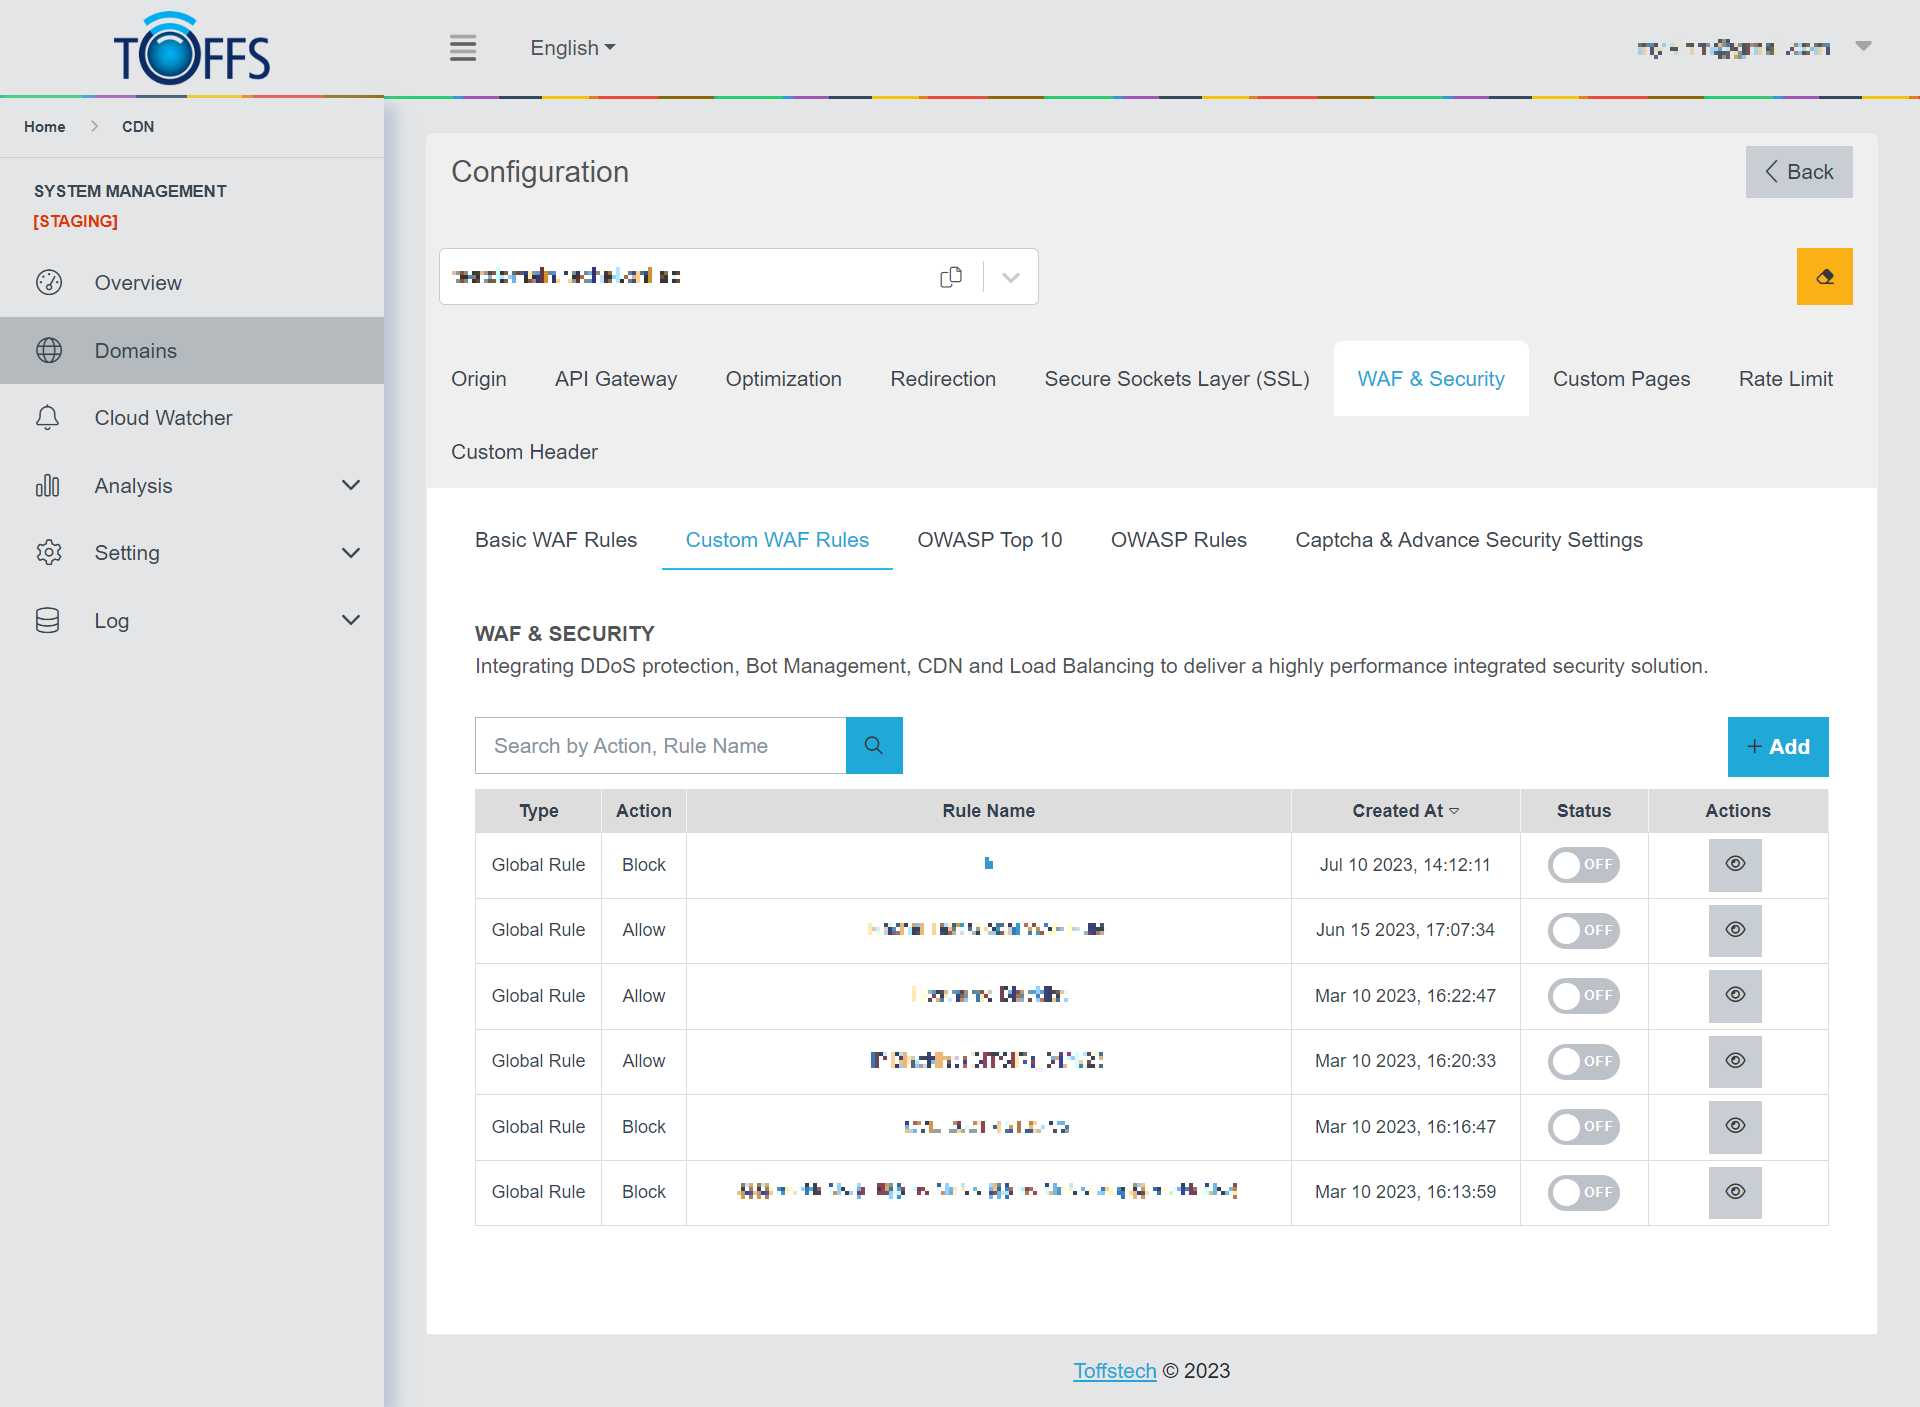 Figure 98
This is the “Custom WAF Rules” page under the “WAF & Security” page. This section is exclusively available to Professional, Premium, and Enterprise users.
On this page, you will find two types of Custom WAF Rules: Global Type and Local Type:
Global Type: This rule type is designed for urgent situations, where a supporter can add a new rule with Global Type to protect customers’ domains across all domains. By default, this rule is set to OFF, but customers have the flexibility to enable or disable it on the Custom WAF Rules page for each specific domain.
Local Type: This rule type allows customers to add their own rules, which are evaluated for each request passing through the WAF. Compared to “Basic WAF Rules,” Custom WAF Rules offer a more detailed approach. These rules hold a higher priority than the rest of the rules in the managed rule sets. The Custom WAF Rules include a rule name, rule priority, and an array of matching conditions.
To make managing your custom rules easier, we have implemented a convenient “Search” function. It allows you to quickly find and access the custom rules you have created.
To add a new Custom WAF Rule, complete the following steps: Step 1: Accessing Custom WAF Rules Go to the Custom WAF Rules section and click on the “+Add” button.
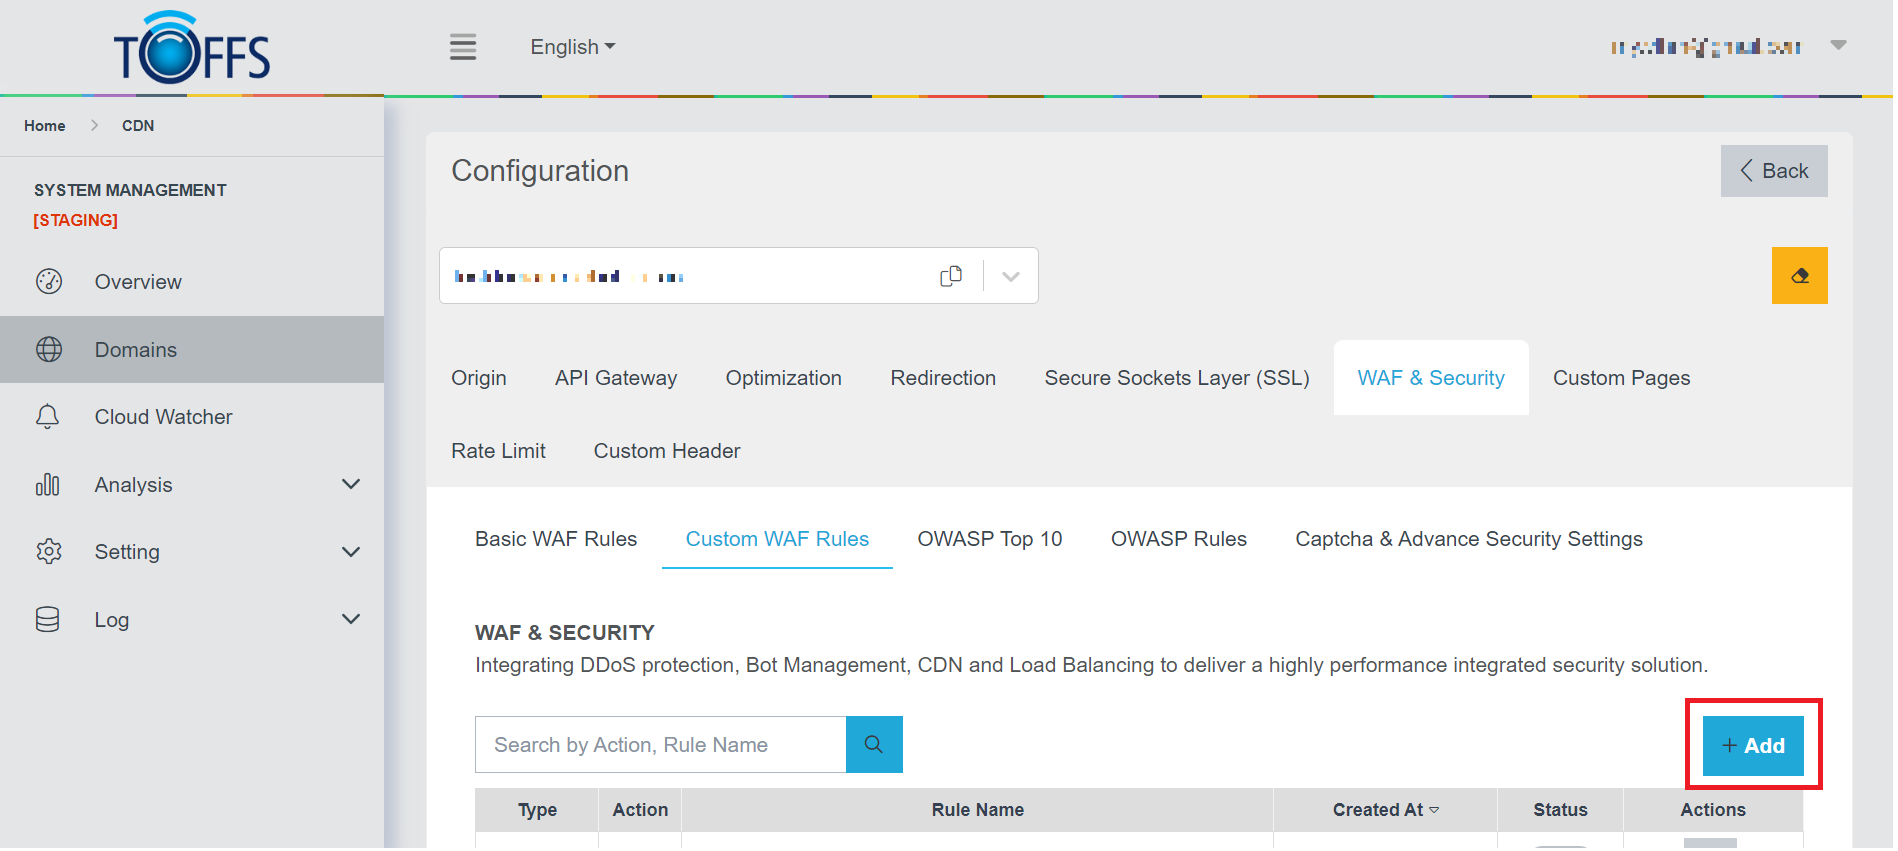 Figure 99
Upon clicking, you will be redirected to the “Add Custom WAF Rule” page.
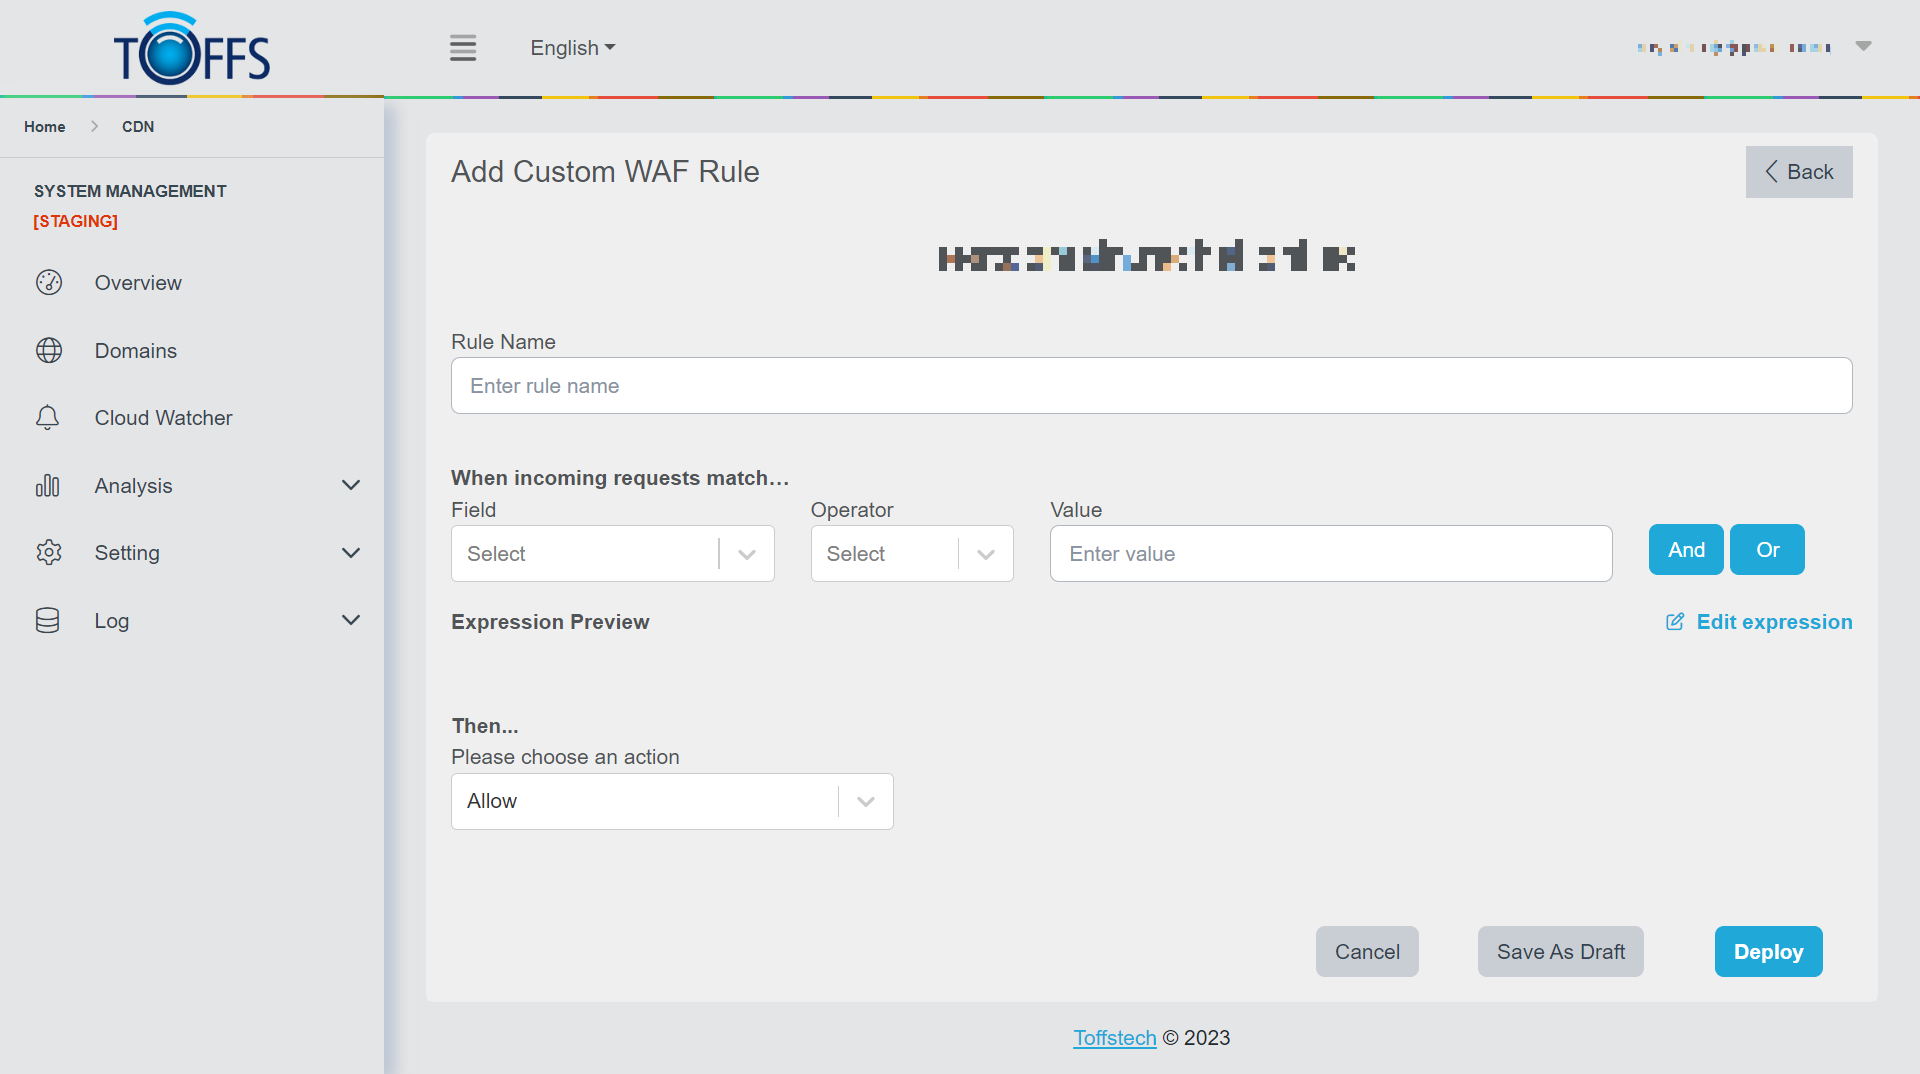 Figure 100
Step 2: Enter the Rule Name In the provided “Rule Name” box, enter a descriptive name for the new rule.
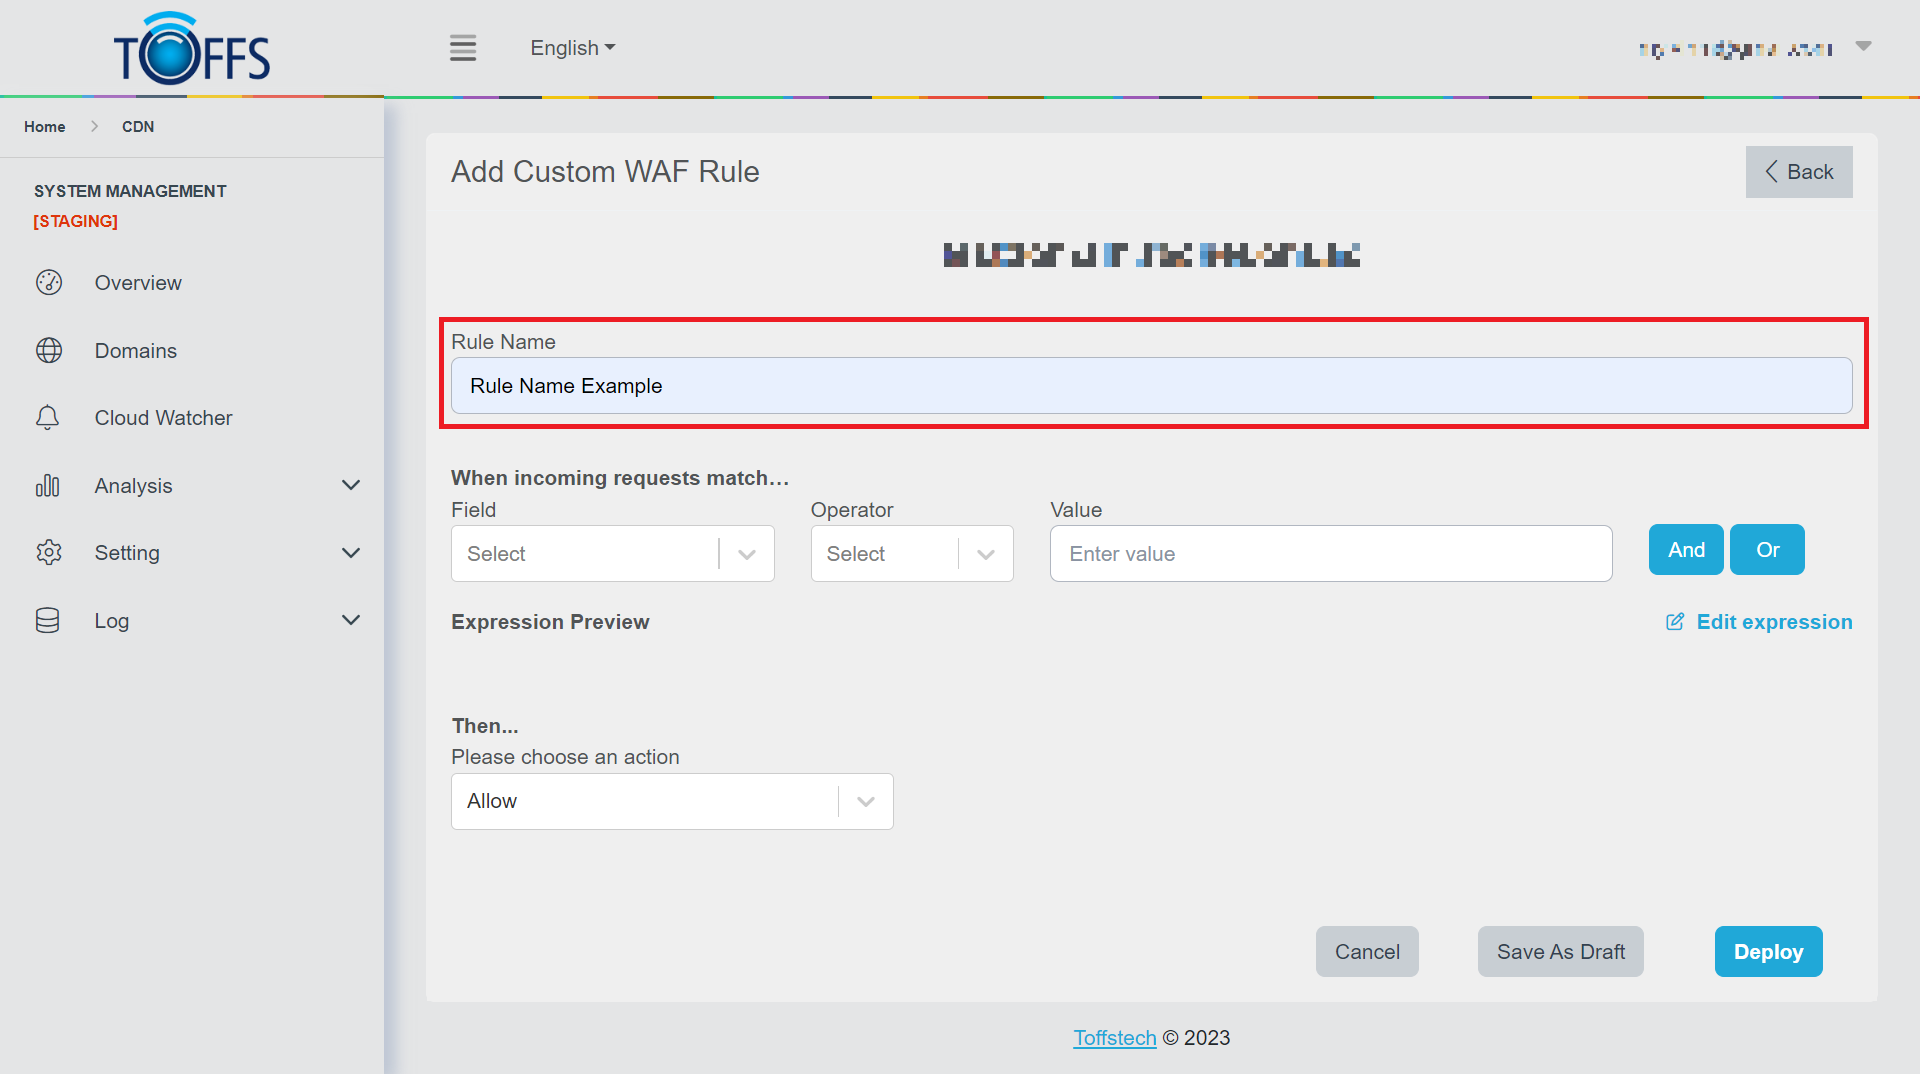 Figure 101
Step 3: Select the Field Choose the relevant field for which you want to create the WAF rule.
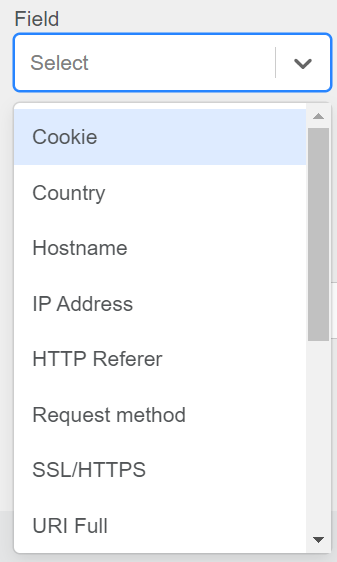 Figure 102
Step 4: Choose the Operator Select the appropriate operator that defines how the WAF rule will evaluate the chosen field.
Step 5: Set the Value Depending on the operator selected, either choose from the available options or manually enter the value to be used in the rule.
Step 6: Combining Rules Click on the “And”/”Or” button to combine multiple rules as needed. To remove a rule, simply click on the “X” button.
 Figure 103
Step 7: Select an Action Choose the desired action that should be taken when the incoming data matches the defined rule criteria.
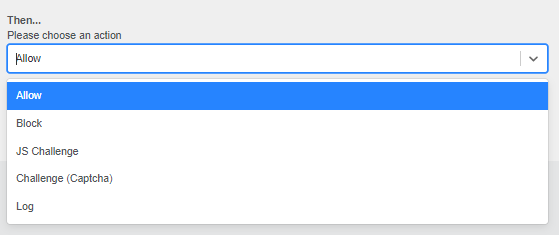 Figure 104
Step 8: Saving the Rule Finally, click on “Deploy” to activate the rule immediately or select “Save As Draft” to save it for future deployment.
 Figure 105
By following these steps, you can successfully add a new Custom WAF Rule to enhance your web application’s security.
OWASP Top 10
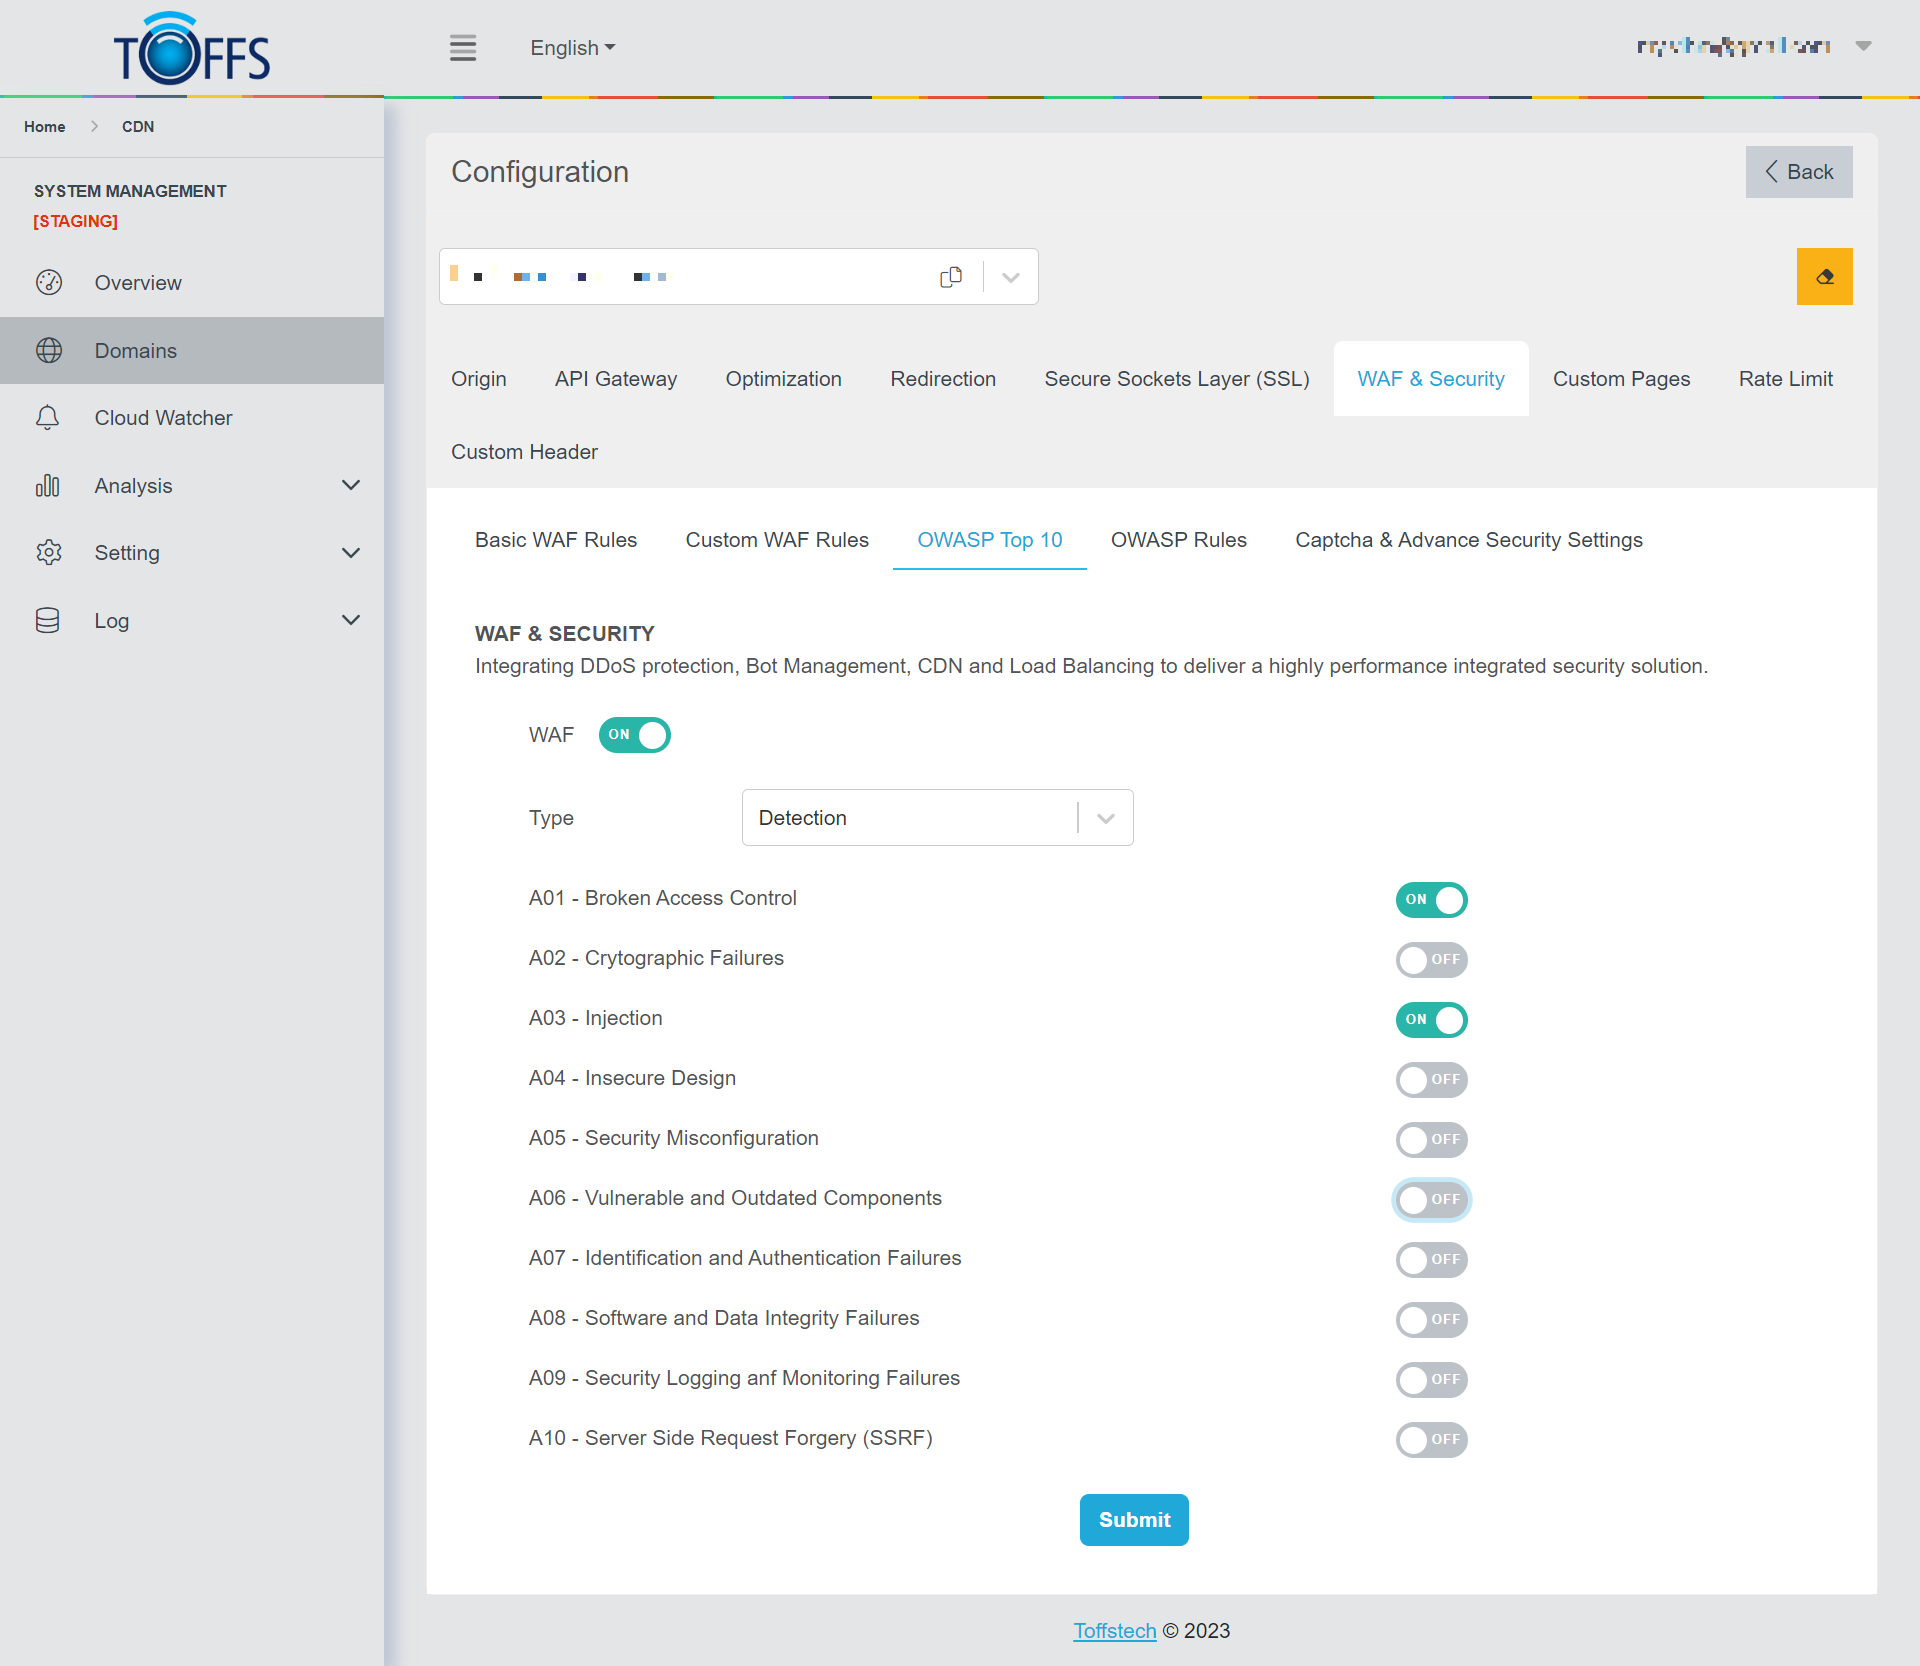 Figure 106
This is the “OWASP Top 10” page under the “WAF & Security” page. This section is exclusively available to Professional, Premium, and Enterprise users.
Activating the Web Application Firewall (WAF) provides automatic protection against the Top 10 vulnerabilities identified by the Open Web Application Security Project (OWASP).
The “Type” function empowers you to configure whether the system should only detect or actively block potential threats to your domain.
Use the “Submit” function to update the WAF whenever you make changes to the “Type” settings or when there are updates to the OWASP Top 10 list. This ensures that your security measures remain up-to-date and effective.
To setup OWASP Top 10 for this domain, complete the following steps:
Step 1: Click on the toggle to Turn ON OWASP Top 10.
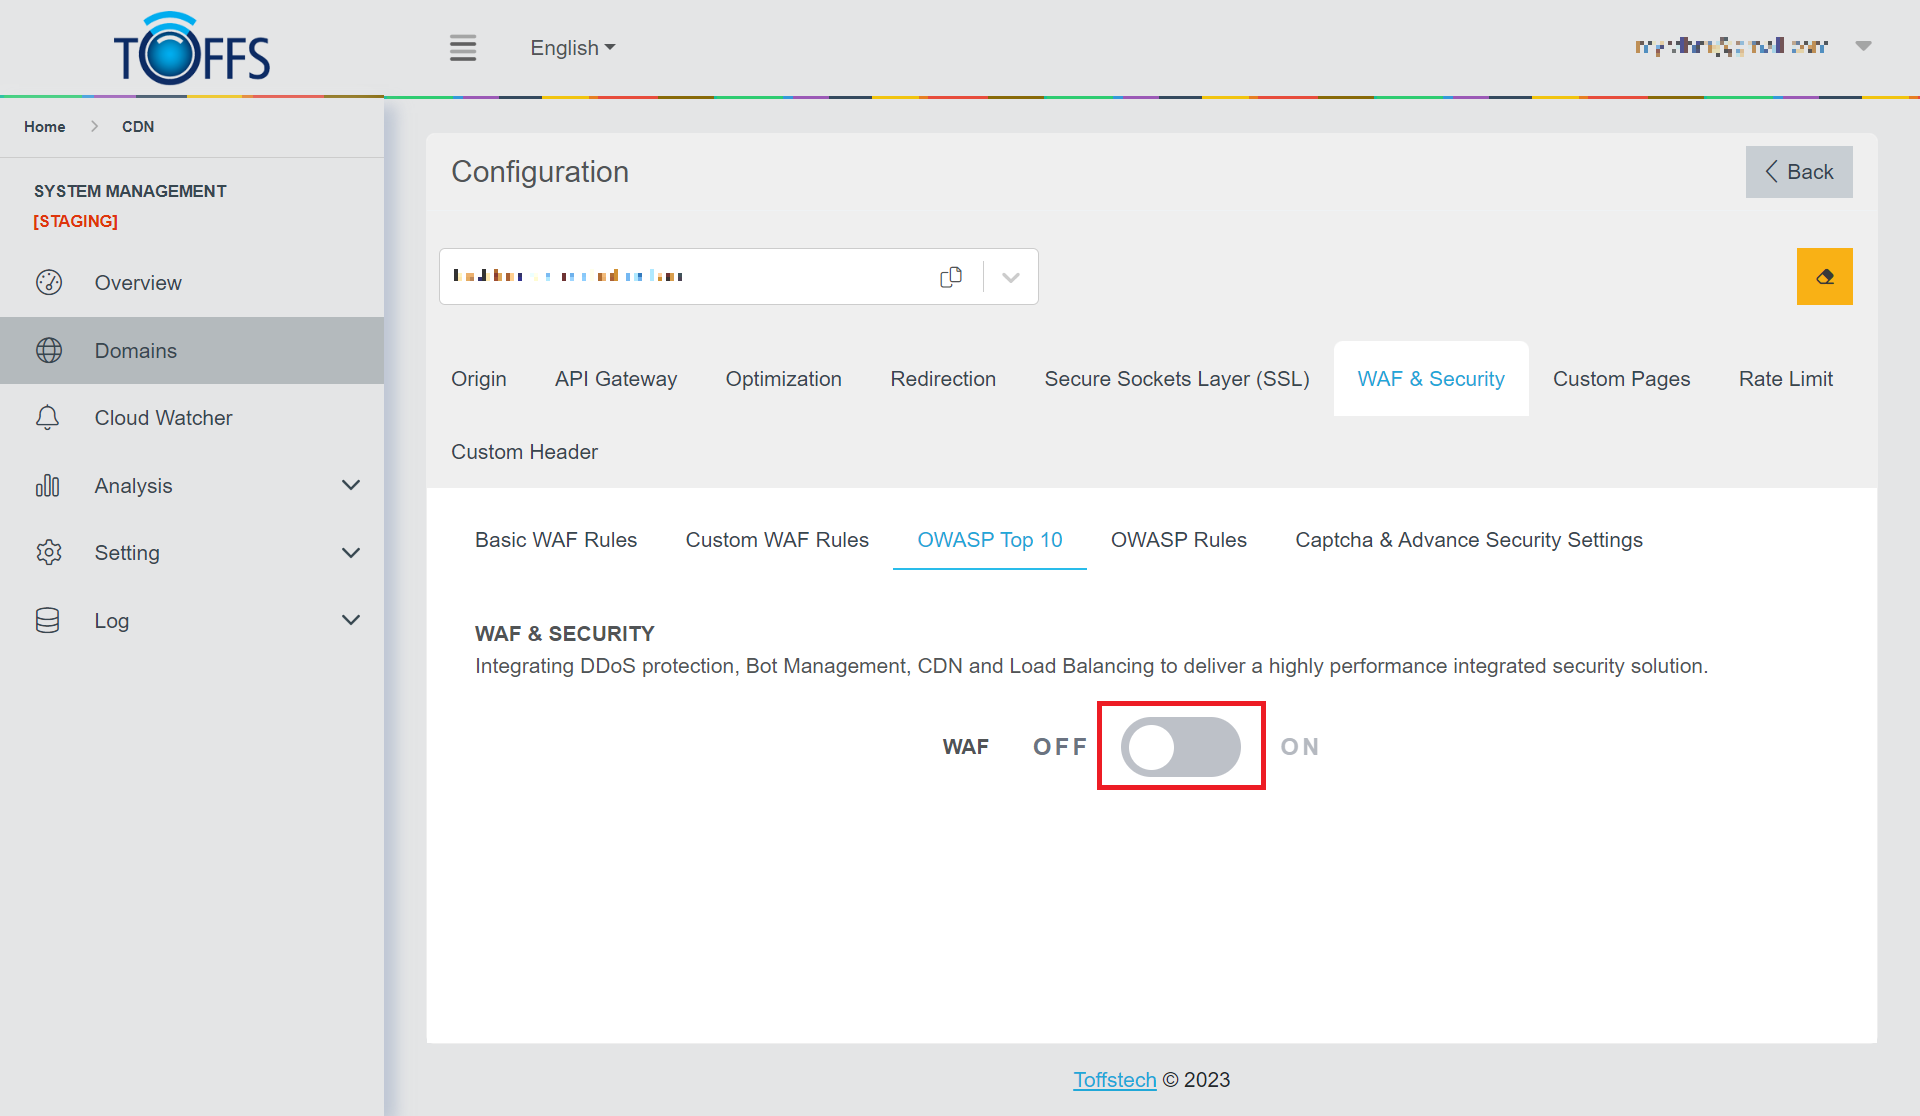 Figure 107
The system will display the default settings for OWASP Top 10 as shown below:
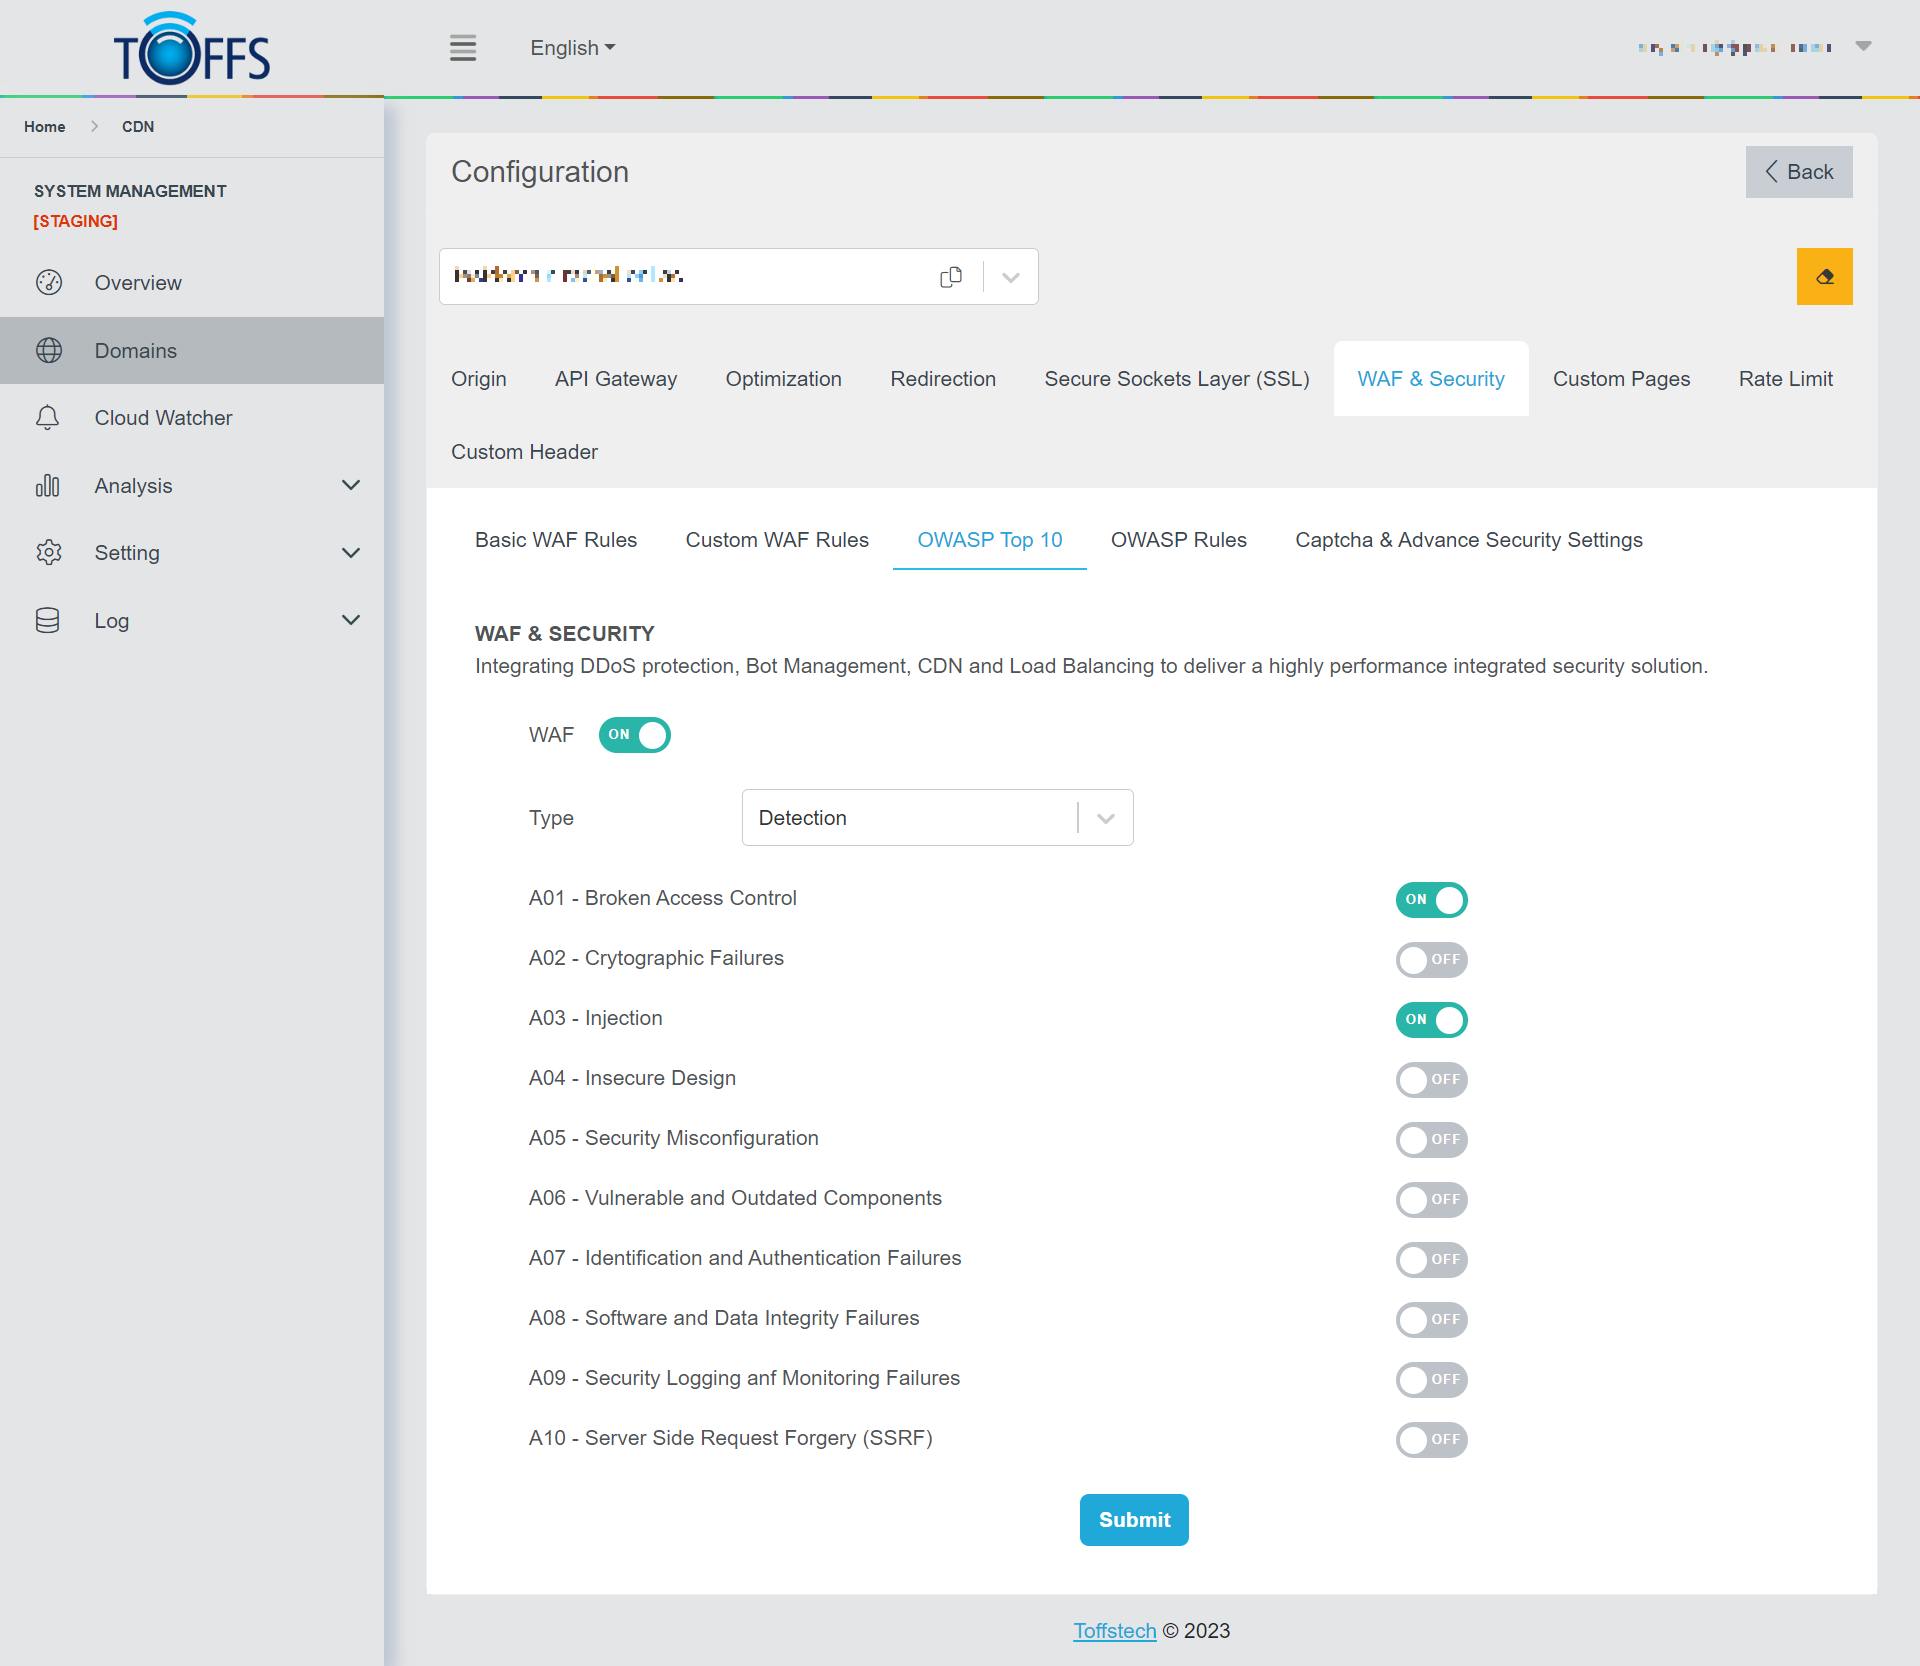 Figure 108
Step 2: Select the desired Type.
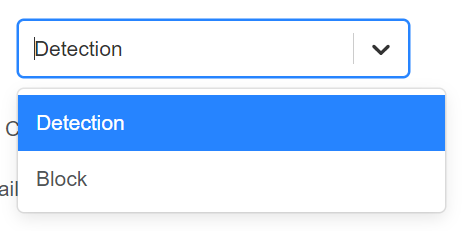 Figure 109
Step 3: Enable the OWASP Top 10 items that you would like to use, and then click the “Submit” button to apply the changes.
 Figure 110
OWASP Rules
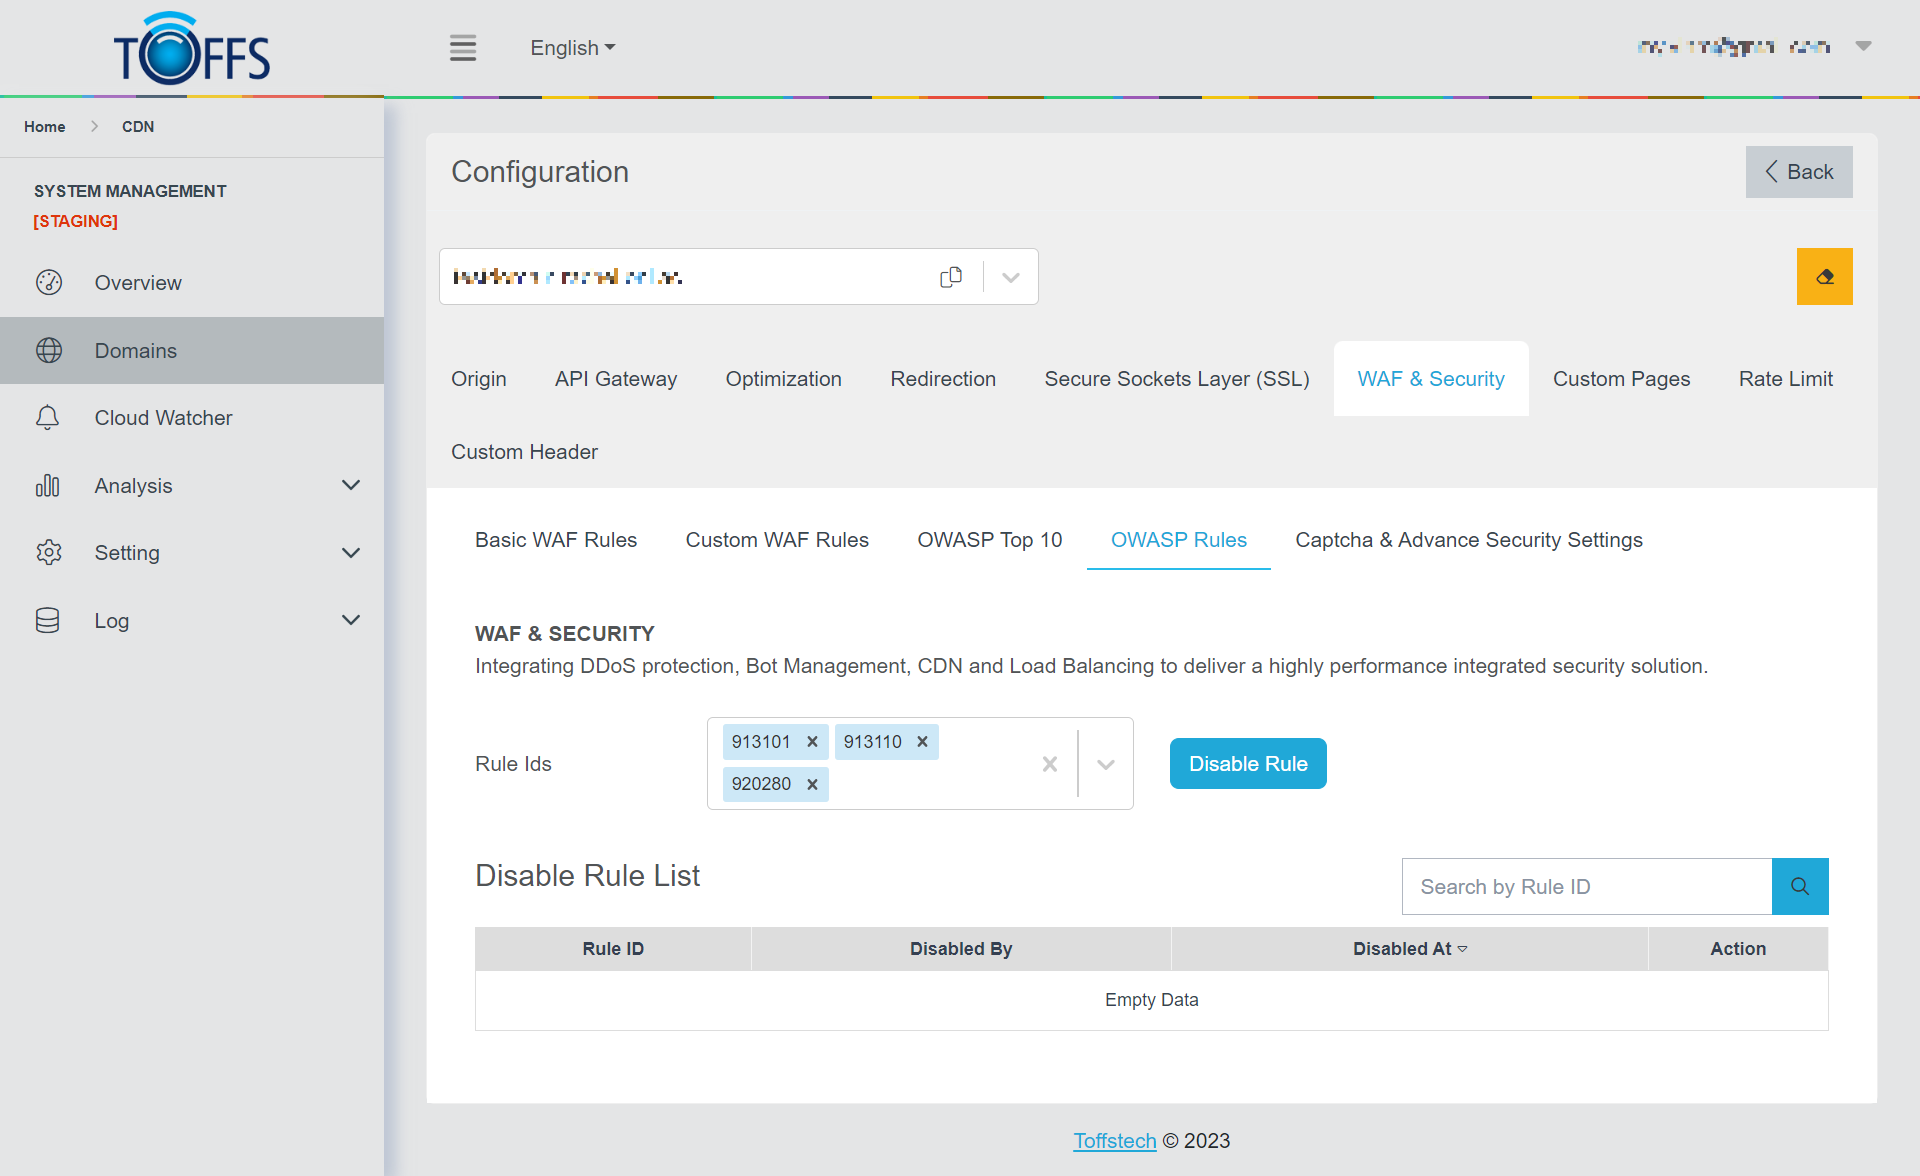 Figure 111
This is the “OWASP Rules” under the “WAF & Security” page. (Exclusive to Professional, Premium, and Enterprise Users)
On this page, you have the ability to manage Rule IDs by disabling them selectively.
To disable a Rule ID, simply press the “Disable Rule” option in the table below, and the Disable Rule List will be displayed, showing the Rule ID, Disabled By, and Disabled At details.
In case you need to remove a Rule ID from the list, you can do so by clicking the “Delete” button.
To setup OWASP Rule for this domain, complete the following steps: Step 1: Choose a Rule ID from the list in the Rule IDs drop-down menu.
 Figure 112
Step 2: Click on the “Disable Rule” option.
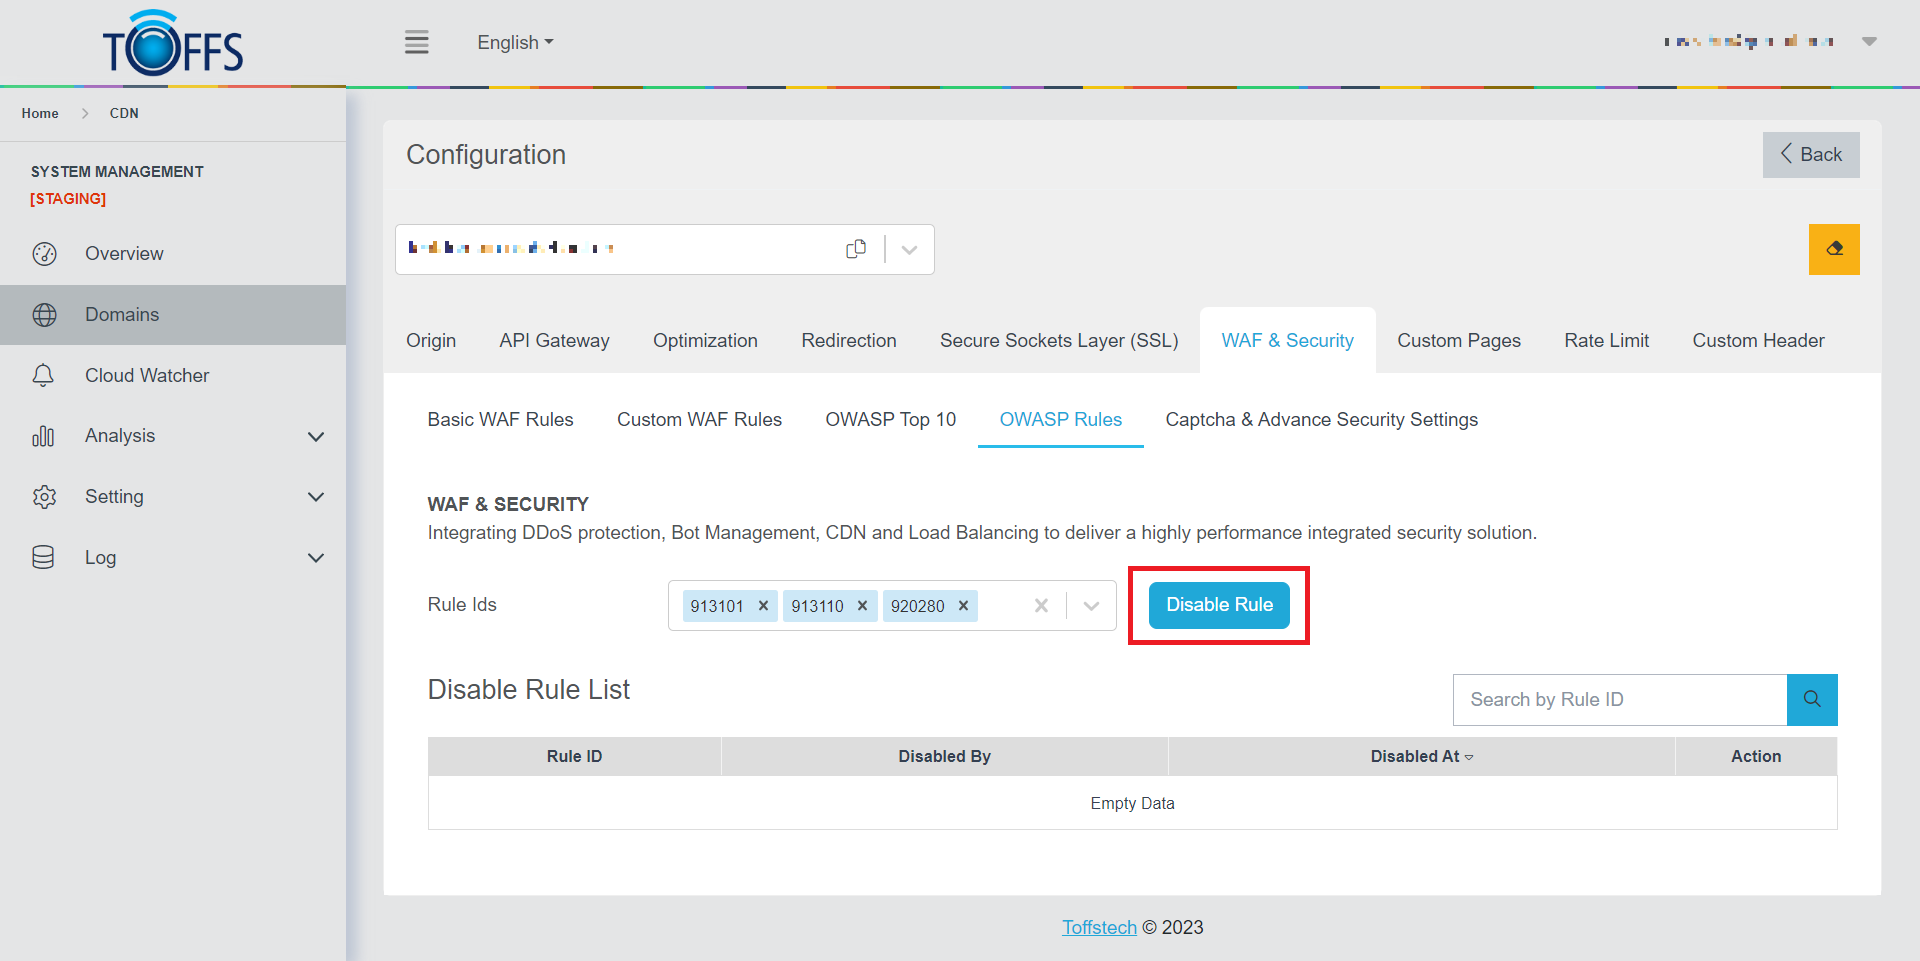 Figure 113
Once completed, the system will display the new OWASP Rule as shown in Figure 114.
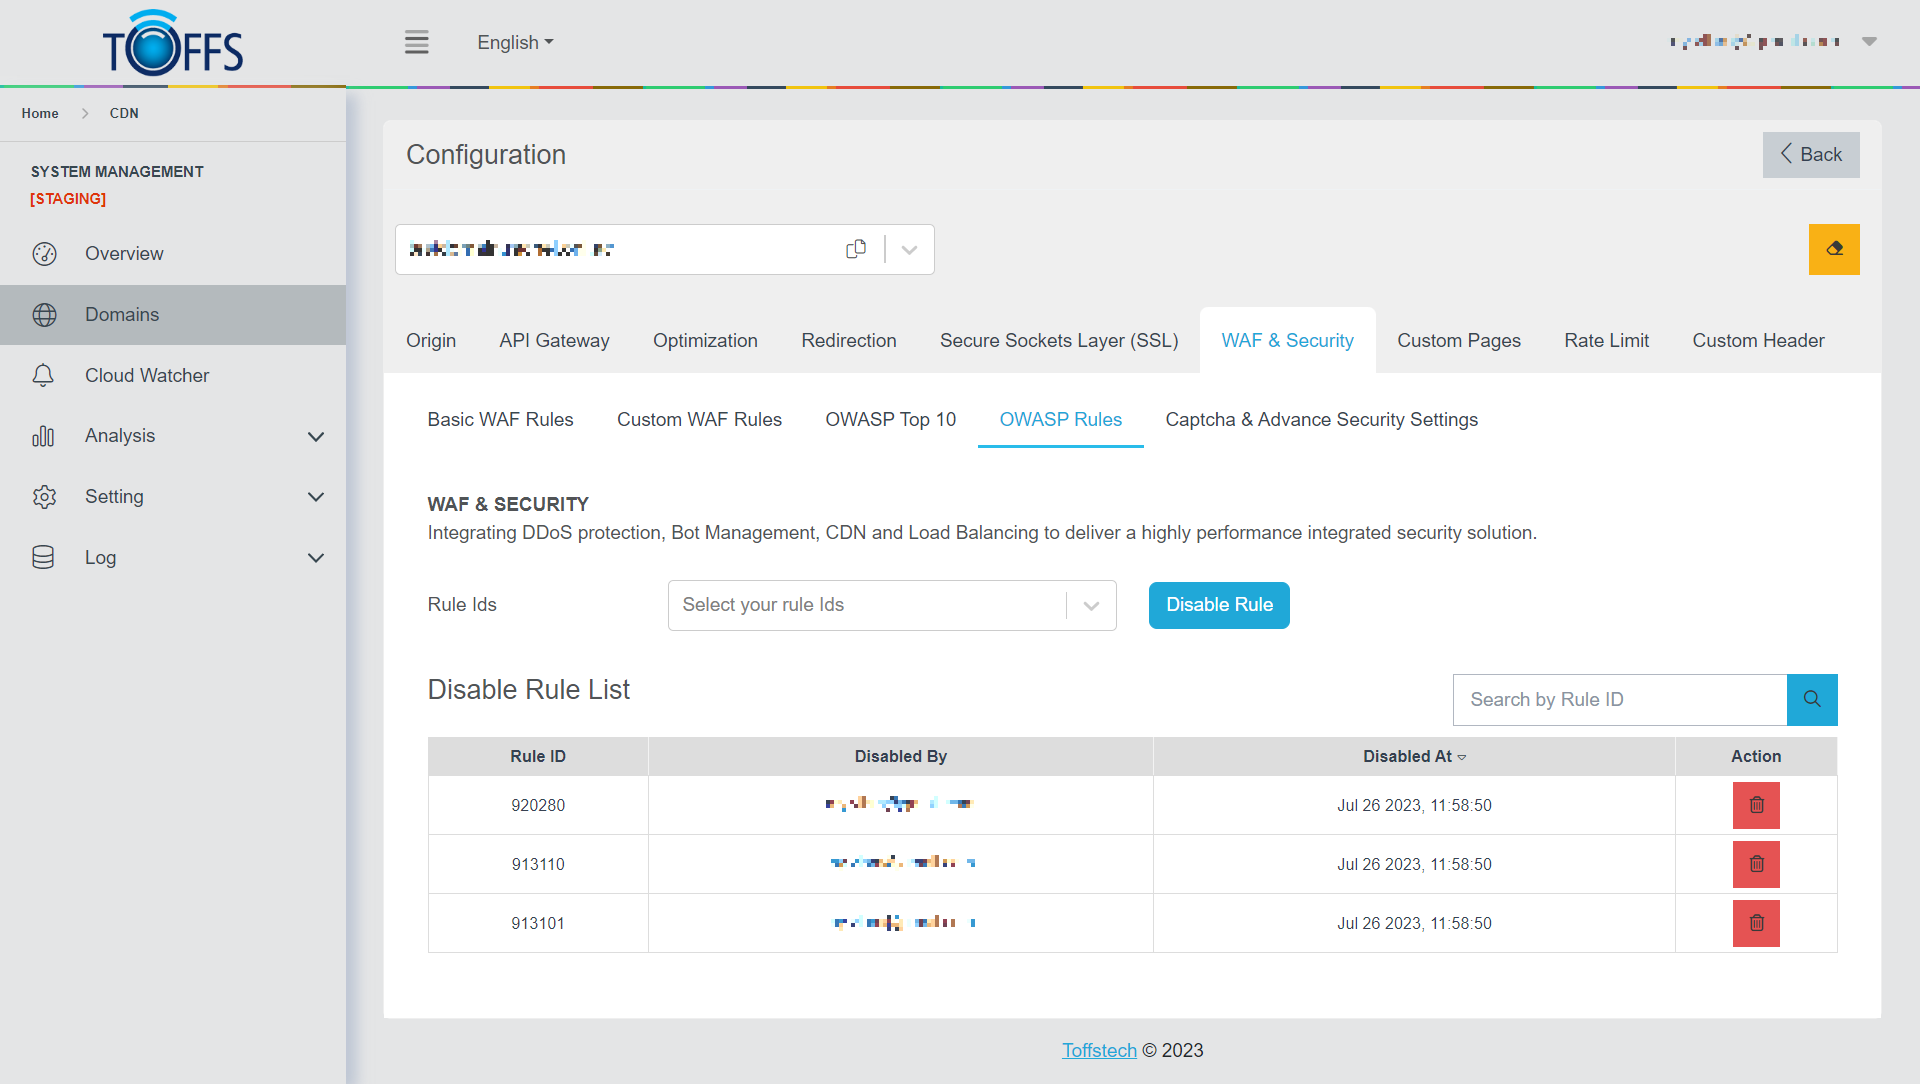 Figure 114
Figure 114
Figure 114
Captcha and Advanced Security Settings
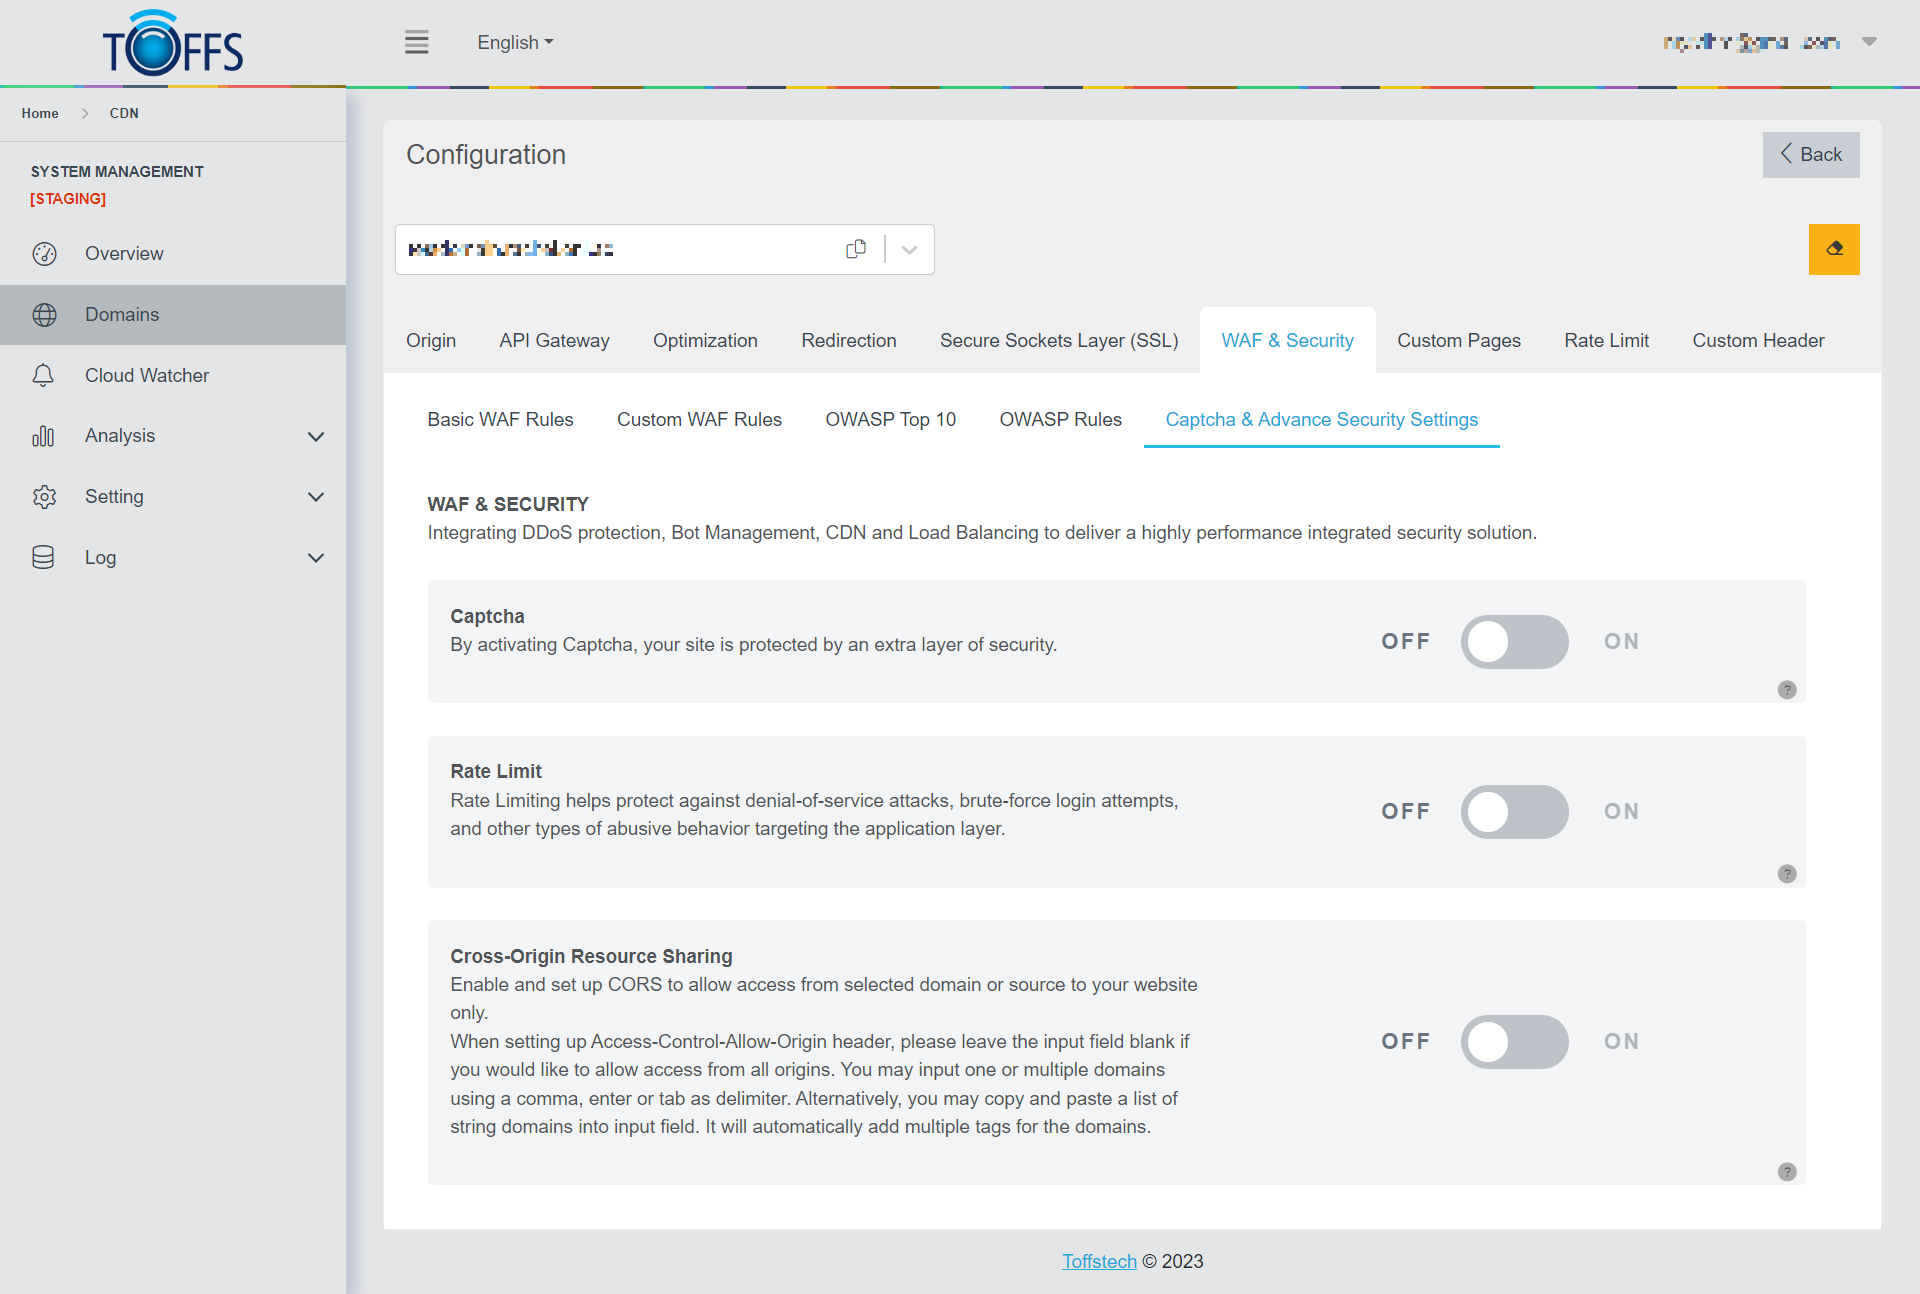 Figure 115
This is the “Captcha & Advanced Security Settings” under the “WAF & Security” page. This section available exclusively to Professional, Premium, and Enterprise.
Captcha: Captcha is a powerful tool designed to differentiate between human users and automated bots. When a visitor accesses the site, they are presented with a word or a challenge to identify. The input provided by the visitor is then compared with the correct answer. If the input matches the expected response, the user is verified as human, granting them access to the site. By implementing Captcha, you can significantly improve your website’s security and protect it from unwanted automated activities.
Rate Limit: The Rate Limit function is a valuable feature that allows you to control the number of HTTP requests made by users within a specific time frame, particularly from a single IP address. By imposing limits on the rate of incoming requests, you can effectively thwart brute force password cracking attempts, prevent web crawling activities, and safeguard your website from potential DDoS attacks. Furthermore, this function enables you to filter and regulate the traffic from standard users, while also logging valuable information such as source URLs for further analysis and monitoring.
Cross Origin Resource Sharing (CORS): CORS is a critical setting that you can enable and configure to control access to your website from selected domains or sources. To allow access from all origins, simply leave the input field for Access-Control-Allow-Origin header blank. However, if you wish to limit access to specific domains, you can input one or multiple domain names using commas, enters, or tabs as delimiters. Alternatively, you have the option to copy and paste a list of string domains directly into the input field, and the system will automatically generate the appropriate tags for each domain. CORS is an essential security measure that helps prevent unauthorized access and ensures that your website can only be accessed by trusted sources.
By leveraging these advanced security settings, Professional, Premium, and Enterprise users can significantly enhance their website’s protection against various online threats, ensuring a safer and more secure online experience for both themselves and their visitors.
Captcha
Captcha is a technique utilized to differentiate between human users and automated robots on a website. By presenting visitors with a word or challenge, the website verifies whether the input provided is correct or not. If the answer matches the expected one, the user is identified as human and granted access to the site.
To implement Captcha on your website, follow these steps:
Step 1: Enable Captcha:
Go to the Captcha & Advanced Security Settings Page.
Locate the Captcha toggle and switch it on.
 Figure 116
The system will display full default settings of the Captcha feature.
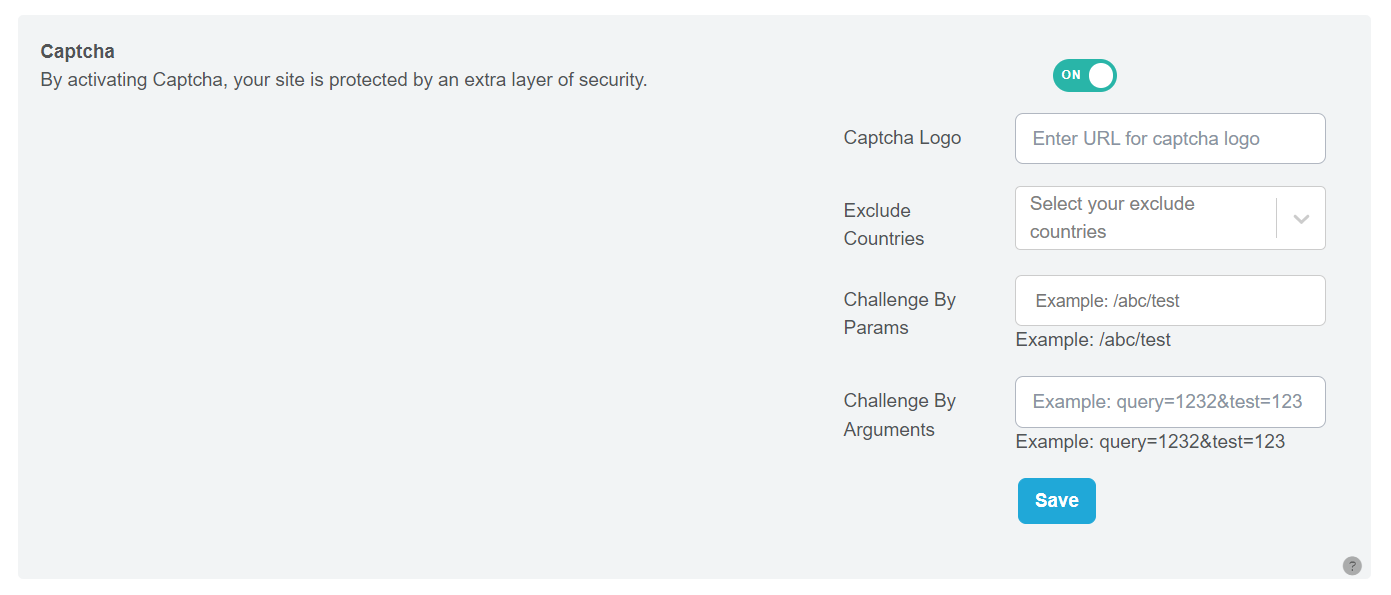 Figure 117
Step 2: Enter Captcha Logo URL: Input the URL for the Captcha logo. This logo will be displayed during the Captcha challenge.
Step 3: Select Countries to Exclude (Optional): If you want to exclude specific countries from the Captcha challenge, select them in this step.
Step 4: Enter Parameters (Params) (Optional): If you wish to add custom parameters to the Captcha URL, enter them here.
Step 5: Enter Arguments (Optional): If you want to include custom arguments with the Captcha URL, enter them in this section.
Step 6: Save Your Settings: Click the “Save” button to save and finalize your Captcha configuration.
Note:
- When accessing the URL with specified Params, Arguments, or both, the Captcha challenge will be displayed.
- For countries listed in the Exclude Countries field, accessing the URL with Captcha parameters will still trigger the Captcha challenge.
- However, for countries not listed in the Exclude Countries field, the Captcha challenge will be shown for all URLs, regardless of the parameters used.
By following these steps, you can successfully set up Captcha on your website and enhance its security by distinguishing between human users and robots.
Rate Limit
Rate Limiting is a crucial function utilized to control the number of HTTP requests users can make within a specific time frame. By implementing rate limiting, we can effectively counter brute force password cracking, web crawling, and prevent Distributed Denial of Service (DDoS) attacks. This technique enables us to regulate and filter legitimate user requests, while also logging valuable information such as source URLs into the system log.
 Figure 118
Memory Size (Megabyte, MB) and IP Address Storage:
The Memory Size parameter is used to determine the limit size for storing client IP addresses. It’s important to note that 1MB of memory can accommodate approximately 8,000 IP addresses. As a recommended setting, a normal website should be configured with a 10MB limit, which allows storage for up to 80,000 IP addresses.
Rate Limit: Rate Limit pertains to the number of requests allowed per second from a single IP address. By defining a suitable rate limit, we can control the frequency at which a single IP address can make requests to our server. For most normal websites, it is suggested to set the rate limit to a range between 10 to 20 requests per second, avoiding exceeding 30 requests per second.
Burst: The Burst parameter is utilized to handle excessive requests that surpass the maximum burst size. If a request count surpasses the burst limit, it results in an error, terminating the request. Properly setting the burst limit is crucial to handle sudden spikes in traffic and ensure the stability of the web server. For a typical website, it is recommended to set the burst limit in the range of 20 to 50 requests.
Rate Limiting is a powerful tool that significantly enhances web security by restricting the number of HTTP requests from individual IP addresses. By adhering to the suggested settings outlined above, web administrators can effectively manage and mitigate potential threats, ensuring a safe and smooth user experience while protecting their web infrastructure from malicious activities.
Configuring Rate Limit Parameters for High Traffic Domains
In this tutorial, we will learn how to set rate limit parameters to effectively manage high traffic domains. We’ll use an example of a domain that experiences the largest traffic on TOFFS Production, receiving 600,000 requests during peak hours from various IP addresses.
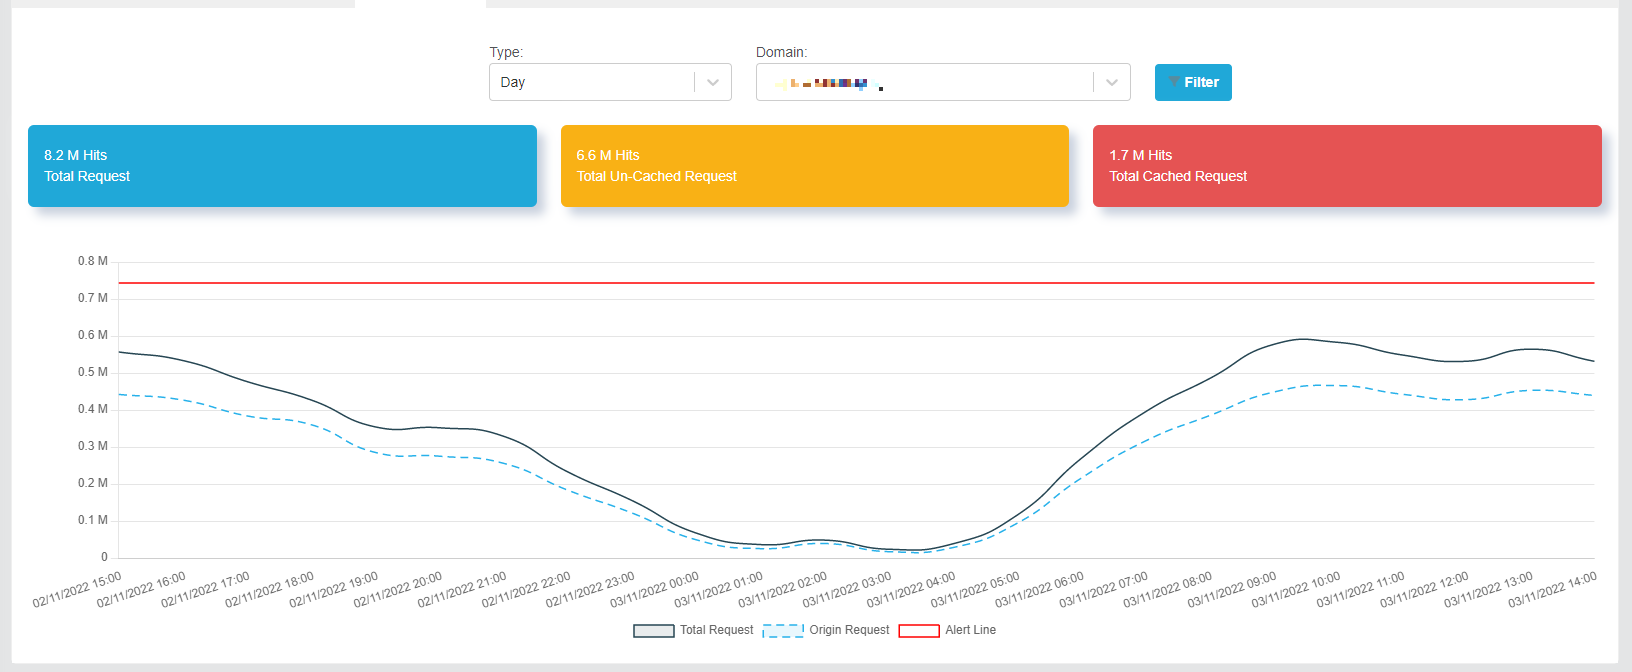 Figure 119
Assumption 1: All 167 requests per second come from different IP addresses. Let’s calculate the memory size required for this scenario:
Memory Size Calculation: 167 requests x 16 bytes = 2672 bytes.
To optimize memory usage, we will set the Memory Size to 1MB (1,048,576 bytes), which will be sufficient to handle the incoming requests.
Assumption 2: Now, let’s assume all 167 requests come from a single IP address. In this case, we will determine the appropriate rate limit and burst values.
Rate Limit Calculation: We’ll set the Rate Limit to 50. It means only 50 requests can access the domain per second from this IP address.
Burst Calculation: To accommodate potential bursts of traffic, we’ll set the Burst to 100. It means that up to 100 requests from the same IP address will be queued and waiting for access.
The remaining 17 requests exceeding the rate limit and burst settings will be rejected or failed during that second.
Real-world Scenario: In actuality, the domain will receive requests from numerous different IP addresses, and not all requests will come from a single IP address. This diversity of incoming requests ensures that the domain remains stable and well-distributed with the rate limit and burst settings configured above.
By carefully setting these rate limit parameters, you can efficiently manage traffic, prevent overload, and maintain stability for high-traffic domains.
To enable Rate Limit for your website, follow these steps:
Step 1: Access the Captcha & Advanced Security Settings Page
Navigate to the Captcha & Advanced Security Settings Page and locate the toggle for Rate Limit. Click the toggle to enable Rate Limit. (Refer to Figure 120 for visual guidance.)
 Figure 120
Step 2: Set Memory Size
In the same settings page, find the “Memory Size” field and enter the desired limit size to be stored for each client IP address in megabytes (MB).
Step 3: Configure Rate Limit
Next, locate the “Rate Limit” field and specify the maximum number of requests per second that can originate from a single IP address.
Step 4: Define Burst Limit
Find the “Burst” field and set the number of excessive requests that should be delayed. If the number of requests exceeds the maximum burst size, the request will be terminated with an error.
Step 5: Save Your Settings
Once you’ve adjusted the Memory Size, Rate Limit, and Burst settings according to your requirements, click the “Save” button to apply and save the changes.
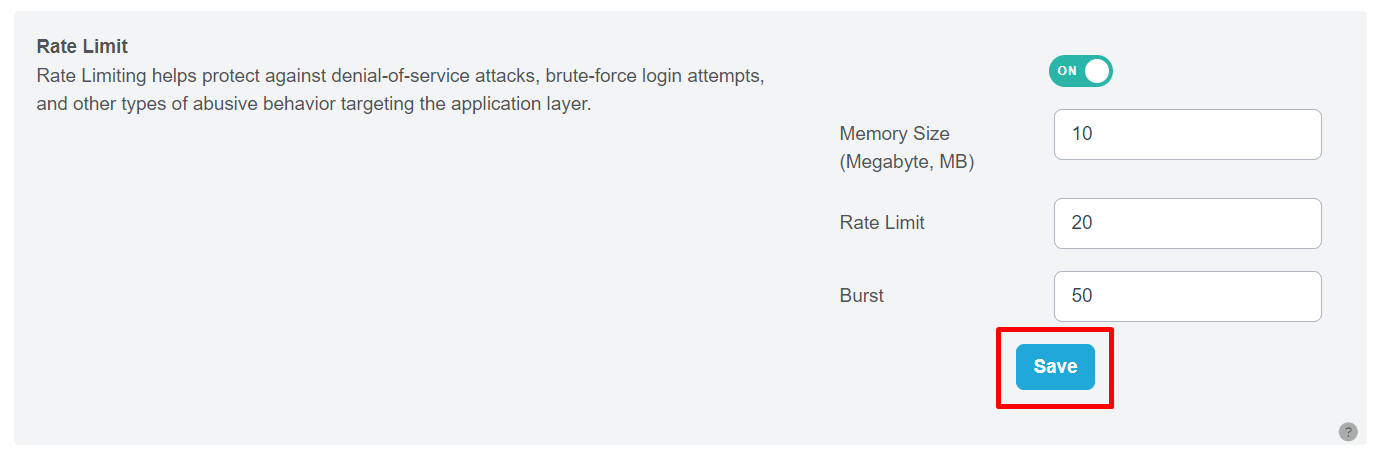 Figure 121
By completing these steps, you have successfully set up the Rate Limit for your Captcha & Advanced Security, helping to manage incoming requests and enhance security measures.
Cross Origin Resource Sharing (CORS)
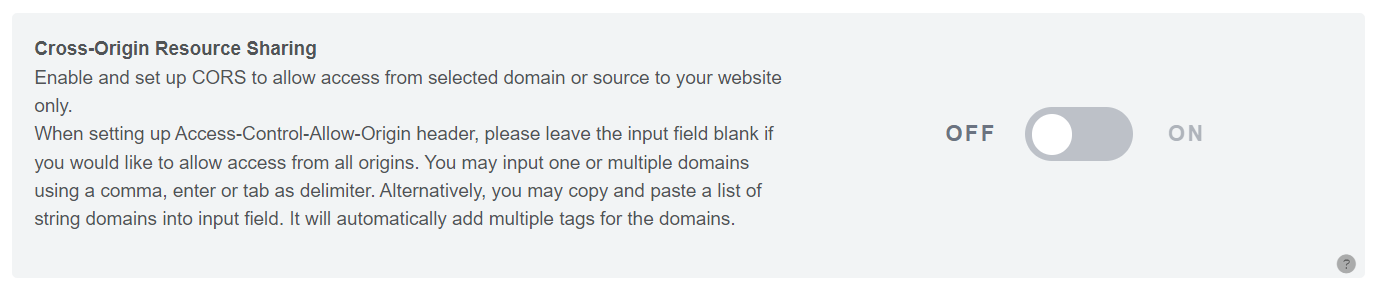 Figure 122
In this section, we will learn how to set up Cross-Origin Resource Sharing (CORS) to allow access from specific domains or sources to your website. By configuring the Access-Control-Allow-Origin header, you can control which domains are permitted to access your resources. If you want to allow access from all origins, simply leave the input field blank. To specify one or multiple domains, use commas, enters, or tabs as delimiters. Additionally, you have the option to copy and paste a list of string domains into the input field, and it will automatically create multiple tags for each domain.
To enable Cross-Origin Resource Sharing (CORS), follow these steps:
Step 1: Go to the Captcha & Advanced Security Settings Page and locate the “Cross-Origin Resource Sharing” option. Toggle it to enable this feature. Upon enabling, a field will appear where you can enter multiple domains.
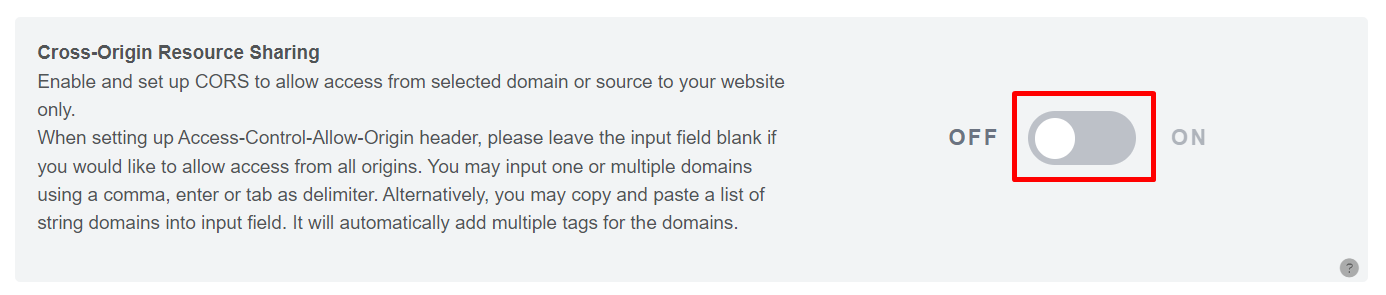 Figure 123
Step 2: In the provided field, enter the domains for which you want to allow Cross-Origin Resource Sharing. You can enter multiple domains if needed.
Step 3: Once you have entered the domains, click on the “Save” button to finalize the configuration.
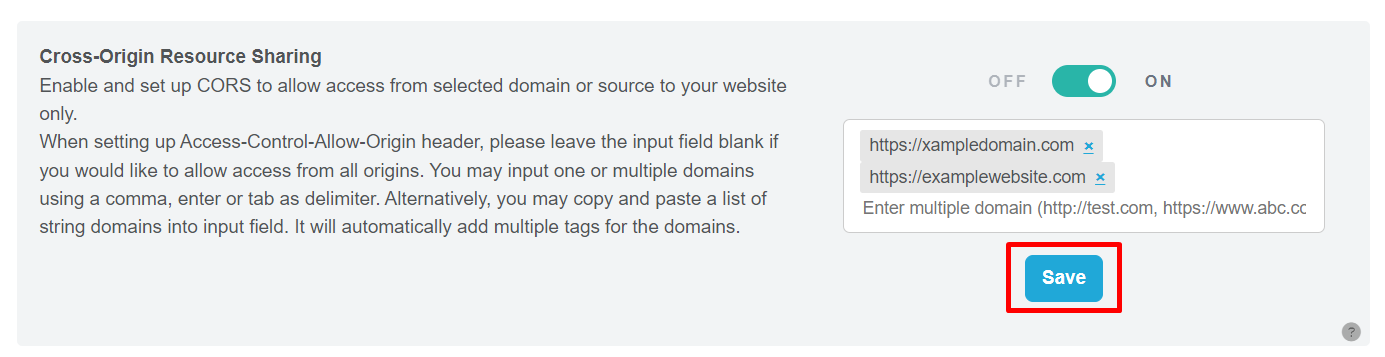 Figure 124
By completing these steps, Cross-Origin Resource Sharing will be set up and configured according to your specified domains, allowing seamless communication between different origins.
Please contact Toffs Security Operation Center for assistance if you encounter any issues.