Custom Pages
Custom Pages
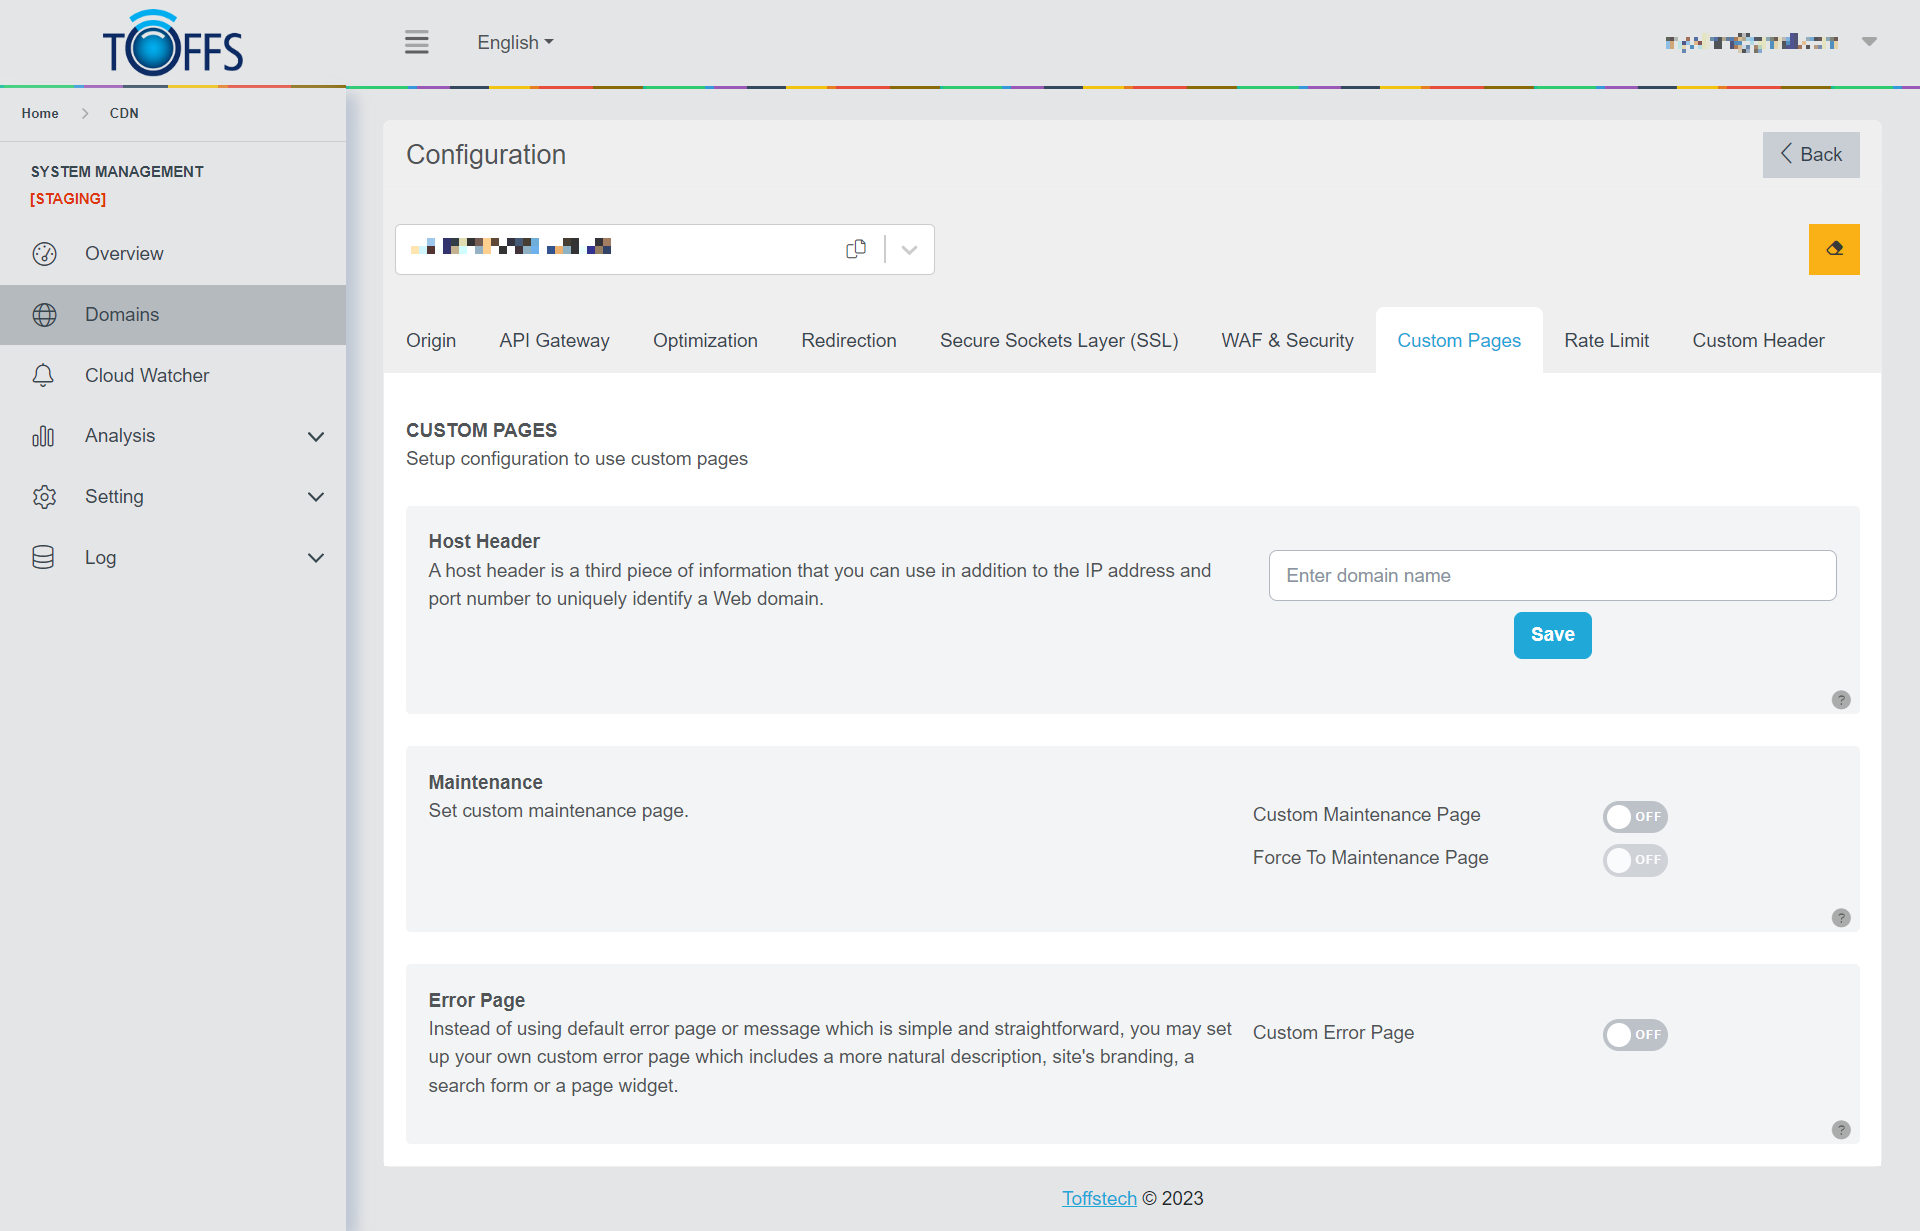 Figure 125
This is the “Custom Pages” page under the “Configuration” page.
Host Header: The Host header is usually used to specify the domain name of the server and the TCP port that the server is listening to. If no port is specified, the default port of the requested server is automatically used (for example, port 80 is automatically used when requesting an HTTP URL).
Maintenance: A maintenance page is a temporary page for times when a site or app is needed to be taken offline for updates, backups or maintenance. Visitors will be redirected to the maintenance page URL when this feature is turned ON. You may set to allow visitors from specific IPs to your website. Maintenance allows redirecting HTLM and static URL (with image) only.
Error Page: Error pages are server’s response, or the result of an HTTP status code returned by servers. Error pages are important to ensure visitors of your site know exactly what’s happening and what they can do when something unexpected happens on your site.
Host Header
The Host Header serves as a crucial component when it comes to defining the domain name and TCP port of the server. It plays a pivotal role in web requests and is commonly employed to ensure proper communication between clients and servers.
When a client sends a request to a server, the Host Header is utilized to specify the destination server’s domain name and, if needed, the corresponding TCP port. In case no specific port is mentioned, the request will automatically default to the standard port associated with the requested server. For instance, when making an HTTP URL request, port 80 will be automatically used.
To leverage the functionality of the Host Header, follow these simple steps:
- Enter the desired domain name in the appropriate field.
- Click the “Save” button to store the changes.
 Figure 126
Figure 126
Figure 126
Figure 126 showcases a practical implementation of using the Host Header for successful communication between the client and server.
Maintenance Page
Maintenance: A maintenance page serves as a temporary placeholder when a website or application needs to be taken offline for updates, backups, or routine maintenance. During such times, visitors will be automatically redirected to the maintenance page URL. Additionally, you have the option to allow access only to specific IP addresses.
 Figure 127
To configure the maintenance page, follow these steps:
Step 1: Go to the Custom Pages and locate the “Maintenance” option. Toggle the switch to enable it.
 Figure 128
Step 2: Click on the “Advance” button.
 Figure 129
Step 3: In the Maintenance URL, enter the URL for the maintenance page.
 Figure 130
Step 4: Select either HTTP or HTTPS, depending on your website’s configuration.
Step 5: If desired, you can enter one or multiple IP addresses in the IP Whitelist section. When an IP address from the Whitelist accesses the website, they will not be redirected to the maintenance page.
Note: This step is optional. If you want to allow access to all visitors during maintenance, you can skip adding IPs to the Whitelist.
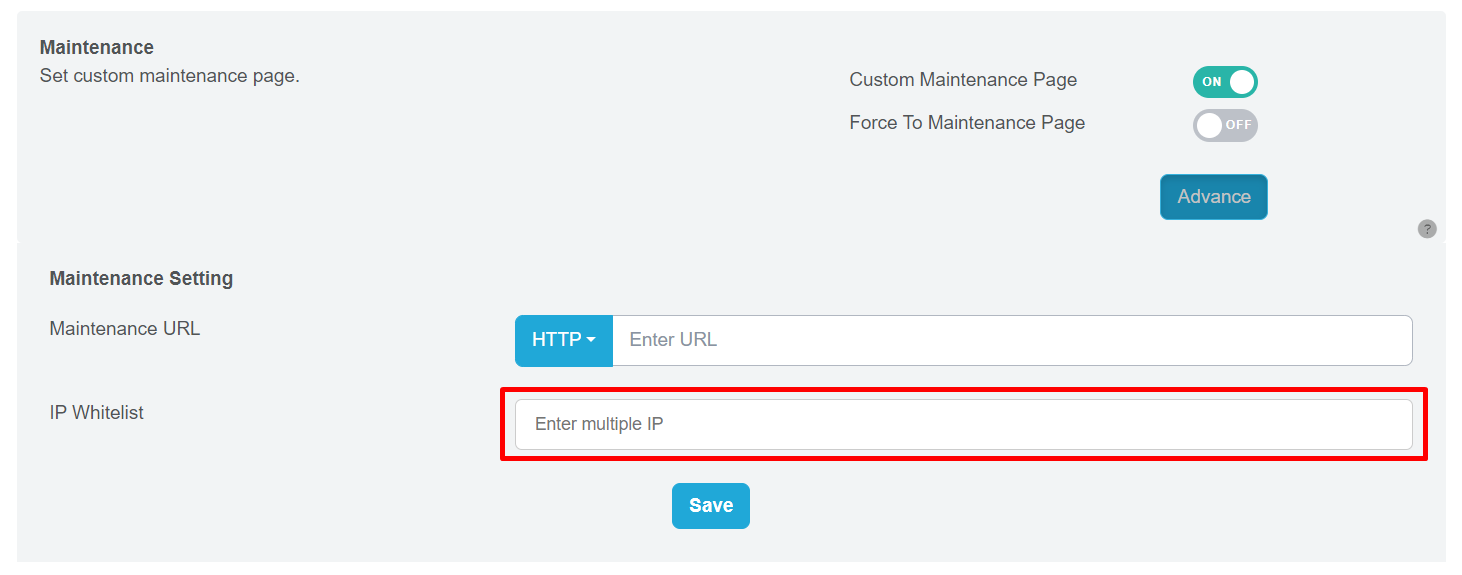 Figure 131
Step 6: Click the “Save” button to finalize the setup.
Step 7: If you wish to force the maintenance page to be displayed, you can use the toggle provided in Figure 132. When enabled, all visitors will be redirected to the maintenance page, regardless of their IP address. This ensures that only those with permission can access the site during maintenance.
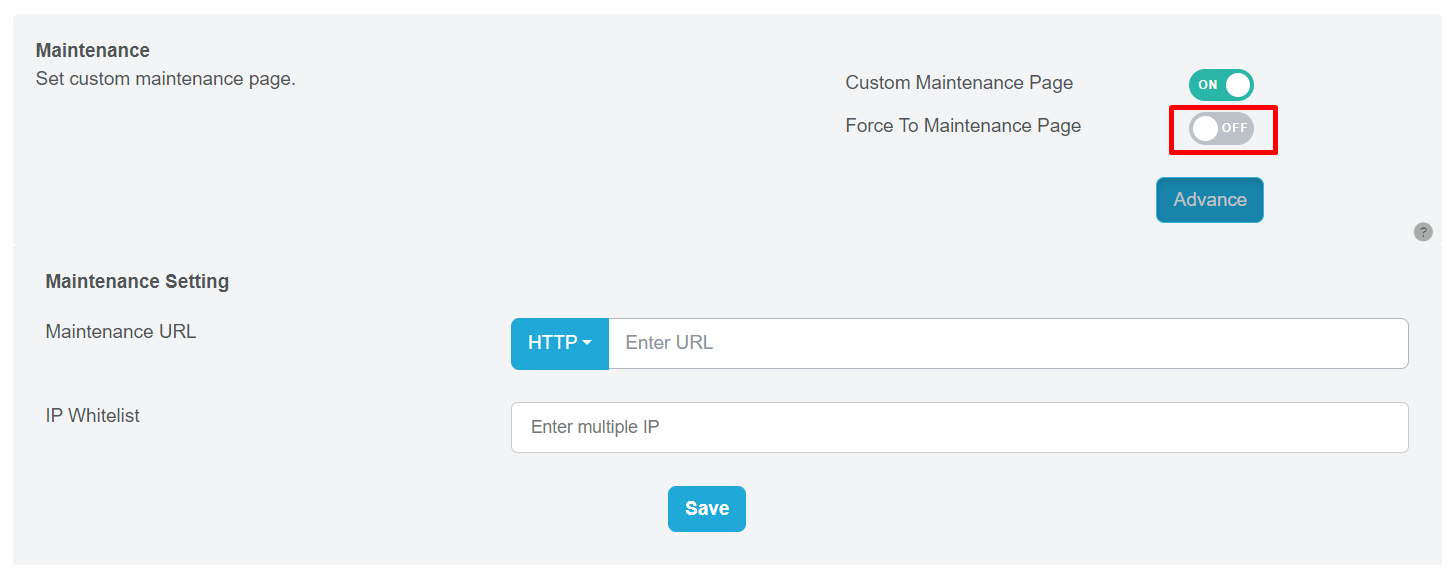 Figure 132
Error Page
Error page is the server’s way of responding to unexpected situations or HTTP status codes returned by the server. These pages play a crucial role in ensuring that visitors to your website are informed about what’s happening and are guided on what steps to take when encountering errors.
To configure your Error Page, follow these simple steps:
Step 1: Go to the Custom Page and locate the “Error Page” option. Enable it by toggling the switch.
 Figure 133
Step 2: Look for the “Advance” button and click on it to access further settings.
 Figure 134
Step 3: Now, you can choose the specific HTTP status code for which you want to set up a custom error page.
Enter the URL of the error page you want to display when the selected status code is encountered.
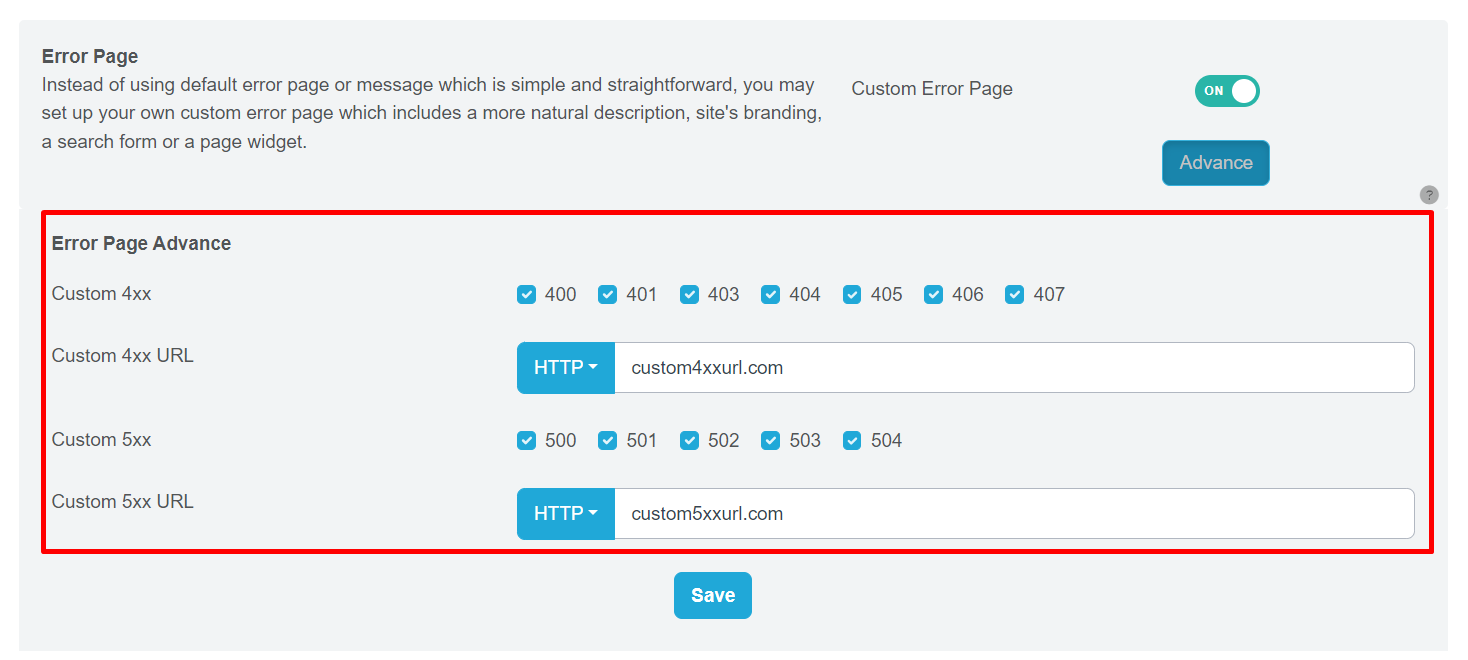 Figure 135
Specify whether the error page should be served over HTTP or HTTPS, depending on your website’s configuration.
Step 4: Finally, click on the “Save” button to complete the setup process.
By following these steps, you’ll have a well-configured error page that will provide a more user-friendly experience to your site’s visitors when they come across any unexpected errors.
Please contact Toffs Security Operation Center for assistance if you encounter any issues.