Custom Header
Custom Header
 Figure 139
This is the “Custom Header” page under the “Configuration” page. Custom Header: Custom headers allow you to modify the headers of incoming requests and outgoing responses. There are two types of custom headers you can use: add_header and proxy_set_header.
- add_header: This type adds a header to the response headers of the request.
- proxy_set_header: This type adds a header to the request headers sent to the origin server.
Follow the steps below to set up custom headers for your domain:
Step 1: Accessing the Custom Header page Click the “+Add” button to start setting up a custom header for your domain.
Step 2: Choose the Header Type Select the appropriate type of header: add_header or proxy_set_header.
Step 3: Providing the required data in Value field Enter the necessary details as prompted for the custom header configuration.
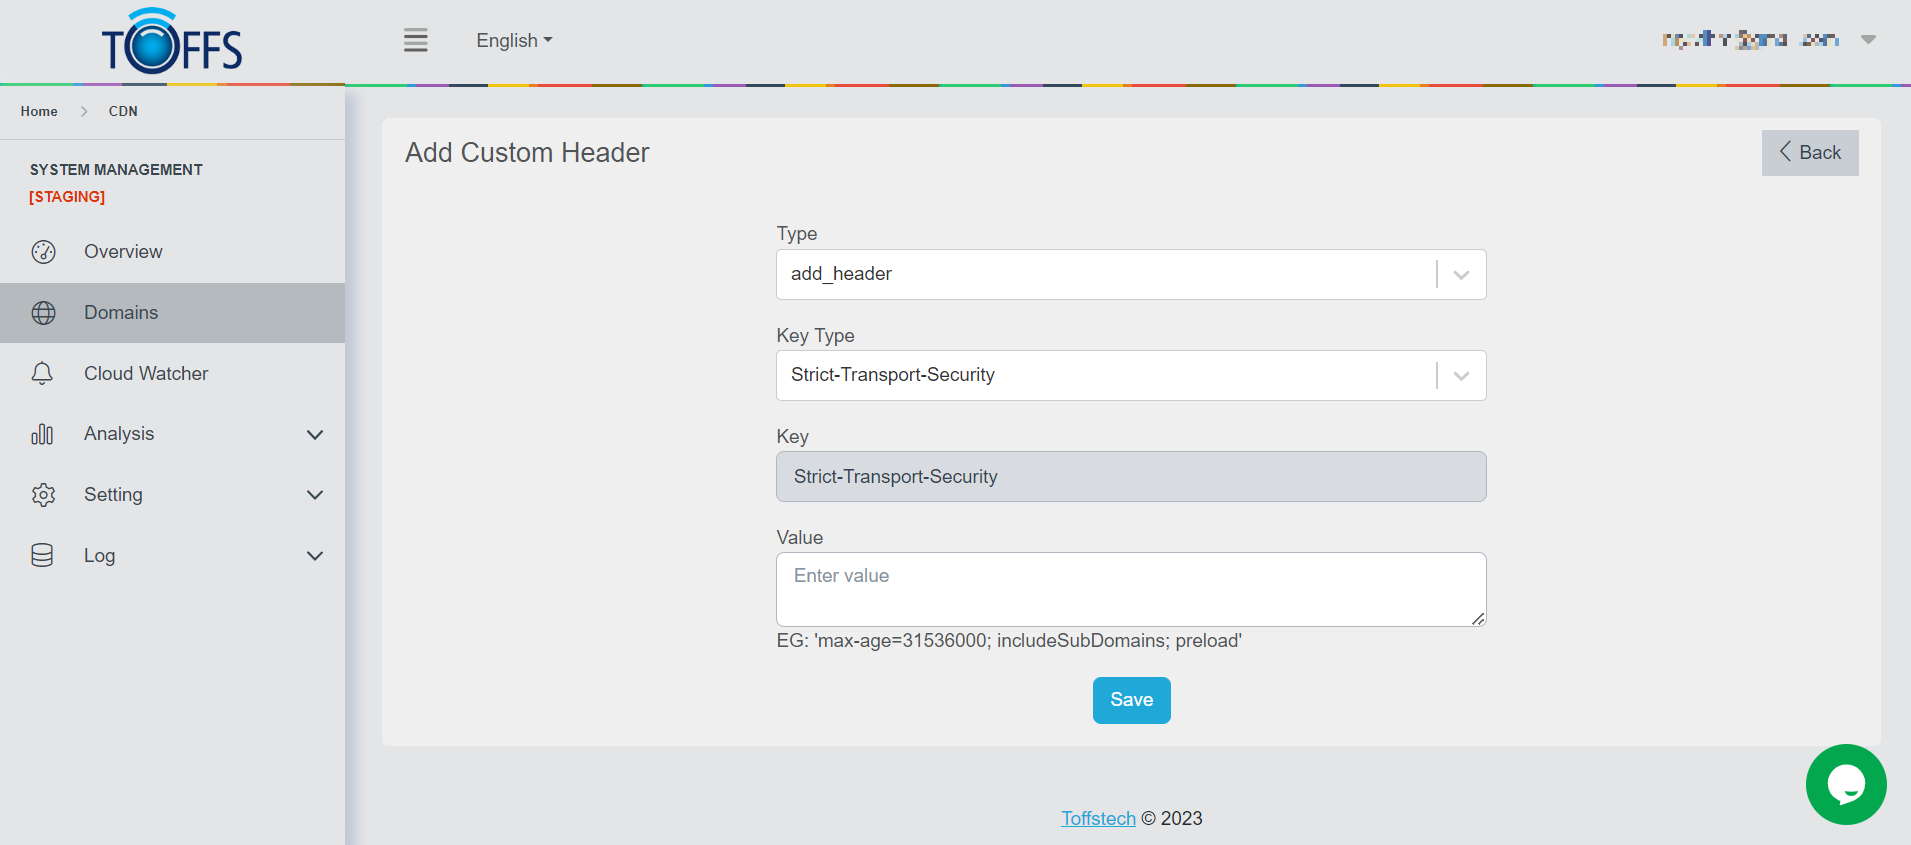 Figure 140
Step 4: Save your Configuration Click the “Save” button when you have finished configuring the custom header.
Important Notes:
- Upgrade HTTP to HTTPS: Enabling this option will automatically add an add_header rule with the Key as “Content-Security-Policy” and the Value as “upgrade-insecure-requests”.
- Caution while adding new Custom Header rules: It’s crucial to be careful when adding new custom header rules. Incorrect formatting can cause Nginx to fail.
- Testing on UAT before Production: Always test your custom header configurations on UAT (User Acceptance Testing) environment before implementing them on the Production server. This ensures that everything works as expected and avoids any potential issues in the live environment.
By following these steps and being cautious, you can effectively set up custom headers for your domain.
Please contact Toffs Security Operation Center for assistance if you encounter any issues.