User Management
User Management
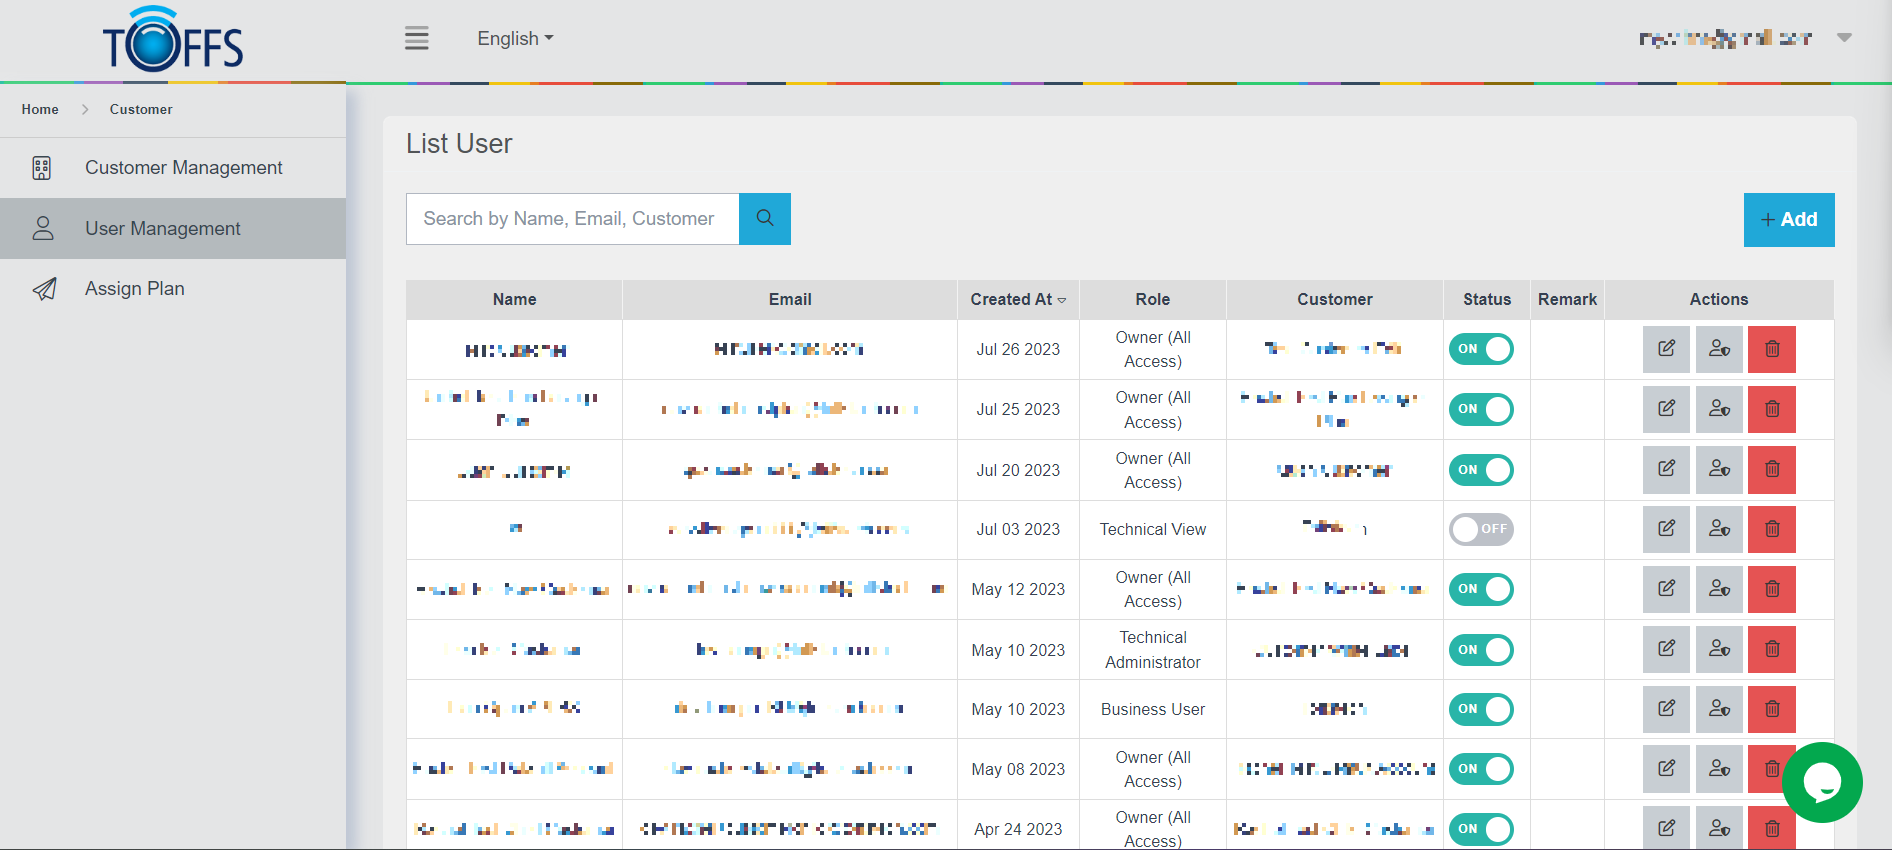
Figure 203
This is the “User Management” page.
This page serves as a hub for managing users’ information associated with a specific account, and it allows you to view various child accounts within the main account.
Let’s get started with the key features:
-
Viewing Users’ Information: The “User Management” page displays comprehensive details about all the users linked to this particular account. You can easily access and manage their information from this centralized location.
-
Utilizing the “Search” Function: We have a powerful “Search” function that allows you to find specific users within this account based on their names or email addresses. This search feature enables quick and convenient access to individual user profiles.
-
Adding New Customers/Users: To expand the network of users associated with this account, we’ve incorporated the handy “+ADD” function. With this feature, you can effortlessly add more customers or users to the account, facilitating seamless information sharing among the added members.
Throughout this tutorial, we will guide you step-by-step on how to effectively use each feature on the “User Management” page. So, let’s dive in and explore the functionalities to enhance your user management experience!
Add a new User
To add a new user to your account, follow the simple instructions below:
Step 1: Access the List User Page
To begin, navigate to the List User page and locate the “+Add” button. Click on this button to proceed.
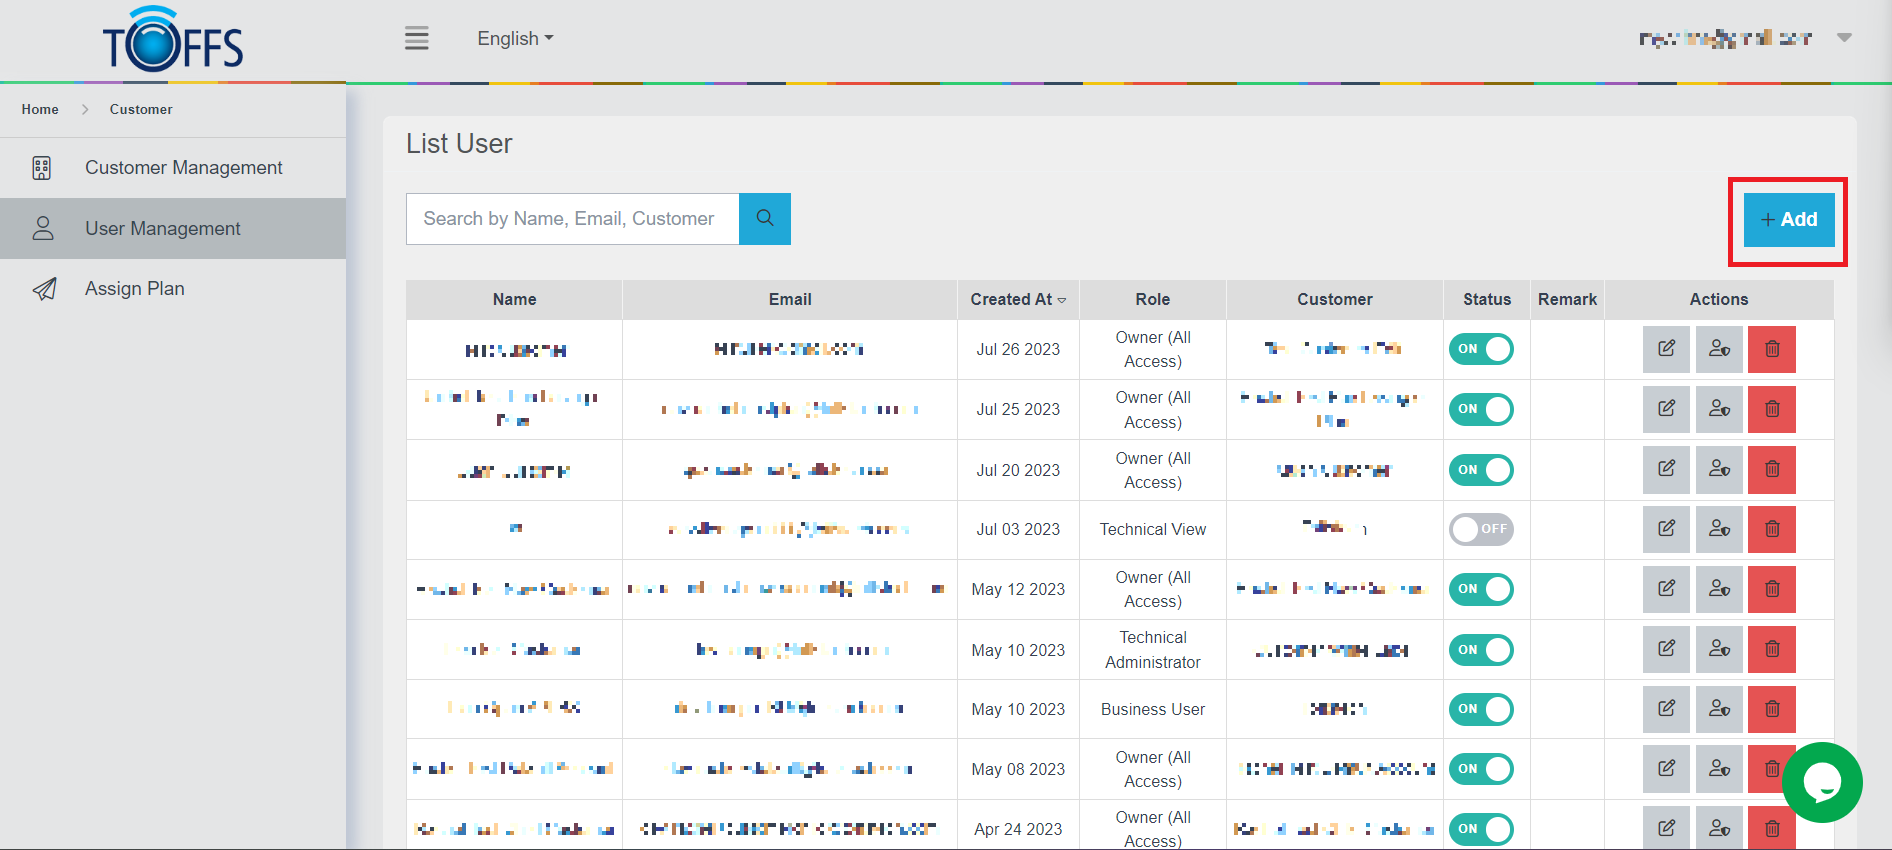
Figure 204
Step 2: Select Customer
Once you’ve clicked the “+Add” button, you’ll be presented with a dropdown menu. From the options available, choose “Customer”.
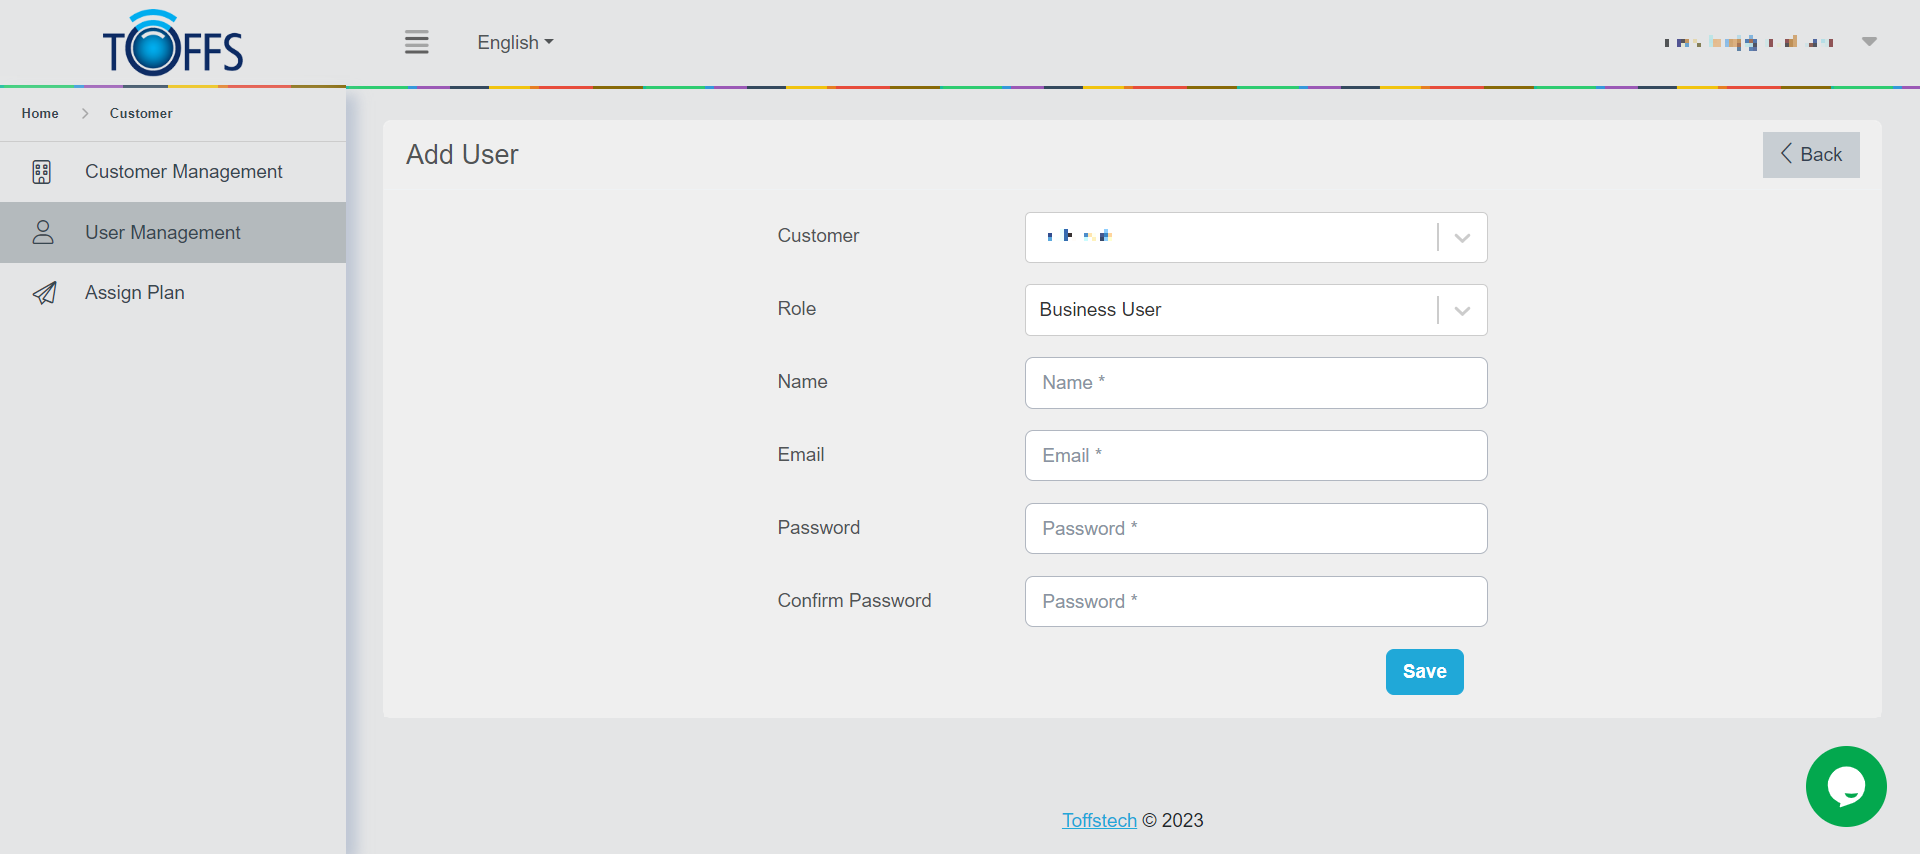
Figure 205
Step 3: Select Role
After selecting “Customer” you’ll be required to choose a role for the new user. Below are the available roles along with their descriptions:
- Toffstech Support: This role provides full default permissions, granting complete access to a wide range of functions, including those applicable to the white label system.
- Owner (All Access): This role comes with default permissions, allowing access and use of functions included in the CDN, based on the customer’s purchased plan.
- Technical Administrator: This role includes default permissions to administer domains and customize technical parameters.
- Technical View: The Technical View role provides default permissions that allow viewing technical parameters.
- Business User: This role has default permissions to view domain information and certain reports.
Step 4: Enter Name
Now, enter the name of the new user in the designated field.
Step 5: Enter Email
Provide the email address for the new user in the specified field.
Step 6: Enter Password
Create a password for the new user and enter it securely.
Step 7: Confirm Password
Re-enter the password to confirm accuracy and avoid any mistakes.
Step 8: Save and Finish
Once you’ve filled in all the necessary information, click on the “Save” button to complete the process.
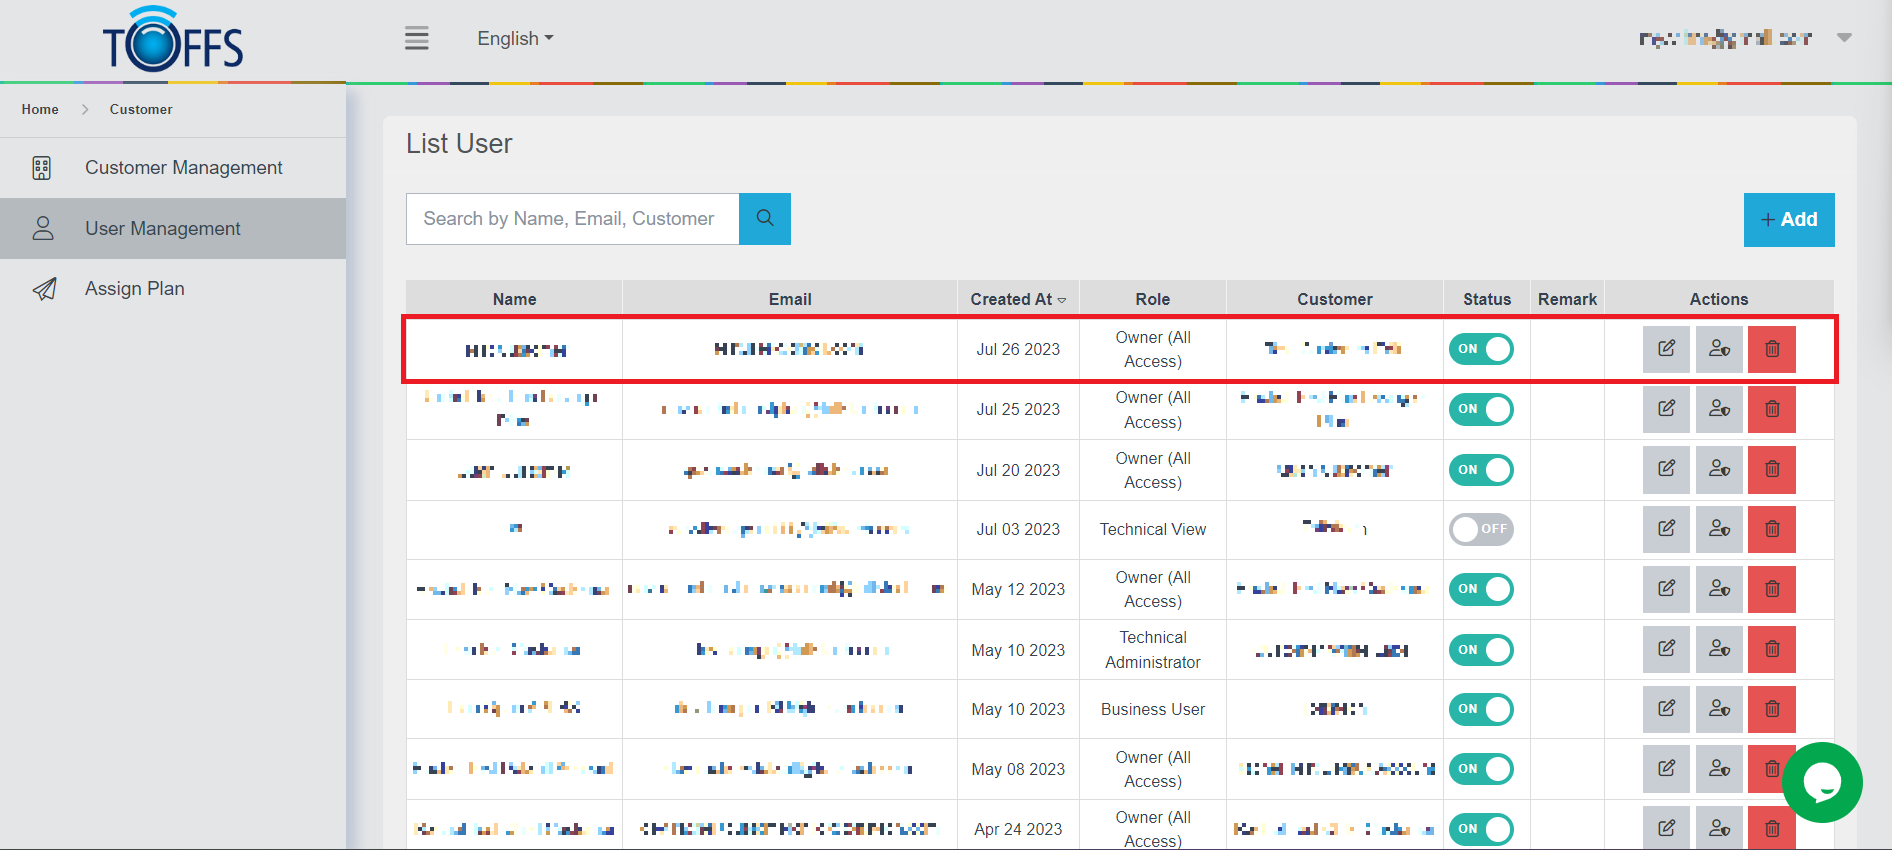
Figure 206
Congratulations! You have successfully added a new user to your account. After adding the user, the system will display detailed information about the user on the List User page.
Edit a User’s details
To edit a user’s details in our system, follow the instructions below:
Step 1: Access the List User Page
First, navigate to the List User page in the system. This page displays a list of users and their respective details.
Look for the “Edit” symbol button located next to each User line that you want to edit. Click on this button to proceed.
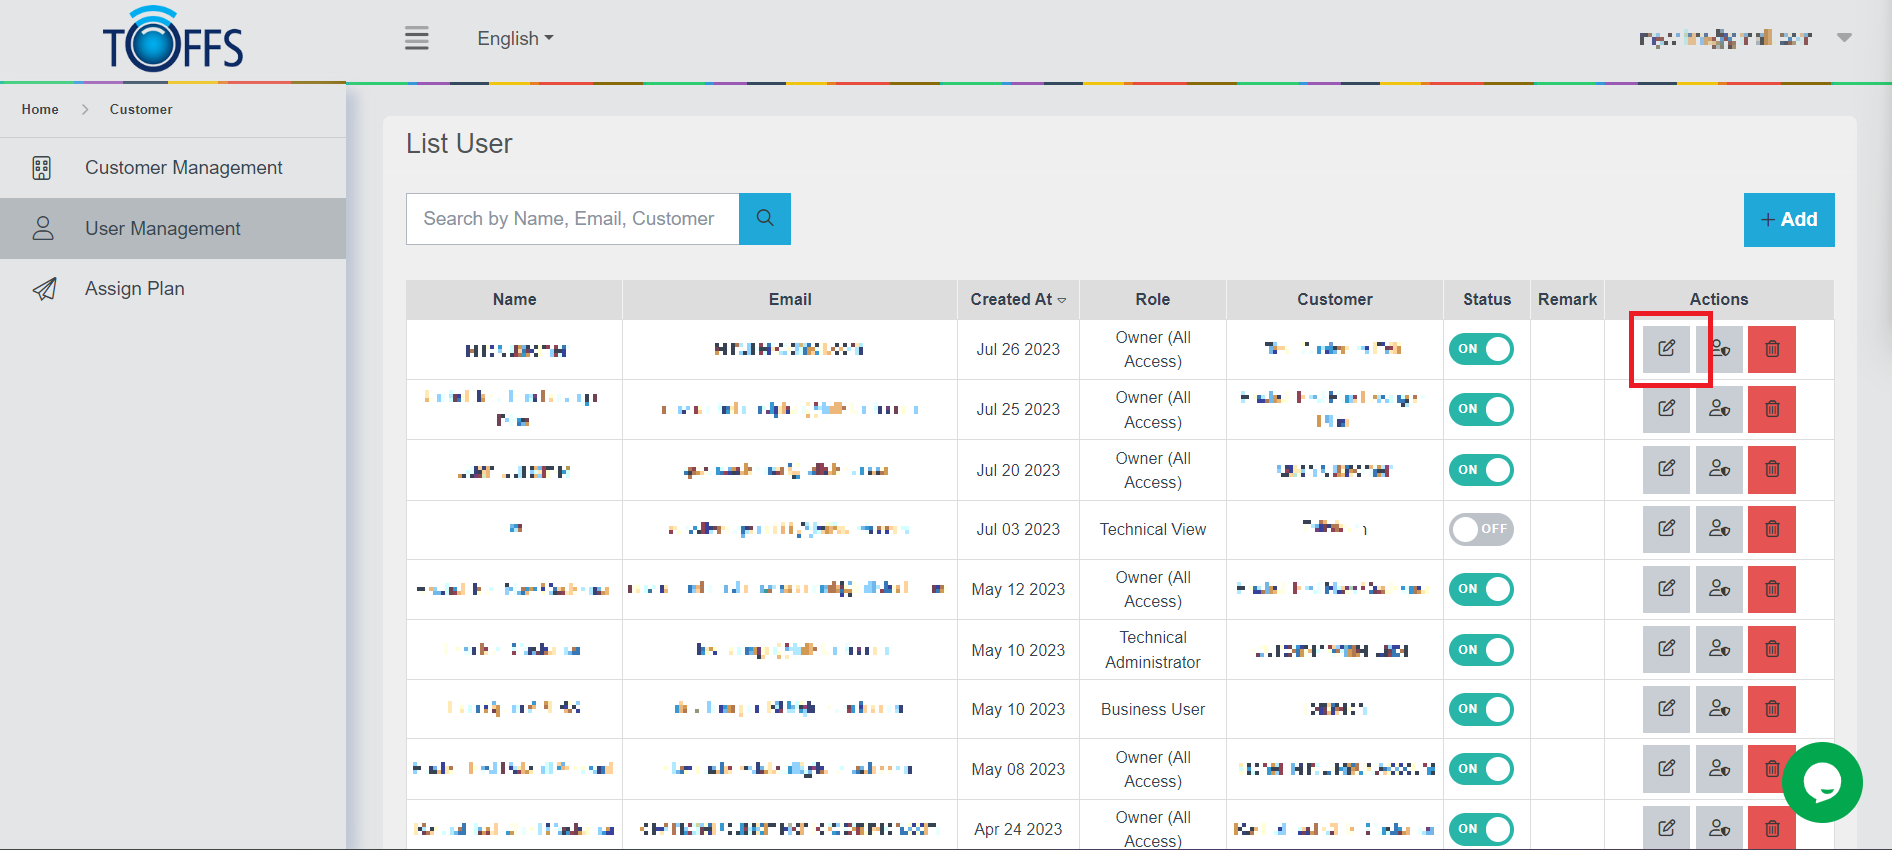
Figure 207
Step 2: Redirect to the Update Customer Page
Once you click the “Edit” button, the system will automatically redirect you to the Update Customer page. This page allows you to make changes or updates to the user’s details.
Step 3: Save the Changes
After making the necessary edits to the user’s details, scroll down to the bottom of the Update Customer page. Locate the “Save” button and click on it to save your changes.
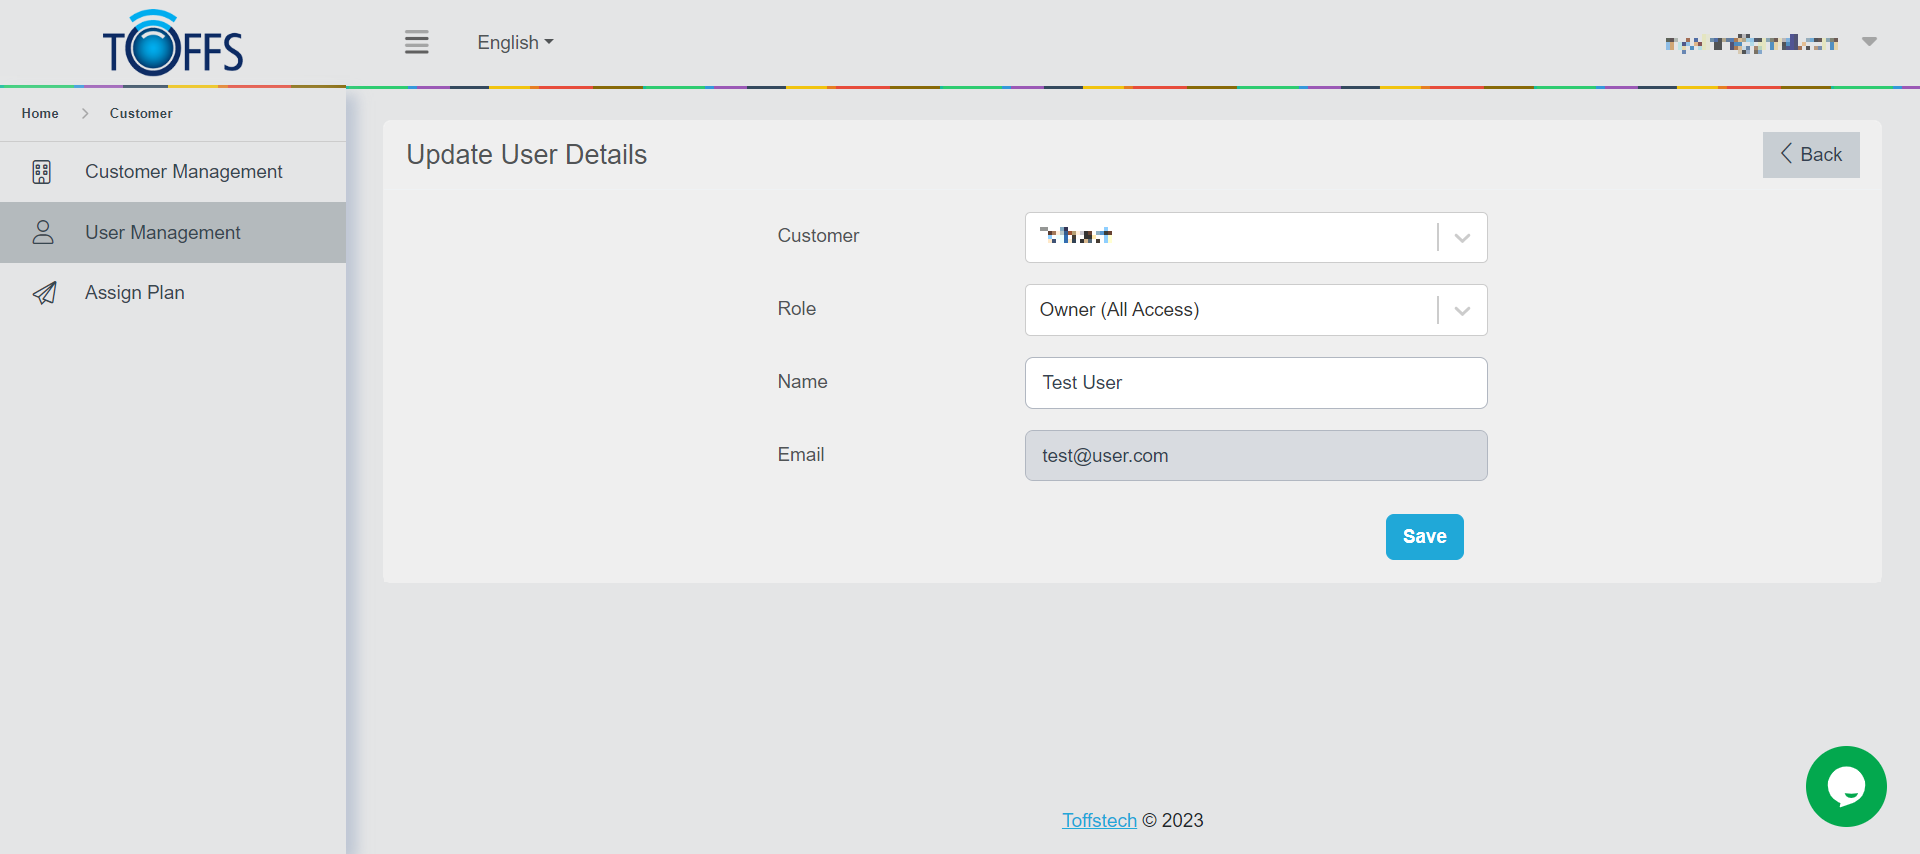
Figure 208 (Note: The image illustrates the location of the “Save” button)
Step 4: Verify the Update
The system will process your changes, and upon successful completion, it will update the new customer information.

Figure 209 (Note: The image confirms that the customer information has been updated)
That’s it! You have successfully edited a user’s details using our system.
Enable/Disable a User
We’ll guide you on how to enable or disable a user in just a few simple steps. By using the toggle switch, you can easily turn on or off the user’s account based on your requirements. Let’s get started!
Step 1: Locate the Toggle Switch
To begin, find the toggle switch associated with the user you wish to enable or disable. The toggle switch appears as an interactive button That can be easily toggled on and off.

Figure 210
Step 2: Enabling a User
To enable a user, simply click on the toggle switch and set it to the “ON” position. Once enabled, the user will gain access to the system and their status will be updated accordingly.
Step 3: Disabling a User
If you want to disable a user, click on the toggle switch and set it to the “OFF” position. Once disabled, the user will lose access to the system, and their new status will be displayed as follows:
This feature allows you to manage user accounts efficiently based on your preferences. Remember to always double-check the user’s status after making changes to ensure everything is set as desired. Happy user management!
Delete a User
To delete a user from the system, please follow the instructions below:
Step 1: Access the List User page
To get started, navigate to the List User page.
Step 2: Initiate the Deletion Process
Once you’re on the List User page, you’ll find a “Delete” symbol button next to each user’s name. Identify the user you wish to delete, and then click on the “Delete” symbol button corresponding to that user.
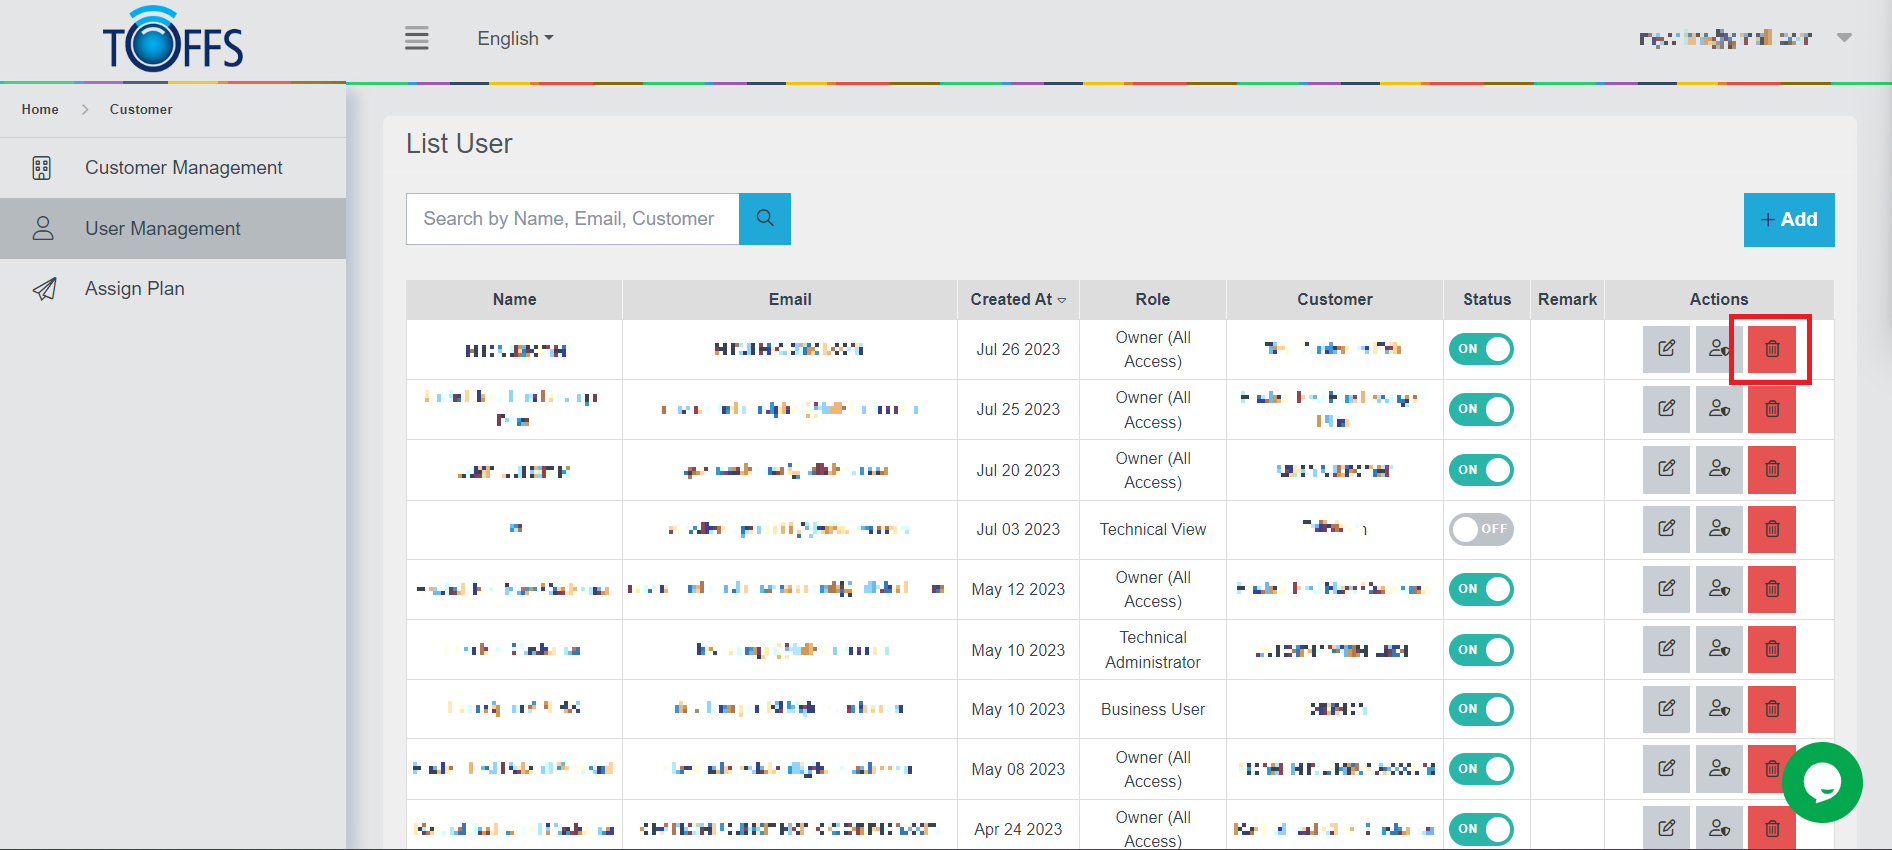
Figure 211
Step 3: Confirm the Deletion
After clicking the “Delete” button, a dialogue box will appear, asking for confirmation before proceeding with the deletion. This extra step helps prevent accidental deletions. To confirm the deletion, click on the “Yes” button.
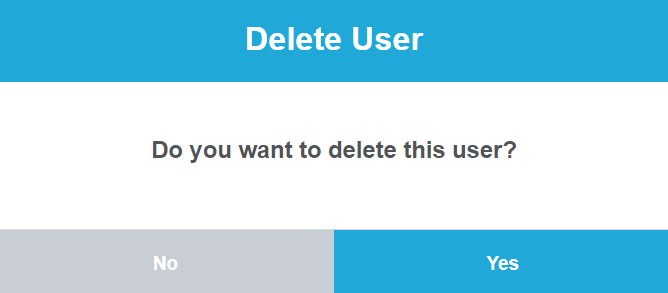
Figure 212: [Include a screenshot or diagram of the confirmation dialogue box]
Step 4: User Successfully Deleted
You have successfully deleted the user from the system. The user’s account and associated data have been permanently removed.
Remember to exercise caution when deleting users, as this action cannot be undone. Make sure you genuinely intend to remove the user from the system before confirming the deletion.
Assign Role
To Assign Roles for Users in the User Management Feature, follow these simple steps:
Step 1: Accessing the List User Page
To begin the process of assigning roles to a user, first, navigate to the List User Page. Locate the “List User” section and click on it to access the user management area.
Step 2: Editing User Details
Once you are on the List User Page, you’ll see a list of users and their associated information. To assign a role to a specific user, find the user’s entry in the list and proceed with the following steps:
- Locate the “Edit” icon button associated with the user you want to assign a role to.
- Click on the “Edit” icon button next to the user’s details.
Step 3: Updating User Details and Assigning Role
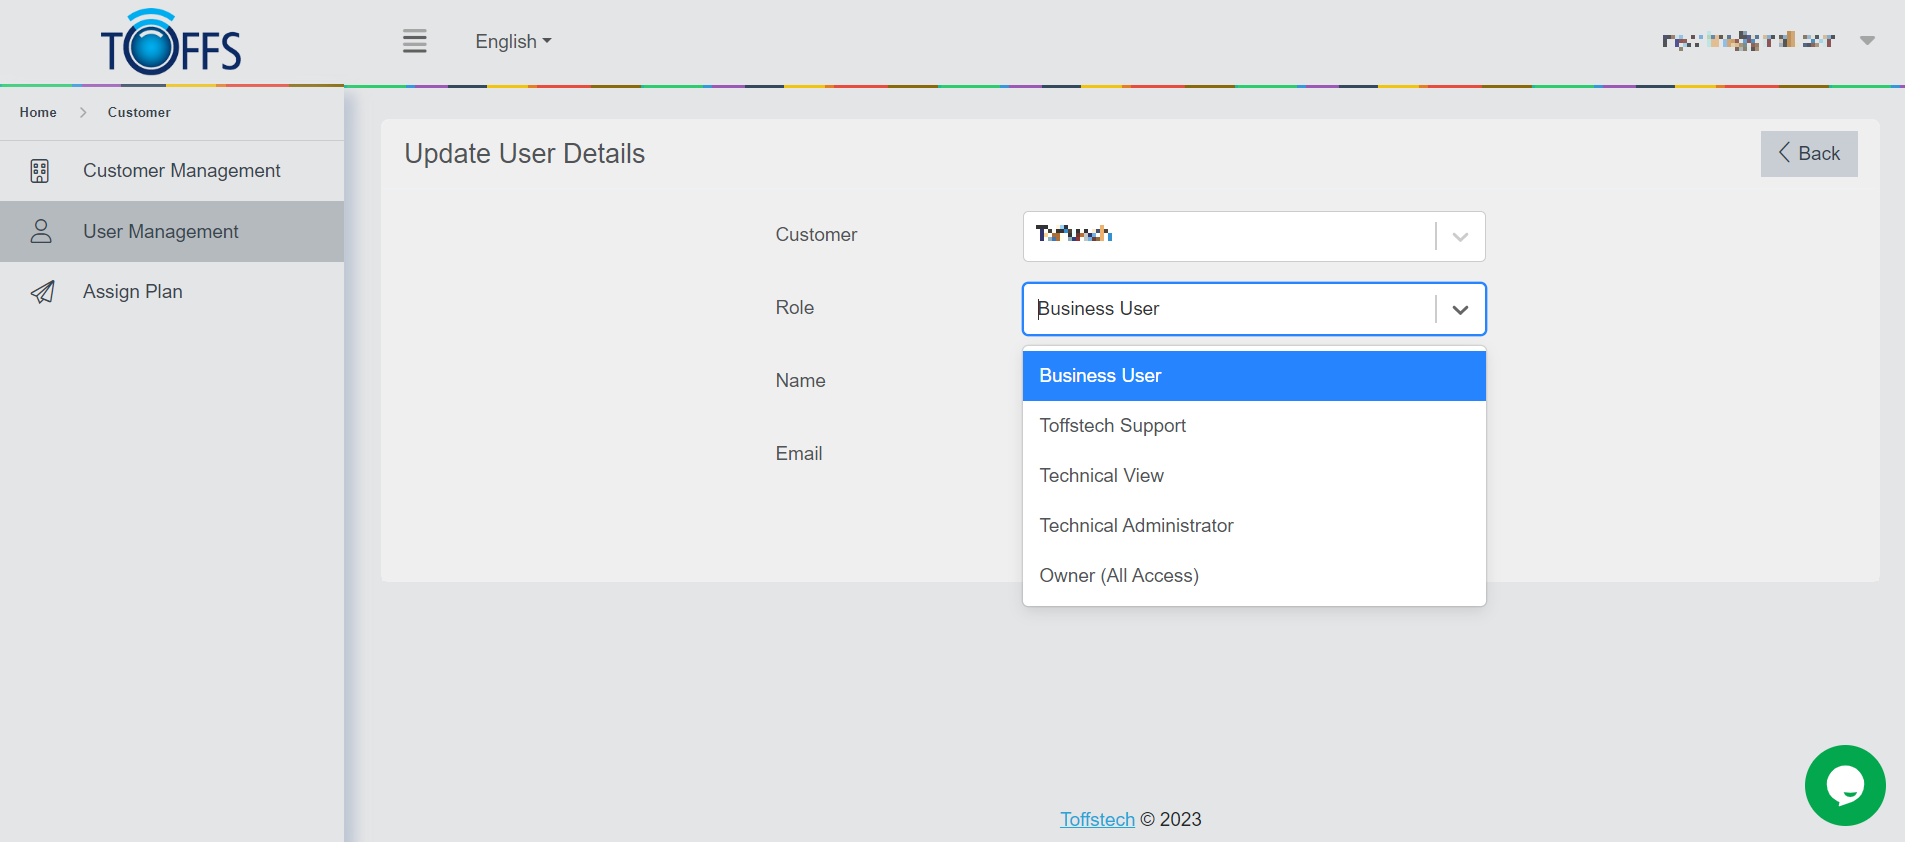
Figure 213
After clicking the “Edit” icon button, the system will direct you to the “Update User Details” page. This page allows you to assign a role for the user. The available roles and their descriptions are as follows:
-
Toffstech Support Role: This role comes with full default permissions, granting the user complete access to all functions, including those applicable to the white label system.
-
Owner (All Access) Role: The Owner (All Access) role provides default permissions that allow access and usage of functions included in the CDN. The level of access is determined based on the customer’s purchased plan.
-
Technical Administrator Role: This role grants default permissions to manage domains and customize technical parameters.
-
Technical View Role: The Technical View role provides default permissions to view technical parameters.
-
Business User Role: The Business User role offers default permissions to view domain information and some reports.
Step 4: Assigning the Role
To assign a role to the user, from the list of available roles, select the desired role for the user you are editing.
Step 5: Saving the Changes
After assigning the role to the user, it’s essential to save the changes. To do this:
- Scroll down to the bottom of the page.
- Click on the “Save” button to save the changes you made.
Step 6: Navigating Back to List User Page
Once you’ve successfully assigned the role to the user and saved the changes, the system will automatically navigate you back to the List User Page. Here, you can review the updated user details and verify the assigned role.
Edit Permissions for a User
In this section, we will learn how to edit permissions for a user using the “Edit Permission For User” page in the “User Management” feature. This page allows supporters to add or remove service permissions for a user account.
Step 1: Accessing the “Edit Permission For User” Page
To begin, follow these steps:
-
Navigate to the “List User” page.
-
Locate the user for whom you want to edit permissions.
-
Click the “Edit Permission for User” symbol button, as shown in Figure 194.
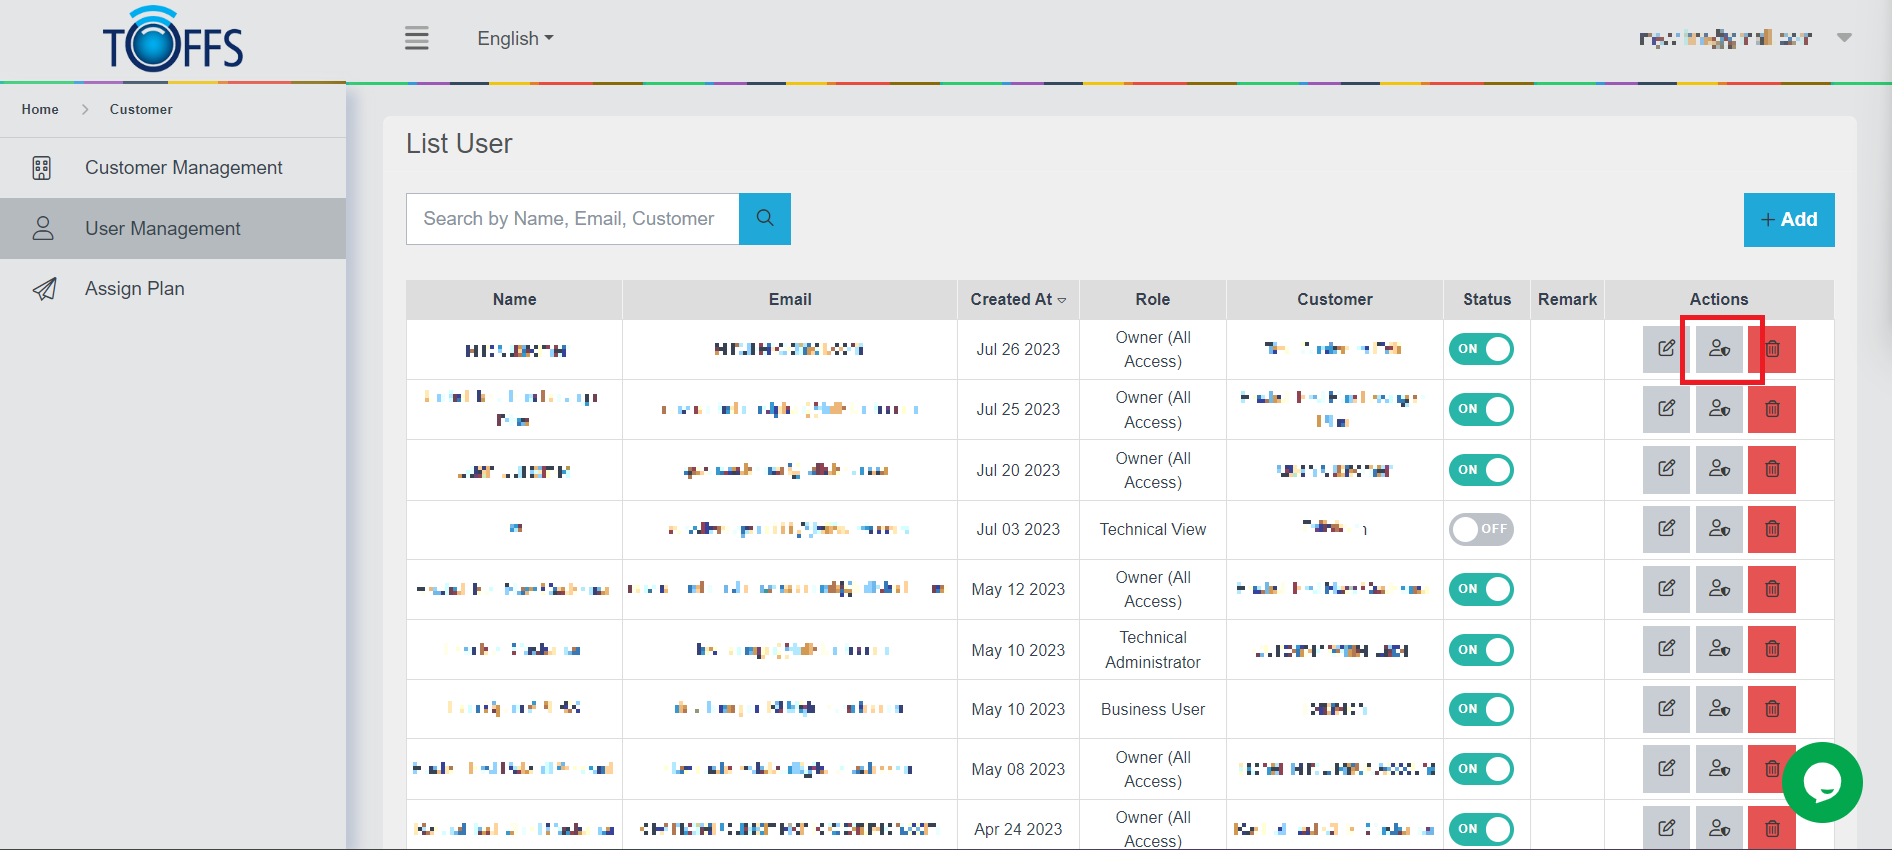
Figure 214 - Insert image of the Edit Permission button
Step 2: Editing User Permissions
Upon clicking the “Edit Permission for User” button, the system will redirect you to the “Edit Permission for User” page, where you can modify the user’s permissions.
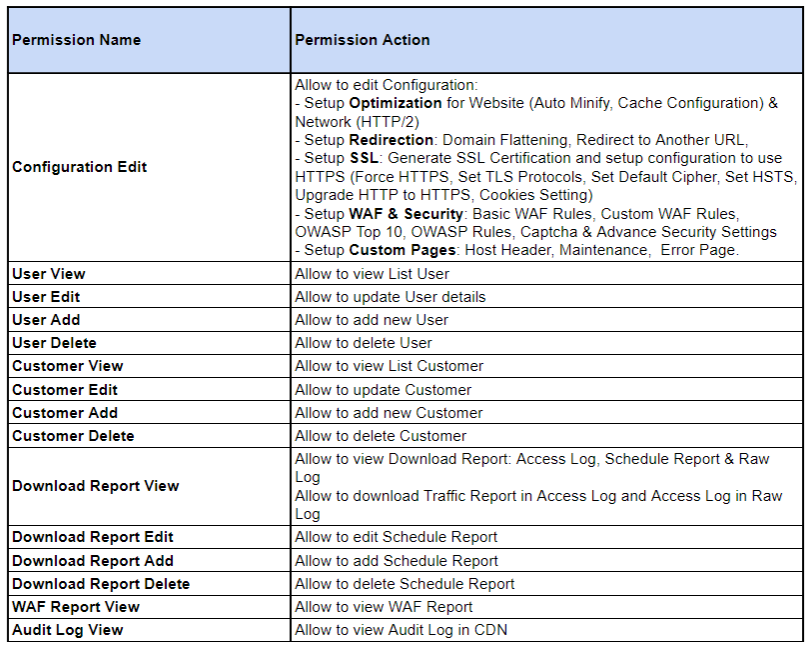
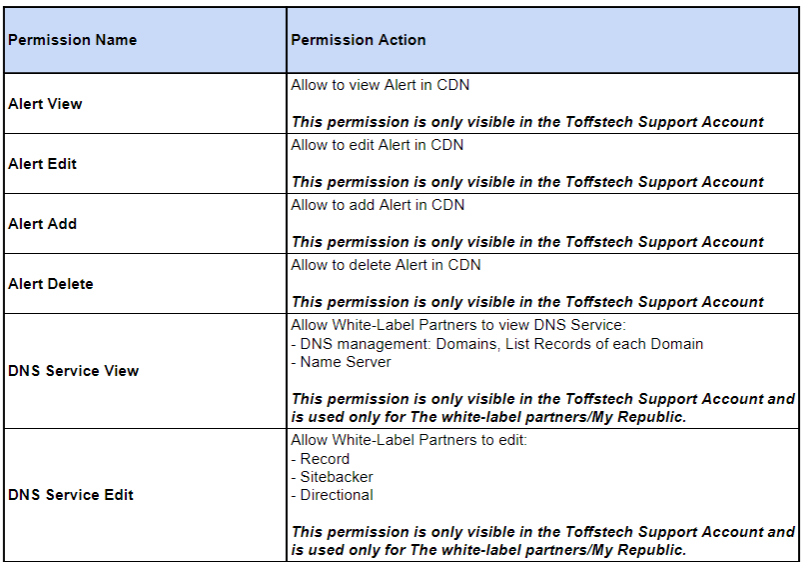
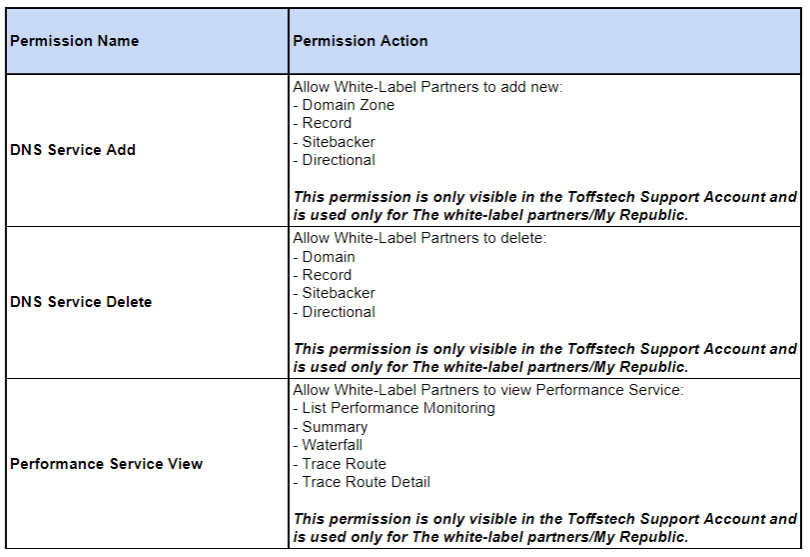
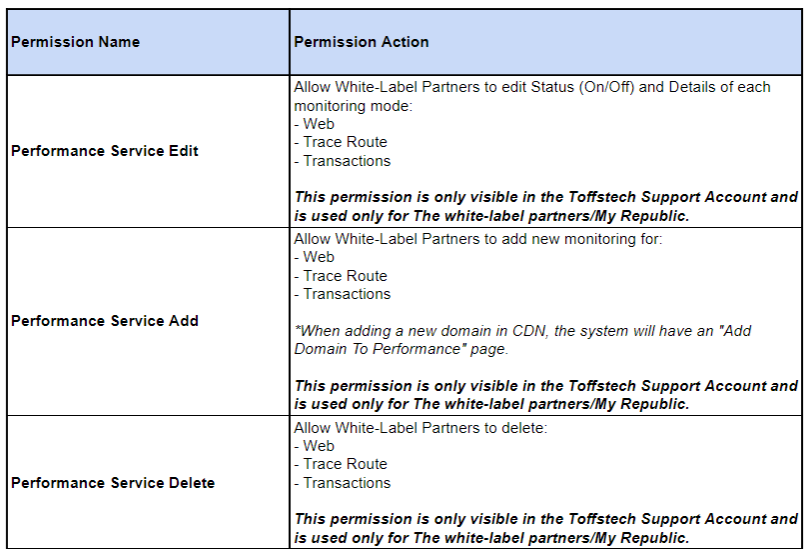
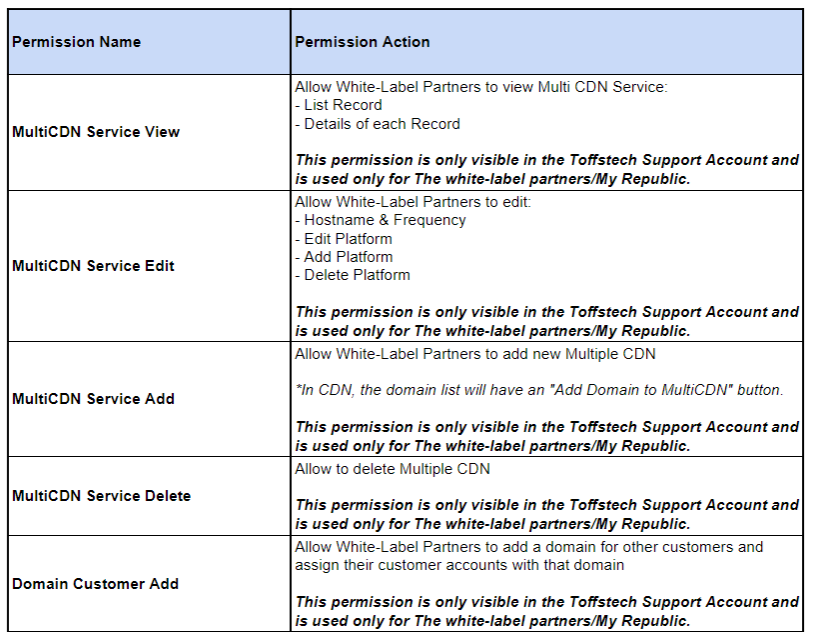
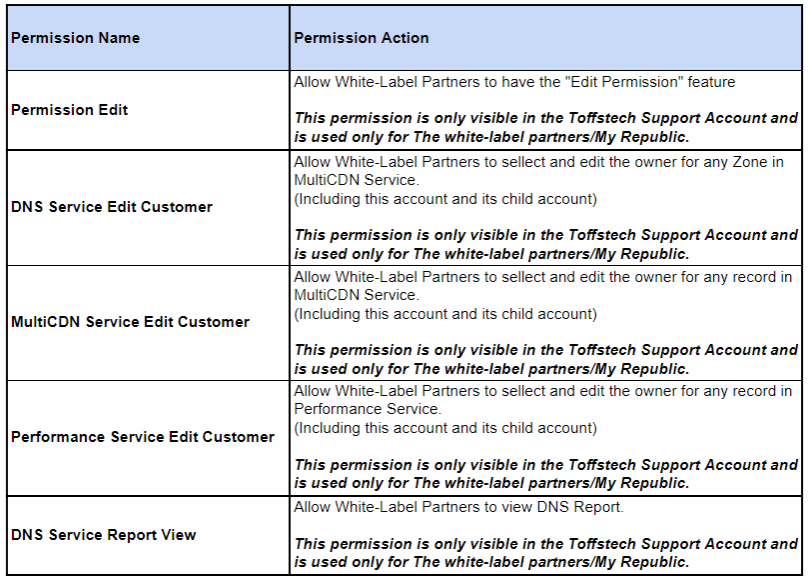
On this page, you can see a table that lists various permission names and permission actions. Each permission has a specific set of functionalities associated with it.
Step 3: Adding or Removing Permissions
To add or remove a permission for the user, follow these steps:
-
Double click on the permission name that you want to add or remove.
-
After making your selection, click the “Save” button to save the changes, as shown in Figure 215.
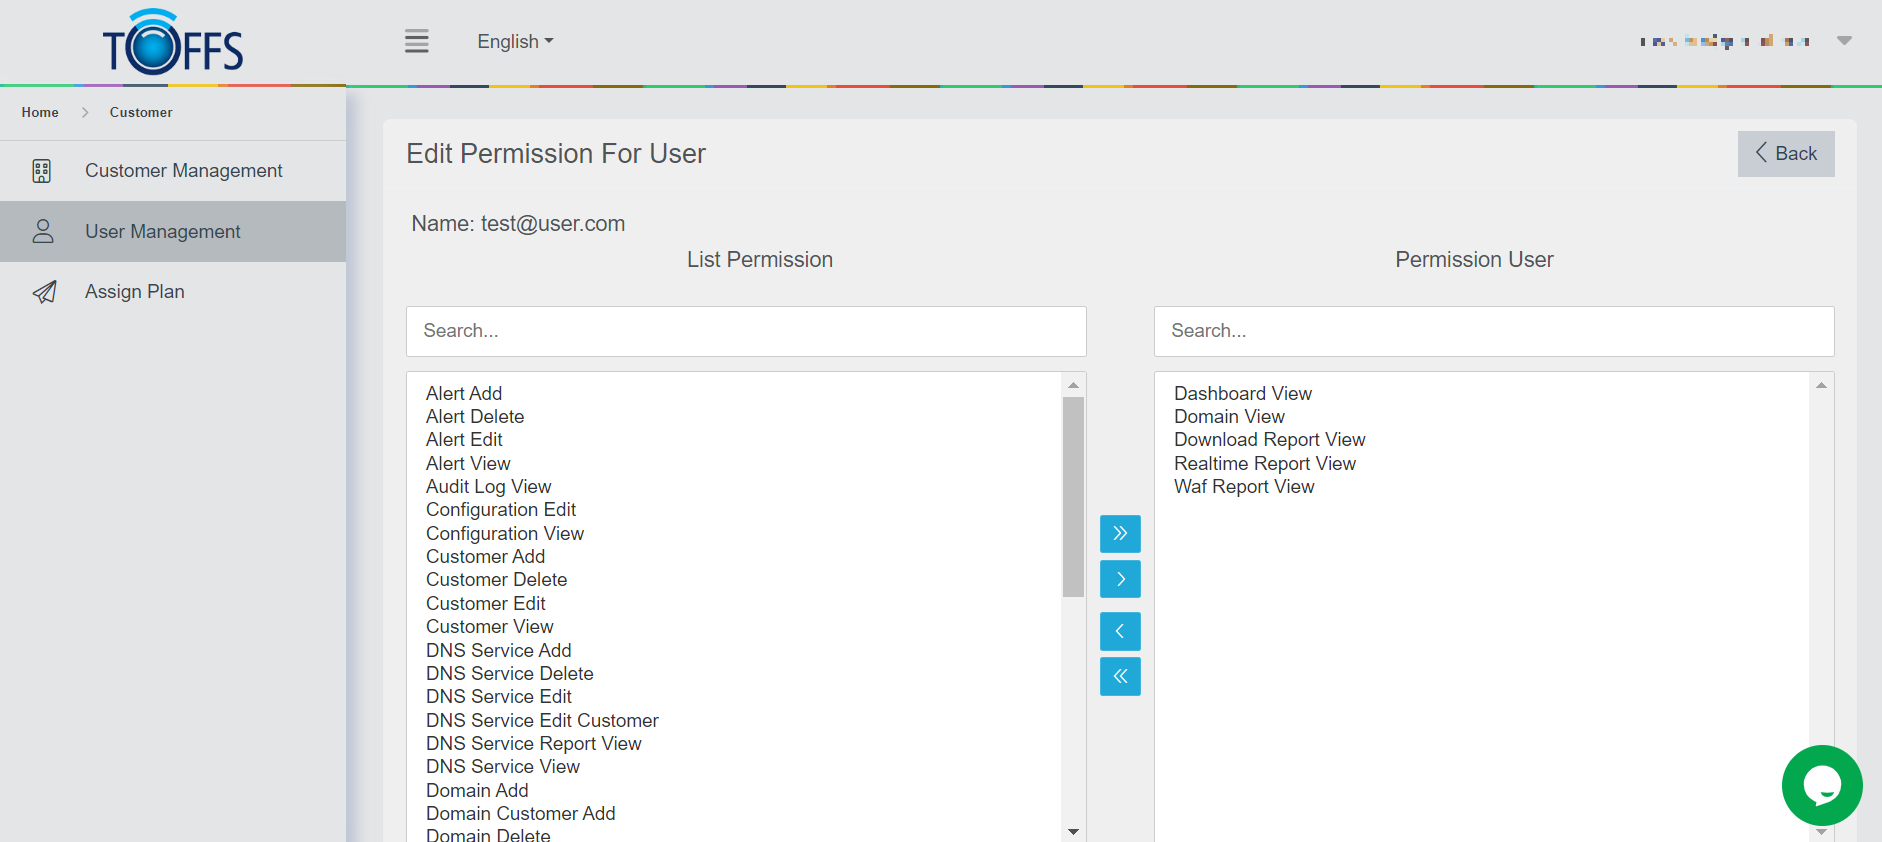
Figure 215 - Insert image of the Save button
Please note that certain permissions may be specific to the “Toffstech Support Account” or the “White-Label Partners/My Republic.” Make sure to choose the appropriate permissions based on the user’s role and access requirements.
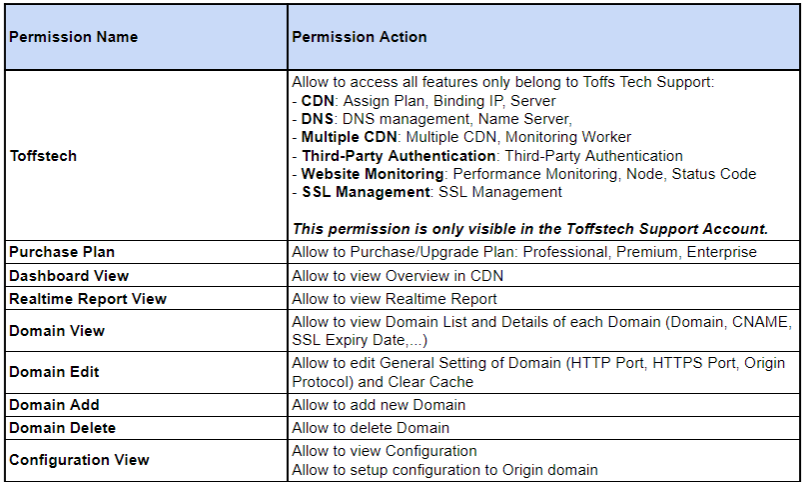
Step 4: Additional Details
For a more comprehensive understanding of each permission and its associated actions, refer to the detailed table provided on the page. This table explains the functionalities available for each permission.

For further details about the roles and their permissions, you can refer to the provided link.
Step 5: Completing the Process
Once you have made the necessary changes to the user’s permissions, click the “Save” button to finish.
Create an account for White-Laber User
In this section, we will walk you through the step-by-step process of creating an account for a White-Label User. The White-Label Customer will be able to use our existing C4 platform, enroll their own customers, and receive dedicated support. To ensure seamless access and functionality, we have set up specific permissions from row 27 to row 45, which will only be visible to Toffstech Support accounts on the “Edit Permission For User” page.
Let’s get started with the account setup for White-Label Partners:
Step 1: Creating a New Customer Account
- Navigate the Customer Management platform using your credentials.
- Click on “+Add” button to Create New Account and provide the necessary details for the White-Label Customer.
By default, the new account will have the “Owner” role and be assigned to the “Lite” plan.
Step 2: Specifying the Enterprise Plan
- Now, go to the “Assign Plan” section within the account settings.
- Here, select the “Enterprise” plan for the account you just created.
- Confirm the selection to upgrade the account to an Enterprise Plan.
The White-Label Customer’s account is now set up with an Enterprise Plan, making a customer with enhanced features and capabilities.
Restricting Access for Public-User Enterprise Customers:
Please note that Public-User Enterprise Customers can only access our CDN (Content Delivery Network) service by default.
Additional Services and Permissions:
- To enable the customer to utilize DNS, Multi-CDN, and Performance services, the SOC team must navigate to the “Edit Permission For User” page and add the permissions listed from row 31 to 42 and 48 to 49.
- To allow the customer to register their clients in C4, the SOC team should navigate to the “Edit Permission For User” page and add the permissions listed from row 43 to 47.
Setting up a Website for White-Label Users:
For a comprehensive guide on setting up a website for a White-Label Customer, please refer to the C4 White-Label Customer Setup Procedure documentation. This will provide you with detailed step-by-step instructions for a successful setup.
By following these instructions, you can easily create an account for White-Label Users, grant the necessary permissions, and offer them access to our C4 platform with specialized support for their business needs.
Please contact Toffs Security Operation Center for assistance if you encounter any issues.